Quantcast
Channel: Baker's corner...somewhere in my kitchen
Viewing all 183 articles
Browse latest View live

Cous Cous with Green Beans and Cherries

$
0
0
Cous Cous with Green Beans and Cherries

Please, please tell me the first thing that came to your mind when you read the title! Yummy... Yuck... Interesting... Curious...
I didn't give myself lots of time for thinking. I'm a curious cat and I had to give it a go.
My verdict: surprisingly good, tasty dish, perfect for hot summer weather. Nutricious and healthy, I simply couldn't ask for more.
And... don't worry about cherries sounding strange in a savoury combination, they fit in so good you won't be sorry if you give them a chance. And since the cherry season is almost over (at least where I live), you might give this dish a try using peaches or nectarines as well.

I found this recipe in last month's issue of my favourite food magazine, Cucina naturale, where you can find a monthly list of the most important fruit, vegetables and herbs in season that month. As well as useful advice and recipes based on those particular ingredients.


Cous Cous with Green Beans and Cherries

Cous Cous with Green Beans and Cherries

(4 servings):
* 400 g green beans
* 200 g cherries
* 100 g black olives
* 200 g cous cous
* 40 g sliced almonds
* a small bunch of fresh basil leaves
* extra virgin olive oil
* turmeric
* salt

Wash the green beens, cut off the ends and cook them for 5 minutes in boiling, salted water.
Drain with a slotted spoon and set aside.
Take 250 ml of the water you cooked the green beans in, still boiling hot, add a little turmeric and pour it over the cous cous you put into a bowl. Stir well and quickly, cover and let rest for 10 minutes.
Dry toast the sliced almonds at low heat and set aside to cool.
Chop the basil leaves, mix them with 3-4 TBspoons of olive oil.
Cut the green beans into small pieces; pit and chop the cherries and the olives.
Stirr the cous cous with a fork. add the green beans and the oil with the basil. In the end stir in the cherries.
Serve the cous cous sprinkled with the toasted almonds.


Cous Cous with Green Beans and Cherries


Cuscus con fagiolini e ciliegie


(per 4 persone)
* 400 g di fagiolini freschi
* 200 g di ciliegie
* 100 g olive nere
* 200 g cuscus
* 40 g mandorle in scaglie
* un mazzetto di basilico fresco
* olio extra vergine d'oliva
* curcuma
* sale


Lavate e spuntate i fagiolini. Lessateli per 5 minuti in acqua bollente, leggermente salata. Scolateli quando sono ancora croccanti.
Prelevate 250 ml di acqua di cottura dei fagiolini ancora bollente, aggiungete un pizzico di curcuma e versatela sul cuscus in una ciotola. Mescolate, coprite e lasciate riposare per 10 minuti.
Tostate le mandorle in un pentolino a fuoco basso.
Tritate le foglie di basilico e mescolatele con 3-4 cucchiai di olio EVO.
Tagliate i fagiolini, le olive e le ciliegie snocciolate a tocchetti.
Sgranate il cuscus con una forchetta, unite i fagiolini e l'olio aromatizzato al basilico. Alla fine aggiungete anche le ciliegie.
Servite il cuscus decorandolo con le mandorle tostate.


Cous Cous with Green Beans and Cherries

Tek sam polovicom ovog mjeseca otkrila da je tema igrice Ajme koliko nas je, trešnje. Temu je zadala Petra s bloga THURSDAYSCOOKING, a kako ja trešnjama jako teško odolijevam prilažem osim ovog recepta za Cous cous još nekoliko novijih i starijih recepata objavljenih na ovom blogu (još gomila ih nije ugledala svjetlo dana i čami u draftu do daljnjeg).
Sladoled od pečenih trešanja, Torta s bijelom čokoladom, sirom i trešnjama, Čokoladni muffini s narančom (i trešnjama), Pekmez od trešanja s cimetom, Vijenac s trešnjama,  Savijača s vrhnjem i trešnjama,  Muffini s trešnjama (bez glutena)

Cous cous sa zelenim mahunama i trešnjama


(za 4 osobe)
* 400 g zelenih mahuna
* 200 g trešanja
* 100 g crnih maslina
* 200 g cous cousa
* 40 g badema u listićima
* svežnjić svježeg bosiljka
* ekstra djevičansko maslinovo ulje
* kurkuma
* sol


Operite mahune, odrežite im krajeve i stavite ih kuhati 5 minuta u posoljenu, ključalu vodu. Trebaju ostati krokantne, nikako raskuhane.
Ocijedite ih i ostavite da se ohlade.
Odvojite 250 ml vode u kojoj su se kuhale mahune, u još vrelu dodajte malo kurkume pa prelijte cous cous koji ste stavili u zdjelu. Dobro ga promiješajte, poklopite i ostavite da odstoji 10 minuta.
Listiće badema kratko tostirajte u tavi na suho, na tihoj vatri, a zatim ostavite da se ohlade.
Listove bosiljka sitno nasjeckajte i pomiješajte s 3-4 žlice maslinovog ulja.
Mahune i odkoštene trešnje i masline nasjeckajte na komadiće.
Pomiješajte cous cous s aromatičnim uljem s bosiljkom, dodajte mahune, masline i na kraju trešnje.
Poslužite cous cous posut tostiranim bademima.


Cous Cous with Green Beans and Cherries


Little Honey Cakes

$
0
0
Honey cakes

"Momy, you won't be too sad if we leave you alone?... it's only for two days!"
Excitement for her first travel by train was even stronger than her momy-attachment. And they left me alone... for two days. The girls are visiting their grandparents and I'm enjoying a few moments of relax and peace, to a certain extent that is. Because this huge belly of mine and the little kicker inside it don't really help. After an almost sleepless night, sweating despite the A/C constantly on, I got up at 5 o'clock this morning, and managed to go back to sleep again after a cup of camomile tea. And I can tell you there's a big difference when you wake up at 10:30, after several hours of sleep, compared to some other days.
However, with the little ones around there's always so much to do, they have so much energy to spend, and when the temperatures are so high like in the past weeks it's even hard to take them out to play and they end up being little zombies in front of the TV and video games.
I wish we could spend more moments like those in the pictures. A kind of picnic in the nearby park. Fill a basket with a few of these honey cakes and some fresh fruit like Little Red Riding Hood, stop to breathe fresh air and watch the animals, run, play and the whole day has a different sense, different flavour.
As I told you before, I often have excess egg whites in my fridge. This recipe was a perfect start to use some of them.These mini cakes are perfect as a snack with a glass of milk, or with a cup of coffee or tea. Since my kids don't like either raisins or cranberries, I added some chocolate to chips to one part of the batter, that way everyone was happy, me and them. Those little hands were really busy taking the chocolate chips out to eat them first.


xDSC_1224

Honey Cakes

* 100 ml milk
* 40 g brown sugar
* 80 g acacia honey
* 1/2 lemon
* 1 TBspoon vegetable oil
* a pinch of ground cinnamon
* 50 g whole wheat flour
* 60 g AP flour
* 50 g potato starch
* 2 egg whites
* a pinch of salt
* 2 teaspoons baking powder
* 40 g raisins or dried cranberries or chocolate drops
* 1 TBspoon powdered sugar

Put the warm milk into a mixing bowl, add the honey, the sugar, the oil, the finely grated lemon zest and cinnamon. Whisk until the sugar and honey have melted.
If adding raisins or cranberries soak them in some lemon juice diluted with water, then drain and add to the milk and honey mixture.
Mix in the flours and starch mixed and sifted together with the baking powder.
Whip the egg whites with an electric mixer until stiff peaks form. Stir them into the batter, gently and slowly using a hand whisk.
If using chocolate chips instead of dried fruit, add them now.
Pour the batter into small round cake pans (10-12 cm) or muffin pan, previously greased and floured. Sprinkle the tops with some powdered sugar.
Bake the cakes in an oven preheated to 170°C for 20-25 minutes.
Remove them from stamps and let cool on a cooling rack.


Honey cakes

Tortine al miele


* 100 ml di latte
* 40 g zucchero di canna
* 80 g di miele d'acacia
* 1/2 limone
* 1 cucchiaio d'olio
* un pizzico di cannella in polvere
* 50 g di farina di frumento integrale
* 60 g di farina bianca "00"
* 50 g di fecola di patate
* 2 albumi
* un pizzico di sale
* 2 cucchiaini di lievito per dolci
* 40 g di uvetta o mirtilli rossi secchi o gocce di cioccolato fondente
* 1 cucchiaio di zucchero a velo


Scaldate il latte, mettetelo in una terrina e aggiungete lo zucchero, il miele, la scorza di limone, la cannella e l'olio. Mescolate con una frusta a mano finché lo zucchero e il miele non si saranno sciolti.
Se volete aggiungere l'uvetta o i mirtilli rossi, lasciateli prima in ammollo nel succo di limone diluito con l'acqua, poi scolateli e aggiungeteli al composto di latte e miele.
Mescolate e setacciate insieme le farine (integrale, bianca e fecola) con il lievito e aggiungetele al composto.
Montate gli albumi a neve ferma e incorporateli al composto precedente usando una frusta a mano.
Se al posto della frutta state usando le gocce di cioccolato, aggiungetele adesso.
Versate il composto nei stampini individuali (possono andar bene anche quelli per i muffin), imburrati e infarinati. Cospargete con lo zucchero a velo e infornate a 170°C per circa 20-25 minuti.
Togliete le tortine dai stampini e lasciatele raffreddare.


Honey cakes

Tortice s medom


* 100 ml mlijeka
* 40 g smeđeg šećera
* 80 g meda od akacije (bagrema)
* 1/2 limuna
* 1 žlica ulja
* prstohvat cimeta
* 50 g integralnog pšeničnog brašna
* 60 g mekog pšeničnog brašna
* 50 g škrobnog brašna
* 2 bjeljanjka
* prstohvat soli
* 2 žličice praška za pecivo
* 40 g suhih grožđica ili brusnica ili čokoladnih kapljica
* 1 žlica šećera u prahu


Zagrijte mlijeko pa ga stavite u zdjelu, dodajte šećer, med, ulje, naribanu koricu limuna i cimet.
Dobro sve izmiješajte pjenjačom da se šećer i med istope.
Ako ćete stavljati grožđice ili brusnice, prethodno ih namočite u soku od limuna razrijeđenom s vodom, a zatim ocijedite i dodajte pripremljenoj smjesi.
Pomiješajte i prosijte sve tri vrste brašna s praškom za pecivo pa ih umiješajte u prethodnu smjesu.
Bjeljanjke umutite u čvrst snijeg i dodajte prvoj smjesi miješajući nježnim pokretima od gore prema dolje ručnom pjenjačom.
Ako ćete umjesto suhog voća dodavati čokoladu, umiješajte je sada u tijesto.
Rasporedite tijesto u male okrugle kalupe ili u kalupe za muffine (malo namaštene i pobrašnjene), pospite površinu šećerom u prahu (stavite šećer u malo mrežasto cjedilo i posipajte) i pecite u pećnici zagrijanoj na 170°C, 20-25 minuta.
Izvadite ih iz kalupa i ostavite da se ohlade.

Honey cakes


Picnic


Picnic

Turtle
Don't you envy this turtle?

Turtle
"Oh, man, it's so hot today!"

Ducks
"Do you think they'll leave us a few crumbs, they seem really hungry?"

Cherry Clafoutis

$
0
0
Cherry Clafoutis

If you have ever made a clafoutis before, you'll be totally surprised with this recipe. So was I. I've tried the classical one and I wasn't really thrilled with the taste. But since I discovered this recipe I can't wait for cherries to be in season again just so I can prepare it and enjoy. Nothing or very little to do with the classical recipe except the fact that there are cherries inside and the cream to be baked. This classical summer French dessert is usually prepared with milk/heavy cream, eggs and flour. Some recipes call for almond meal and liquor as well. Here, in this Gérard Mulot's recipe (that I picked up here), there's very few ingredients: eggs, sugar and crème fraîche, besides the cherries, of course. No flour or nuts that is to say. But the result is an increadibly smooth, soft, delicious baked cream. You will most certainly fall in love with it... I did. Don't wait and don't hesitate.

 Cherry Clafoutis 
(by Gérard Mulot)

* 130 g crème fraîche (double cream) 
* 40 g brown sugar 
* seeds from 1/2 vanilla bean 
* 2 eggs 
* 230 g cherries or sour cherries 
* butter for the pan 

 Preheat the oven to 190°C. Whisk the eggs and the sugar. Add the crème fraîche and the scraped vanilla seeds.
Grease a baking dish with butter (or 4 single dishes) and place the cherries on bottom (you may pit them or leave them whole).
Pour the cramy mixture over the cherries and bake the clafoutis for about 20 minutes, or until the cream's become solid and golden on top.
Let it cool at room temperature and serve.


Cherry Clafoutis

Clafoutis ho fatto per la prima volta seguendo una delle classiche ricette per questo dolce francese. E non posso dire che mi abbia entusiasmato tanto. Poi ho visto questa ricetta di Gérard Mulot qui, lo preparato subito e questa volta è stato l'amore al primo cucchiaio. A differenza di quella consistenza da frittella cotta al forno che ha il classico clafoutis, questo dolce è morbido, vellutato e semplicemente si scioglie in bocca. Provare per credere. 
Crème fraîche non è difficile da trovare (almeno qui a Modena), lo trovate per esempio da Leclerc e da Naturasì. 


Clafoutis alle ciliegie 
(di Gérard Mulot)


 * 130 g di crème fraîche 
 * 40 g di zucchero di canna 
 * semi di 1/2 bacca di vaniglia
 * 2 uova 
* 230 g di ciliegie o amarene (snocciolate o intere) 
 * burro per lo stampo 


 Riscaldate il forno a 190°C. Mescolate con una frusta a mano le uova con lo zucchero in una terrina. Unite la crème fraîche e i semi di vaniglia. 
Imburrate una pirofila (o quattro stampini da 10-12 cm) e distribuite le ciliegie sul fondo. 
Versate la crema sopra le ciliegie e infornate per circa 20 minuti o finché la crema si sarà rappresa e diventi dorata in superficie. 
Sarà molto difficile, ma lasciate raffreddare un po' prima di servire. Servite comunque in giornata. 


Cherry Clafoutis

Prvi clafoutis koji sam pripremila bio je prema klasičnom receptu za ovaj ljetni francuski voćni desert. Onaj s tijestom koje podsjeća na veliku debelu palačinku pečenu u pećnici. Ne mogu reći da sam bila nešto posebno ushićena okusom. Bilo je ok. A onda sam jednog dana otkrila ovaj recept Gérarda Mulota na ovom blogu, isprobala ga odmah i jednostavno se zaljubila u njega. Ovo je već treće ljeto za redom kako ga pripremam čim se dokopam trešanja. Recept se razlikuje od onog klasičnog po tome što smjesu od jaja, mlijeka i brašna zamjenjuje puno jednostavnija: samo crème fraîche i jaja (crème fraîche je najsličniji našem mileramu, gust i s oko 30% masnoće). Rezultat je jedna jako fina, mekana, baršunasta pečena kremica koja se jednostavno topi u ustima. I ne samo to, budući da je bez dodatka brašna, ovaj je clafoutis pogodan i za sve koji su alergični na gluten. 

Clafoutis s trešnjama 
(Gérarda Mulota)


 * 130 g crème fraîche (double cream) 
 * 40 g smeđeg šećera 
 * sjemenke pola mahune vanilije 
 * 2 jaja 
 * 230 g trešanja (bez koštica ili cijelih) ili višanja 
 * maslac za kalup 


 Zagrijte pećnicu na 190°C. Pomiješajte u zdjeli jaja sa šećerom ručnom pjenjačom. Dodajte crème fraîche i sastrugane sjemenke 1/2 mahune vanilije. 
Namažite odgovarajuću vatrostalnu posudu maslacem (možete upotrijebiti i 4 pojedinačne posudice promjera 10-12 cm) i rasporedite trešnje na dno. 
Prelijte pripremljenu kremu preko trešanja i stavite peći clafoutis oko 20 minuta odnosno dok se krema ne stisne i dobije zlatno žutu boju na površini. 
Ostavite clafoutis da se prohladi prije posluživanja. Svakako poslužite u toku dana.


Cherry Clafoutis

Pane di Genzano

$
0
0
Pane di Genzano

Genzano is a town some 20 minutes by car from Rome within the regional park Castelli Romani.
It's famous for the Infiorata feast for the celebration of Corpus Christi - a long flower carpet that is made for the religious procession.
And the town is also famous for it's bread baking tradition that goes way back in time.
Up to the 50s women would prepare the dough at home, shape the loaves and then take them to the public ovens to bake. The whole town would be filled with the smell of freshly baked bread and the chestnut wood used for fire in the ovens, from the early morning, day after day.
Modern technology and electrical ovens make life easier today for the bakers, but there are still several wood fire ovens where bread is baked in traditional way and where time seems to have stopped for a while. Where time is the only factor that determines the rhythm. Slow rise, the right temperature, the right moment to take the bread out of the oven, they are all equally important to get that characteristic thin, crunchy crust and soft fragrant bread inside. The tradition and secrets that are passed from fathers to sons - the preparation of yeast starter, the flour selection, the right quantity of water and the wheatbran used for sprinkling the loafs, they all together make sure this bread is unique.
(info found here)

Pane di Genzano

It would be hard to pretend that the bread I tried to reproduce at home in my electric oven has the same flavour and the same fragrance as the one described above. But I'm more then satisfied with the result. Before I made my sourdough starter, this bread was the one most often baked one for months in my house.
I even used this dough to make baguettes with an excellent outcome.

With this recipe I'm participating in BYOB - Bake Your Own Bread, check the rules over at Girlichef

Baguettes


Bread from Genzano

Biga:
* 300 g flour
* 3 g fresh yeast
* 150 ml cold water


Main dough:
* biga (about 450 g)
* 500 g (+ 100 - 150 g) flour (Italian type "0")
* 10 g fresh yeast
* 450 ml lukewarm water (30°C)
* 20 g salt
* wholebran for sprinkling the loafs.

Prepare the biga (starter) one day ahead.
Put the water (150 ml) into a bowl, dissolve the yeast and then add the flour, mix well and knead into a small ball of dough.
Place it in a bowl (at least 1,5 liters bowl), place a cover over it but do not close it tightly because the dough needs to breath.
Let it proof at room temperature (ideally 16-18°C) for 18-24 hours before proceeding with the next step.

Put the 450 ml lukewarm water into a large mixing bowl. Dissolve the yeast and the biga in it. Add the 500 g of flour and bring everything together - the dough at this point will be very sticky and soft. Add the salt and then the remaining 100 to 150 g of flour, just so much that the dough remains very soft but not sticky any more. Knead it for a few minutes on a floured kneading board.
Put the dough into a clean bowl, cover and let rise for 30-45 minutes.
Put the dough again on the floured kneading board and flatten a little bit pressing very lightly with your hands making sure you don't lose all the air. Fold the upper third towards midle, and then fold the lower third of the dough over it. Cut this log in two and then fold the sides of both halfs towards the midle to get two balls of dough. Turn them in a way that the seam is underneath. You may leave them round or shape into small loaves.
Place them on branwheat sprinkled board, cover and let double in size (about an hour).
I bake them in a hot cast iron oval pot with a lid, that I heat to 250°C together with the oven. Place the dough in and bake covered for 20-30 minutes. The steam that forms inside the covered pot helps to form that beautiful crunchy crust. Then I uncover the pot and bake the bread until it reaches nice, dark colour.
Otherwise, place both loaves on a baking sheet and bake in an oven preheated to 220°C for 40-45 minutes.


Pane di Genzano

Mi piacerebbe tanto potermi trovare a Genzano la mattina presto e vivere dei momenti profumati descritti qui. Deve essere un'esperienza fantastica. 
Un pane davvero buono anche quando è fatto in versione casalinga senza il forno a legna. Con la crosticina sottile e croccante, e l'interno bianco e morbido.
La ricetta viene da "I quaderni di Alice cucina - Pane, pizza e focacce) ma ho dovuto solo leggermente modificare la quantità di farina indicata nella ricetta. 


Pane di Genzano


Biga:
* 300 g di farina
* 3 g lievito di birra fresco
* 150 ml di acqua fredda


Impasto principale:
* biga (circa 450 g)
* 500 g (+ 100 - 150 g) di farina "0"
* 10 g di lievito di birra fresco
* 450 ml di acqua tiepida (30°C)
* 20 g sale
* cruschello per cospargere il pane


La sera prima preparate la biga. Sciogliete il lievito nell' acqua, poi aggiungete la farina e impastate bene. Formate una pallina, mettetela in una ciotola abbastanza grande (da circa 1,5 l) coprite e lasciate lievitare per 18-24 ore (idealmente a temperatura tra 16-18°C).


Per l'impasto principale, mettete l'acqua leggermente intiepidita (30°C) in una ciotola. Aggiungete il lievito sbriciolato e la biga. Mescolate con la mano per far sciogliere il lievito e ammorbidire la biga. 
Unite i 500 g di farina, e poi il sale. L'impasto a questo punto sarà molto morbido e appiccicoso. 
Gradualmente unite la restante farina (circa 100-150 g) per ottenere l'impasto ancora abbastanza morbido ma non più appiccicoso. Lavoratelo per qualche minuto sulla spianatoia infarinata e poi trasferitelo in una ciotola pulita. Coprite  e lasciate lievitare per circa 30-45 minuti.
Trasferite l'impasto sulla spianatoia infarinata e appiattitelo leggermente con le mani formando un rettangolo. Piegate la parte superiore del rettangolo verso il centro e poi anche la parte inferiore. Tagliate a meta e poi piegate i lati di ogni metà verso il centro formando due pagnottine. Allungatele leggermente e lasciate lievitare cosparse con il cruschello fino al raddoppio (circa 1 ora).
Togliete la crusca in eccesso e trasferite le pagnotte lievitate su una placca da forno. Infornate a 220°C per 40-45 minuti circa. 
Io, come al solito, faccio cuocere anche questo pane in una pentola di ghisa con il coperchio che faccio riscaldare insieme al forno a 250°C. Ci metto una pagnotta alla volta, la faccio cuocere per circa 20-30 minuti coperta (con il vapore al interno della pentola si forma una bellissima crosticina croccante e sottile) e poi altri 10-15 minuti scoperta.


Pane di Genzano

Genzano je gradić u blizini Rima (nekih 20 minuta vožnje autom) unutar regionalnog parka Castelli Romani. Poznat je po proslavi pod nazivom Infiorata - cvjetnom tepihu napravljenom svake godine za procesiju na Tijelovo. 
Druga je znamenitost kruh koji u ovom gradu ima dugu, dugu tradiciju. Ujedno je i prvi kruh kojem je Europska zajednica dodijelila oznaku IGT (tipična geografska indikacija).
Sve do negdje '50-ih godina prošlog stoljeća žene bi mijesile kruh kod kuće, a onda oformljene štruce nosile u javne peći na drva na pečenje. Svaka bi obitelj stavljala svoj znak na njih da bih kasnije mogli razlikovati. Gradom se od ranih jutarnjih sati širio miris tek pečenog kruha i kestenovog drveta koje se koristilo za vatru u pećima.
Moderna tehnologija i električne peći olakšali su posao pekarima danas, ali u gradu još uvijek postoje pekare s tradicionalnim pećima na drva gdje je i danas, baš kao nekad, vrijeme jedini važan faktor pri pečenju kruha - vrijeme potrebno za dizanje tijesta, vrijeme pečenja potrebno da bi se dobila karakteristična, tanka, hrskava korica i mekana, bijela, mirisna sredina, jednom riječju sve ono što ovaj kruh čini posebnim i jedinstvenim. 
Tradicija koja se prenosi generacijama s očeva na sinove - priprema kvasa, odabir brašna, točna količina vode, upotreba mekinja za posipanje - sve su to naoko sitnice, ali daju ovom kruhu one karakteristike po kojima je poznat.
Neću reći da je moj kruh identičan onome u Genzanu, ali i moja električna pećnica odradila je prilično dobar posao, tako da sam više nego zadovoljna rezultatom. Prije nego sam počela koristiti kiselo tijesto kao kvas za kruh, ovaj je kruh bio najčešći gost kod nas za stolom. Uz sve preporuke, isprobajte ga. Čak sam pravila i baguette od istog tijesta s jako dobrim rezultatom.


Kruh iz Genzana


Biga:
* 300 g brašna
* 3 g svježeg kvasca
* 150 ml hladne vode


Glavno tijesto:
* biga (oko 450 g)
* 500 g (+ 100 - 150 g) brašna
* 10 g svježeg kvasca
* 450 ml mlake vode (30°C)
* 20 g soli
* pšenične mekinje za posipanje


Bigu pripremite dan ranije nego ćete peći kruh.
Otopite kvasac u hladnoj vodi (sobne temperature), dodajte brašno i zamijesite sve skupa. Oblikujte kuglicu koju stavite u posudu od barem 1,5 litru da budete sigurni da vam ne iskipi.
Pokrijte poklopcem, ali ne hermetički jer tijesto mora disati, već ga samo prislonite na zdjelu.
Ostavite bigu da kvasa na sobnoj temperaturi (idealno između 16 i 18°C) 18-24 sata.


Za glavno tijesto ugrijte vodu da bude sasvim malo umlačena (30°C), stavite je u zdjelu u kojoj ćete mijesiti kruh i namrvite u nju kvasac, dodajte i bigu i miješajte rukama da odmekne u vodi.
Dodajte sad 500 g brašna i mijesite rukama - dobit ćete jako mekano i ljepljivo tijesto. Tek sad dodajte sol i pomalo još dodajite brašno dok tijesto ne prestane biti ljepljivo ali mora i dalje biti jako mekano. Kratko ga izmijesite na radnoj površini.
Stavite tijesto u zdjelu i ostavite da se diže 30-45 minuta.
Nakon toga tijesto istresite na radnu površinu posutu brašnom, malo ga rastanjite rukama pazeći da ne istisnete zrak iz tijesta. Preklopite 1/3 tijesta prema sredini, a zatim i s druge strane slobodnu trećinu preko već preklopljenog dijela. Prerežite tijesto na pola, pa ponovite ovaj način preklapanja s obje polovice tako što ćete onu prerezanu stranu preklopiti prema sredini i preko nje suprotni kraj.
Oblikujte tako dva kruščića, okrenite ih da preklop bude dolje i ostavite da se dižu na dasci posutoj mekinjama ili u košaricama prekrivenim pamučnom krpom posutom mekinjama dok se ne uduplaju (oko 1 sat).
Ako ćete kruh peći u posudi s poklopcem kao ja (po principu No knead bread), stavite prikladnu posudu s poklopcem u pećnicu da se zagrijavaju skupa na 250°C (bilo koja posuda s poklopcem koja nema plastičnih dijelova - metalni pekač ili šerpa, od lijevanog željeza ili vatrostalna).
Kad su posuda i pećnica zagrijani stavite dignutu štrucu u nju i poklopite. Pecite 20-30 minuta dok ne dobije lijepu boju karamela. Maknite poklopac i pecite još 20-ak minuta odnosno dok kruh ne dobije tamniju hrskavu koricu (ako vam je vatra prejaka možete smanjiti na 220-200°C). Ponovite i s drugom štrucom. Moja je posuda ovalna pa ja štruce prije pečenja malo izdužim - tijesto je mekano pa je lako.
Možete kruh ispeći i na tradicionalni način, na običnom plehu (tako možete ispeći obje štruce zajedno) - pecite ih na 220°C oko 40-45 minuta.

Pane di Genzano and Herb butter

Vanilla Ice Cream

$
0
0
DSC_0034

I ended the last week with a recipe for bread hoping that would bring some good vibration to my oven. But the poor thing is still out of use, and I'm still waiting for the guy to replace the missing piece so I can have my beloved friend back. My hands are itching to bake something, my nose and taste buds are craving something nicer and more delicious than just a plain slice of meat from the grilling pan. Not to speak of desserts. All this delicious stone fruit is making me wish to bake a nice golden pie or something similar.
Since nothing has changed since last week, and the only oven working non-stop is the sun-oven. I'm afraid to go out, honestly.
There's little I can do, however, but prepare a dessert that doesn't need oven and is refreshing at the same time. Ice cream, what else. A continuous production wouldn't be complete without the most classical of all - vanilla ice cream. Nice and creamy, with rich vanilla flavour - this is the case when you need to pull out your best vanilla bean.
If you use evaporated milk (unsweetened condensed milk) your ice cream will have even creamier texture.

The funny thing is that kids, in the beggining, seing those little seeds, refused to eat the vanilla ice cream saying it was momy's ice cream. But then all of sudden, probably because the chocolate flavoured one was finished grabbed "my ice cream" and finished it off saying just "mmmmmmm, so good"... asking, of course when I was making it again.
Ever since I made the cookies with white chocolate and coffee ganache cream, I had this idea that white chocolate-coffee combination would be great as an ice cream flavour as well. So that was my next thought after I prepared the vanilla ice cream. And just as I thought, I loved it. And I repeat again, coffee flavor is not among my favourites when it comes to any type of dessert. But there's something irresistible in this combination with white chocolate that I like.
I'm almost sure the weather will change next week, simply because we're leaving for a vacation at the seaside. But until then, who can resist a delicious refreshment?

Vanilla Ice cream

Vanilla Ice Cream

* 250 ml full fat milk (or evaporated / unsweetened condensed milk)
* 250 g heavy cream
* 6 egg yolks
* 90 g sugar
* 1 vanilla bean (+ 1 teaspoon pure vanilla extract)

Mix the milk and the heavy cream in a heavy bottom saucepan. Cut the vanilla bean in half, lenghtwise and scrape the seeds. Add both the seads and the bean to the milk. Heat the mixture until it has almost reached the boiling point, then turn off the heat, cover and let sit for 10 minutes.
Whisk the egg yolks and the sugar together in a mixing bowl. Gradually add the hot milk pouring it in a thin streak while whisking the mixture. Pour everything back into the pot and cook on low heat stirring continuously until the custard starts coating the back of the spoon (it should reach maximum 80°C).
Remove from heat and pour immediately into a clean bowl through a fine mash sieve (remove the vanilla bean, rinse it carefully and let dry, you can add it to sugar or use it to feed your homemade vanilla extract). If your like stronger vanilla flavour add a teaspoon of vanilla extract as well.
Place the bowl with the custard over an ice bath to speed up the cooling. Then cover the bowl and leave in the fridge for at least 3-4 hours or overnight.
Process the custard in your ice cream maker until firm and then transfer into a freezer suitable container and freeze for at least couple hours before serving.

# for White Chocolate Coffee Ice cream add the following to the basic vanilla ice cream:
* 200 g white chocolate
* 2-3 teaspoons instant coffee powder (I use decafinated Nestle coffee)
* 2 TBspoons heavy cream.

Prepare Vanilla ice cream as a base with only 1/2 vanilla bean.
Heat the heavy cream and dissolve the instant coffee in it. Melt the white chocolate in a microwave oven and then mix it with coffee flavoured cream.
Add the mixture to the hot custard and stir well, proceed as described above.


Vanilla Ice cream and White Chocolate Coffee Ice Cream


Gelato alla vaniglia


* 250 ml di latte intero (o latte condensato non zuccherato)
* 250 g panna fresca
* 6 tuorli
* 90 g di zucchero
* 1 baccello di vaniglia  (+ 1 cucchiaino di estratto puro di vaniglia)


Mettete il latte e la panna in un pentolino con il fondo spesso.
Tagliate il baccello di vaniglia a metà nel senso di lunghezza e togliete i semi con un coltello. Aggiungete i semi e il baccello al latte e portati quasi a bollire sul fuoco moderato. Togliete il pentolino dal fuoco, coprite e lasciate riposare per 10 minuti.
Nel frattempo mescolate in una ciotola i tuorli con lo zucchero usando una frusta a mano.
Aggiungete il latte caldo versandolo a filo e mescolando i tuorli contemporaneamente per evitare che coagulino.
Mescolate bene e poi mettete di nuovo nel pentolino. Fate cuocere la crema sul fuoco basso mescolando in continuazione con un cucchiaio di legno. La crema non deve bollire, ma raggiungere massimo 80°C e essere abbastanza densa da velare il dorso del cucchiaio.
Versate subito la crema in un ciotola pulita attraverso un colino a maglie fitte. Mettete la ciotola con la crema in un'altra un po' più grande con l'acqua fredda e ghiaccio per farla raffreddare più velocemente. Se volete il sapore di vaniglia ancora più accentuato aggiungete anche un cucchiaino di estratto di vaniglia.
Una volta fredda, mettete la crema in frigo per almeno 4 ore o, ancora meglio, tutta la notte.
Versate la crema ben fredda nella gelatiera e raffreddatela seguendo le istruzioni per la vostra macchina. Poi trasferite il gelato in un contenitore adatto per il freezer e congelatelo per ancora un paio d'ore prima di servirlo.
Se non avete una gelatiera, trasferite la crema direttamente dal frigo nel freezer avendo cura di mescolarlo almeno ogni due ore per evitare che si formino dei grossi cristalli di ghiaccio.


# per il Gelato al caffè e cioccolato bianco, aggiungere:


* 200 g di cioccolato bianco
* 2-3 cucchiaini di caffè solubile  (ho usato Nestle, decaffeinato)
* 2 cucchiai di panna fresca

Preparate come base il gelato alla vaniglia (è sufficiente aggiungere 1/2 baccello di vaniglia) come descritto sopra.
Poi scaldate la panna fresca e aggiungete il caffè solubile. Tagliate il cioccolato bianco a pezzettini e fatelo sciogliere nel forno a microonde o a bagno maria. Mescolate il cioccolato fuso con la panna aromatizzata al caffè e uniteli alla crema per il gelato ancora calda. Mescolate bene, poi procedete come già descritto nella ricetta per il gelato alla vaniglia.

Vanilla Ice cream


Sladoled od vanilije


* 250 ml punomasnog mlijeka (ili nezaslađenog kondenziranog mlijeka)
* 250 g svježe (mliječno) slatko vrhnje
* 6 žumanjaka
* 90 g šećera
* 1 mahuna vanilije  (+ 1 žličica čistog ekstrakta vanilije)


Pomiješajte mlijeko i slatko vrhnje u loncu s debelim dnom.
Mahunu vanilije prerežite na pola po dužini pa tupom stranom noža sastružite sjemenke. Dodajte sjemenke i praznu mahunu u lonac s mlijekom. Zagrijavajte mlijeko na srednje jakoj vatri skoro do točke vrenja, zatim maknite s vatre, poklopite i ostavite da odmara 10 minuta da mlijeko upije bolje aromu vanilije.
U međuvremenu pripremite zdjelu s jako hladnom vodom i ledom.
U drugoj zdjeli pomiješajte žumanjke sa šećerom, dovoljno je razmutiti ih dobro ručnom pjenjačom.
Sipajte vruće mlijeko u tankom mlazu u zdjelu sa žumanjcima istovremeno miješajući žumanjke da se ne bi naglo zgrušali.
Vratite sve u lonac pa kuhajte na laganoj vatri neprestano miješajući dok krema ne dostigne temperaturu od 80°C i zgusne se tek toliko da ostaje trag na poleđini žlice.
Kremu odmah prespite u čistu zdjelu sipajući je kroz gusto mrežasto cjedilo, pa zdjelu s kremom stavite u ledenu kupelj (zdjelu u koju ste usuli hladnu vodu i led). Ako želite još izraženiji okus vanilije umiješajte i žličicu čistog ekstrakta.
Kad se krema ohladi premjestite je u hladnjak na barem 4 sata ili, još bolje, preko noći, da se dobro ohladi i da se okusi bolje prožmu.
Dalje pripremite sladoled u stroju za sladoled prema uputama za vaš stroj ili kremu izravno iz hladnjaka premjestite u zamrzivač dok se ne stegne miješajući je barem svaka 2 sata da se ne bi stvorili veliki kristali leda.


# Za sladoled s kavom i bijelom čokoladom, dodajte:


* 200 g di bijele čokolade
* 2-3 instant kave (ja sam stavila  Nestle, bez kafeina)
* 2 žlice slatkog vrhnja

Pripremite kao osnovu sladoled od vanilije (dovoljno je dodati 1/2 mahune vanilije).
Posebno zagrijte 2 žlice slatkog vrhnja pa otopite u njemu instant kavu.
Bijelu čokoladu sitno nasjeckajte i otopite u mikrovalnoj pećnici ili na pari.
Pomiješajte čokoladu i vrhnje aromatizirano s kavom.
Dodajte ovu smjesu još toploj kremi za sladoled i dalje nastavite kako je opisano u postupku za pripremu sladoleda od vanilije.


Vanilla ice cream


Bruschette with Stracchino Cheese and Cherries

$
0
0

Bruschette with Stracchino Cheese and Cherries

Another unusual, for me, recipe with cherries in savoury combination, on a bruschette, with cheese. And once more I couldn't be more positively surprised with how good it tasted. But after the Cous Cous with cherries, I could have expected it and almost knew I'd love this one, too.I've been very busy, getting ready for our vacation, preparing, washing and ironing all the stuff for the little guy whose arrival is not expected for another month and a half, but can't risk anything. Better be ready in case we need to run to hospital straight from the beach.So, for now I'm leaving you with this quick recipe ideal for a hot summer day. But I might be back with something else before we leave on Sunday.

And this is another bread recipe I'm sending over to Heather from Girlichef who's hosting the BYOB (Bake your own bread) event.

Bruschette with Stracchino Cheese and Cherries

(4 servings)
* 12 small slices of bread
* 200 g of stracchino or crescenza cheese
* about 200 g cherries
* fresh chive
* extra virgin olive oil
* salt or gomasio

Toast the bread in an oven under the grill or in a grilling pan.
While still hot drizzle with some good quality extra virgin olive oil (if you like hot stuff, you may finely chop a hot pepper and add it to the oil)
Wash, dry and finely chop a small bunch of chive.
Mix it with the cheese (stracchino and crescenza are a type of fresh, soft and gooey Italian cheese). Spread some cheese on each slice of bread.
Stone and cut in half the cherries. Add them on top of your bruschette with cheese and drizzle with a little more EVOO. Sprinkle with a little salt or gomasio and serve.
You may serve these bruschette as an appetizer, finger food or part of a brunch.


Bruschette with Stracchino Cheese and Cherries

Bruschette con stracchino e ciliegie
(da Cucina naturale, numero di giugno 2012)

(per 4 persone)
* 12 fettine piccole di pane
* 200 g di stracchino o crescenza
* circa 200 g di ciliegie
* un mazzetto di erba cipollina fresca
* olio extra vergine d'oliva
* sale o gomasio

Tostate le fettine di pane nel forno sotto il grill o in una bistecchiera.
Irroratele con l'olio extravergine d'oliva, che potete anche rendere piccante aggiungendoli un peperoncino sminuzzato.
Lavate, asciugate e tagliate finemente l'erba cipollina. Mescolatela con il formaggio e spalmate sulle fettine di pane tostate.
Snocciolate e tagliate a metà le ciliegie. Distribuitele sopra il formaggio. Condite il tutto con un altro po' di olio EVO e un pizzico di sale o gomasio.
Servitele come antipasto, finger food o parte di un brunch.


Bruschette with Stracchino Cheese and Cherries

Bruschette sa stracchinom i trešnjama

(za 4 osobe)
* 12 manje kriške kruha
* 200 g sira stracchino ili crescenza
* oko 200 g trešanja
* svježi vlasac
* ekstra djevičansko maslinovo ulje
* sol ili gomasio

Prepecite kriške kruha u pećnici pod grilom ili u gril tavi.
Poprskajte ih dobrim maslinovim uljem, kojem po želji (ako volite pikantno) možete dodati i sitno nasjeckan svježi feferon.
Operite, posušite i sitno nasjeckajte manji svežnjić vlasca. Pomiješajte ga sa sirom (stracchino i crescenza su vrsta svježeg, mekanog talijanskog sira, nije sličan ni ricotti ni krem siru, ali ne znam ima li našem području sličan sir).
Namažite malo sira na svaku krišku prepečenog kruha.
Trešnjama izvadite koštice i prepolovite ih. Rasporedite ih ukrasno na kruh preko sira. Pospite s još malo ulja i mrvicom soli ili gomasia.
Poslužite ih kao predjelo, finger food ili kao dio bruncha.


Bruschette with Stracchino Cheese and Cherries


No bake chocolate and fruit tartelettes

$
0
0
No bake tartelettes with chocolate and fruit

No oven or too hot turn it on? but you don't won't to say "goodbye" to a delicious dessert?  That was my case the other day. When I start craving something I must have it. And that's how I got the idea for these no-bake tartelettes.
The first idea was to make some kind of mini cheesecake, but I would have prefered a baked version, and it was out of question. Then I thought I could still prepare a cookie based tartelettes and fill them with chocolate ganache. Then my hand got a bit generous and plain chocolate ganache got a little richer. A small box of mixed berries waiting to be used was just the "cherry" on top I was looking for.
And it seems this brought up some good vibes, because the oven guy said he'd have the missing piece today and should restore life to my oven sometime today. Too bad it's only two days before leaving for the seaside.
But... I don't think my consolation was a bad one these days. Don't you think so? Which one do you prefer, black or white?

No bake tartelettes with chocolate and fruit


No bake chocolate and fruit tartelettes

(for 6 tartelettes)
* 100 g sandwiched cookies (any kind similar to these)
* 50 g melted butter
* 150 g chocolate (dark, with 50% cocoa or white)
* 60 g sweetened condensed milk
* 2 TBspoons heavy cream
* 20 g butter
* fresh berries  (raspberries, blueberries, currants, gooseberries, etc.)

Grind the cookies in a food processor. Put the crumbs in a mixing bowl. Add the melted butter and mix well with a fork.
Line a 6-muffin pan with paper cups and divide the cookie mixure evenly. Using a coffee spoon press the cookie crumbs in a way to cover the bottom and the sides of the paper cups.
Cover and let rest in the fridge for at least 1/2 hour or until set.
In the meantime prepare the chocolate cream. Chop and melt the chocolate in a microwave oven.
Mix the condensed milk, the cream and the butter and heat until all is melted and warm. Pour the liquid over the melted chocolate and stirr with a spoon until the cream is smooth and shiny.
Take the prepared shells out of the fridge and fill them with the chocolate cream.
Put them back in the fridge until ready to serve.
Just before serving put some fresh berries on top.
* * * White chocolate cream is pretty sweet and it pairs well with more sour fruit like red currants for example, but blueberries are my favourite combo, however.
Or to make it less sweet, prepare the cream using heavy cream only instead of mixing the heavy cream and the sweetened condensed milk.

No bake tartelettes with chocolate and fruit

Tartelette senza cottura con cioccolato e frutta


(per 6 tartelette)
* 100 g di biscotti ripieni (ho usato i Baiocco di Mulino bianco)
* 50 g burro fuso
* 150 g di cioccolato (fondente con 50% di cacao o bianco)
* 60 g latte condensato zuccherato
* 2 cucchiai di panna fresca
* 20 g burro
* frutti di bosco  (lamponi, mirtilli, ribes, ecc.)


Frullate i biscotti nel robot da cucina per ottenere delle briciole. Mescolate i biscotti sbriciolati con il burro fuso usando una forchetta.
Mettete sei pirottini nello stampo per i muffin. Dividete i biscotti sbriciolati e poi usando un cucchiaino premeteli in modo da coprire il fondo e i lati dei pirotini di carta.
Metteteli in frigo a rassodare per almeno 1/2 ora.
Nel frattempo preparate la crema al cioccolato.
Tagliate il cioccolato a pezzettini e fatelo sciogliere nel forno a microonde.
Scaldate insieme la panna con il latte condensato e il burro. Versate questo liquido caldo sul cioccolato e mescolate bene fino a ottenere una cremina liscia e lucida.
Versatela nei gusci di biscotti e riponete nel frigo fino al momento di gustarli.
Poco prima di servirli distribuite sopra la crema di cioccolato la frutta a piacere.
*** la crema al cioccolato bianco e abbastanza dolce e consiglio di abbinarla alla frutta più acida come per esempio ribes rosso. Oppure preparatela usando solo la panna fresca, evitando il latte condensato.


No bake tartelettes with chocolate and fruit

Nepečene tartelette s čokoladom i voćem


(za 6 tarteletta)
* 100 g punjenog keksa (sendvič keksi s kremom, po izboru)
* 50 g otopljenog maslaca
* 150 g čokolade (tamne ili bijele)
* 60 g zaslađenog kondenziranog mlijeka
* 2 žlice slatkog vrhnja
* 20 g maslaca voće po želji (maline, ribizle, borovnice, itd.)


Stavite kekse u multipraktik i sameljite ih.
Vilicom pomiješajte mljevene kekse s otopljenim maslacem.
Stavite šest košarica u kalup za muffine i ravnomjerno rasporedite smjesu od keksa.
Žličicom utisnite smjesu da pokrijete dno i stranice košarica.
Pokrijte i stavite u hladnjak na barem 1/2 sata da se smjesa stisne.
Za kremu, nasjeckajte čokoladu i otopite je u mikrovalnoj.
Pomiješajte kondenzirano mlijeko, slatko vrhnje i maslac, zagrijte ih skupa pa dodajte u posudu s čokoladom.
Miješajte žlicom dok smjesa ne postane ujednačena, glatka i sjajna.
Rasporedite čokoladnu kremu u pripremljene košarice od keksa.
Ostavite u hladnjaku do posluživanja.
Prije posluživanja rasporedite preko kreme voće po želji.
*Krema s bijelom čokoladom je poprilično slatka stoga je ili kombinirajte s kiselijim voćem poput ribizli ili je eventualno pripremite samo sa slatkim vrhnjem (umjesto kondenziranog mlijeka).


***ja sam koristila ove kekse za podlogu


No bake tartelettes with chocolate and fruit

Saffron Macarons

$
0
0

Saffron Macarons

I don't think I've ever suffered so much on a vacation. There are moments when I think the really short walk from the hotel to the beach is impossibly long. And most of the time I feel like a fish out of water gasping for my breath. And yet when I look at myself in the mirror the only difference is this huge baloon attached to my body. And yet it feels so different. In any case impossible to relax 100% since I can't stay in one position for more than two minutes.
I've been resting from the kitchen and everything that has to do with food except eating it, actually enjoying these rare moments when someone else is taking care of it. But don't worry, my oven got repaired just before leaving and I can't wait to bake something as soon as I'm back.
If I were home this would be a perfect moment for it. Just as I'm writing strong wind started blowing and rain is expected in the evening. Not really happy with the prospect of bad weather ruining the last days of our vacation.
There's simply not the right moment for some things. But I don't think there's a wrong moment for a macaron. Especially if it's (naturally) sunny like these bright yellow ones, flavoured and coloured with saffron.
I especially enjoyed the ones filled with mixed citrus curd (orange-lemon-grapefruit), but for those who prefer chocolate... just go for it.


Saffron Macarons


Saffron Macarons

* 2 egg whites (about 70 g)
* 80 g very finely ground almonds
* 120 g powdered sugar
* 50 g caster sugar
* a little powdered saffron

First thing, you need very finely ground almonds. If using a hand nut grinder I suggest you grind them twice, in this way you'll get very finely ground almond powder. Otherwise place the almonds and the powdered sugar in the bowl of a food processor and process them in short intervals until finely ground.
In any case once you're done, sift the almonds together with the powdered sugar to remove any lumps and larger pieces of almonds left.
The egg whites need to be aged 2-5 days in the fridge - separate them from the egg yolks 2-5 days ahead, keep in the coldest part of the fridge, and take out at least 3 hours before you start the preparation.
Place the egg whites in a mixing bowl and start whisking them with a hand mixer. When they start foaming, add sugar - in three additions, not all at once.
Do not overbeat the eggwhites otherwise your macarons will be too dry - you only want to reach the soft peaks stage, that is to say as soon as they are stiff enough to be able to turn the bowl upside down without the eggwhites falling out, you're done.
Add the mixture of almonds and powdered sugar and a pinch or two of powdered saffron. At first give the mixuture a few quick stirs sith a silicone spatula to break the meringue, and then continue folding it until the mixture reaches the "lava" consistency. That is to say, if you pour it from a spoon, it will fall in a thick streak blending slowly with the rest of the mixture. You may do a test: grab a little batter with a spoon and put it on a plate, if the tip disappears, the consistency is perfect, if it doesn't, give the mixture a few more folds to turn it softer.
When ready, transfer the mixture into a pastry bag with a plain, round tip and squeeze little heaps on a baking pan lined with parchment paper or silicone baking mat.
The macarons should spread alone to 2,5-3 cm circles. Let them dry a little at room temperature for 30-60 minutes.
Bake them in an oven preheated to 150°C for 13-15 minutes.
As soon as you take the pan out of the oven slide the baking paper with the macarons on it to the table. Wait until they're completely cooled before removing them and filling with the cream.
For these Saffron coloured and flavoured macarons I used Lemon orange grapefruit curd (for one part) as well as chocolate ganache. But I particularly liked how well the citrus flavoured curd paired with saffron.

How to store the macarons: empy cookies can be stored at room temperature, in an airtight container for 2-3 days or frozen for a week. Fill the frozen cookies with the cream you choose withour thawing them, and then store in the fridge, in an airtight container for 24-48 to let them thaw and the flavors to merge.
Once they are filled with a cream, the macarons can be stored in the fridge for 3-4 days (I've kept them even for a week)


Saffron Macarons


Macarons allo zafferano

* 2 albumi d'uovo (circa 70 g)
* 80 g farina di mandorle
* 120 g zucchero a velo
* 50 g zucchero semolato
* un pochino di zafferano in polvere


Tritate molto finemente le mandorle pelate - io uso la macchinetta (manuale) per tritare la frutta secca e le trito due volte per ottenere una polvere finissima, altrimenti usate il robot da cucina e mettete le mandorle insieme allo zucchero a velo - cosi non si trasformeranno in pasta oleosa.
Setacciate le mandorle insieme allo zucchero a velo per mescolarli bene e per rimuovere eventuali pezzettini più grandi rimasti.
Gli albumi devono essere invecchiati di 2-5 giorni. Cioè, separateli dai tuorli 2-5 giorni prima e conservateli nella parte più fredda del frigorifero. Tirateli fuori dal frigo almeno 3 ore prima di iniziare la preparazione.
Mettete gli albumi in una ciotola e cominciate a sbatterli con le fruste elettrice. Quando comincia a formarsi la schiuma, aggiungete lo zucchero semolato in tre volte e continuate a sbattere fino a ottenere una neve ferma ma morbida (in pratica, non appena la massa e abbastanza ferma da non cadere dalla ciotola rovesciata, gli albumi sono montati a sufficenza). Se montate troppo gli albumi, macarons risulteranno troppo asciutti e rischiano di spaccarsi in cottura.
Aggiungete la miscela di mandorle e zucchero a velo un pizzico di zafferano (regolatevi in base al colore che volete raggiungere ma tenete in mente che lo zafferano darà anche un sapore particolare ai biscotti) e usando una spatola in silicone mescolate tutto insieme - prima due tre volte energicamente, e poi con i movimenti più lenti girando e piegando la massa finché non diventi abbastanza fluida da assomigliare alla lava (se la alzate cade lentamente in un filo denso e non lascia la punta).
Trasferite la massa pronta in un sacchetto da pasticceria con beccuccio liscio, tondo di diametro 1 cm e formate dei mucchietti sulla carta da forno - la massa dovrebbe stendersi da sola formando dei cerchietti di 2,5-3 cm di diametro.
Lasciateli asciugare per 30-60 minuti a temperatura ambiente e poi infornate a 150°C per circa 13-15 minuti.
Non appena togliete la placca dal forno fate scivolare la carta con dei macarons sul tavolo per fermare la cottura. Staccateli dalla carta soltanto quando si sono raffreddati completamente - se ce bisogno aiutatevi con un coltello o una spatola sottile di metallo.
Una volta freddi uniteli due a due con un po' di crema, metteteli in un contenitore a chiusura ermetica e conservate in frigo per 24-48 ore prima di servirli.
Io questa volta ho usato la crema al limone, arancia e pompelmo (Lemon orange grapefruit curd) per una parte e la ganache al cioccolato fondente per il resto.
Come si conservano i macarons: i biscottini vuoti si possono conservare a temperatura ambiente per 3-4 giorni in un contenitore a chiusura ermetica, oppure possono essere congelati per una settimana prima di farcirli. Per farcire i biscotti congelati, uniteli con la crema senza prima scongelarli, e poi lasciate in frigo per 24-48 ore prima di servirli. Una volta farciti, si conservano in frigorifero 3-4 giorni (io li ho tenuti anche per una settimana).


Saffron Macarons


Macarons sa šafranom


* 2 bjeljanjka (oko 70 g)
* 80 g što sitnije mljevenih badema
* 120 g šećera u prahu
* 50 g sitnog kristal šećera
* malo šafrana u prahu


Bademe što sitnije sameljite: ako imate ručni stroj za mljevenje orašastih plodova, sameljite ih dvaput, ako koristite blender stavite mljeti bademe zajedno sa šećerom u prahu, tako vam bademi neće ispustiti ulje i u svakom slučaju meljite ih u kraćim intervalima.
Kad ste ih samljeli, prosijte bademe zajedno sa šećerom u prahu.
Bjeljanjci trebaju biti stari barem 2-5 dana. To jest, odvojite bjeljanjke od žumanjaka 2-5 dana ranije i ostavite ih u hladnjaku, u najhladnijem dijelu, do upotrebe. Izvadite ih iz hladnjaka barem 3 sata prije početka pripreme.
Mutite mikserom bjeljanjke. Kad se malo zapjene dodajite kristal šećer - u tri dodavanja, ne sav odjedanput. Umutite do kraja da dobijete mekani snijeg - čim je smjesa dovoljno gusta da ne ispada iz zdjele kad je okrenete naopako, dovoljno je. Previše umućeni bjeljanjci: presuhi macarons, veća mogućnost da ispucaju pri pečenju. 
Dodajte smjesu badema i šećera u prahu - sve odjedanput. Dodajte malo šafrana (šafran neće dodati samo boju, već i svoju aromu, stoga se regulirajte po oku i okusu). Prvo promiješajte smjesu silikonskom špatulom naglim pokretima nekoliko puta da razbijete bjeljanjke, a zatim nastavite miješati kao da smjesu preklapate dok nije sva ujednačena i ima gustoću lave tj. kad je zagrabite žlicom pada u gustom mlazu i polako se stapa s ostatkom smjese.
Premjestite smjesu u slastičarsku vrećicu s okruglim otvorom promjera 1 cm i istiskujte hrpice na pleh obložen papirom za pečenje ili na silikonsku podlogu. Smjesa bi se trebala sama razliti u krug promjera 2,5-3 cm bez da ostane čvrst vrh (kao kod puslica npr.). 
Ostavite ovako oblikovane macarons da se suše na zraku 30-60 minuta.
Pećnicu zagrijte na 150°C.
Pecite macarons 13-15 minuta.
Čim izvadite pleh iz pećnice papir s macaronsima ili silikonsku podlogu skliznite na stol da se zaustavi pečenje i ostavite ih da se potpuno ohlade prije nego ih krenete odvajati inače će vam dno ostati zalijepljeno. Ako i dalje imate problema pomozite si nožem ili metalnom špatulom.
Ohlađene macarons nafilujte kremom i ostavite u hladnjaku 24-48 sati prije posluživanja.
Ja sam ove macarons punila Kremom od limuna, naranče i grejpa (lemon orange grapefruit curd), a dio i ganache kremom od tamne čokolade. Obje su mi varijante dobre, ali posebno mi se svidio kontrast citrusa i šafrana.


Čuvanje: prazne keksiće možete čuvati 2-3 dana na sobnoj temperaturi u hermetički zatvorenoj posudi prije nego ćete ih filovati kremom, ili ih možete zamrznuti (navodno tjedan dana, nisam probala). Smrznute kekse spajajte kremom bez da ih prvo odmrznete, a nafilovane ostavite u hladnjaku 24-48 sati. Jedanput nafilovane kekse spremite u hladnjak (3-4 dana, iako su meni nekad stajali i po tjedan dana bez problema). Izvadite ih iz hladnjaka 30 minuta prije posluživanja.


Saffron Macarons


Pizza and focaccia with sourdough starter

$
0
0
Focaccia with sourdough starter

The story goes simply like this. Once I though my sourdough starter was ready to be used, the recipe for pizza dough I saw on the wonderful Profumo di lievito blog had to be put to test. And the first baby my sourdough starter produced was so good that I simply decided to stick with this recipe for pizza but also for focaccias. My older daughter who wasn't so happy to eat pizza and complained every time, loved it, too. Not only she loved it, she said it was the best pizza in the whole Universe, and declared it's the only pizza she wants to eat.
So you can imagine, I've been making it often and not only the big pizzas for dinner, but these cute little pizzas that the girls like particularly.
This dough requires some time for preparation, but I assure you it's worth every minute of your time.
It's so light, it tastes fantastic, it's soft with a thin outside crust.
I don't want to go into details of what and why (the author of this recipe explains in his post) because I didn't get much of that myself, but I followed his recipe literally (except for doubling the sourdough starter) and it comes out perfect every time. So I'm just following his recipe blindly  ^__^

When I left for a vacation I was a bit afraid for the destiny of my sourdough starter. I refreshed it the evening before we left and then in the morning put it in the fridge. I thought it would be totally dead after ten days. But to my surprise it is still in great shape. I refreshed it twice before using it in a focaccia yesterday. And it looked fantastic.
Unfortunately, the dough is not the only thing growing like crazy in this house. Apart from my belly, it's my feet too, that look like they are about to burst any moment. So I'm leaving you this recipe today, and I'm off to the swimming pool hoping that soaking them in cold water will help a little.
Have a great Sunday!


Pizza  with sourdough starter

Pizza and focaccia with sourdough starter
(adapted from Profumo di lievito blog)

Dough:
* 300 g strong flour (Italian manitoba flour)
* 300 g fine semolina flour (semola rimacinata)
* 470 g water
* 200 g sourdough starter (hydrated at 50%)
* 7 g fresh yeast
* 14 g fine seasalt
*  20 g extra virgin olive oil


For focaccia and pizza:
* extra virgin olive oil
* coarse sea salt, cherry tomatoes, onions, olives, etc.
* pelati tomatoes, mozzarella cheese, etc.

Refresh your sourdough starter the evening before as described here.
Put 250 g barely lukewarm water (at 30°C) into the bowl of your stand mixer. Add the sourdough starter and mix it with your hand or a fork until it's almost completely dissolved.
Add the first flour (manitoba) and start mixing with paddle attachment at low speed for about 4 minutes. Proceed on a slightly faster speed until the dough starts coming together. Mix for a further couple minutes using a dough hook.
Seal the bowl with a piece of plastic wrap and let the dough proof for 3-4 hours, until it doubles in volume.
About half an hour before the dough is ready, crumble the fresh yeast into a small bowl. Sprinkle the salt over it, cover and let sit for 30 minutes. After that add 20 g water and stir well.
Mix the semolina flour with 200 g water, forming a soft dough. Cover and let rest for 30 minutes.
Add the semolina dough to the bowl with the first dough and mix them together using the paddle attachment, at low speed, until the two are well combined.
Continue mixing at higher speed and pour slowly the yeast and salt mixture. Once it's been absorbed, pour in the oil in a thin streak.
Once the oil has been well absorbed, continue mixing the dough using a dough hook.

                       Pizza and focaccia with sourdough starter       Pizza and focaccia with sourdough starter

                        Pizza and focaccia with sourdough starter      Pizza and focaccia with sourdough starter

Cover the bowl with a piece of plastic wrap and let the dough rest again for 45 minutes.
Now transfer the dough on a lightly floured kneading board. Flatten it gently with your hands being careful not to lose all the air trapped inside the dough.
Fold the upper third towards the middle and then in the same way the lower third. Cut the thus obtained log into two or three pieces. Fold the cut ends towards the middle to shape each piece into a ball.

          Pizza and focaccia with sourdough starter     Pizza and focaccia with sourdough starter

          Pizza and focaccia with sourdough starter     Pizza and focaccia with sourdough starter 

Place each ball of dough on a floured board and cover with a cotton cloth or even better with a bowl (that way it won't dry in surface). Let them rest for 45 minutes again.
For a focaccia: Put the dough into a lightly oiled baking pan. Flatten the dough with your hands to about 1,5-2 cm thick. Pour a little warm water and extra virgin olive oir on top and spred evenly with your hand. Then push your finger energetically into the dough to form the typical focaccia holes. Sprinkle with coarse sea salt (or add other seasoning like rosemary leaves, finely cut onionis, olives, halved cherry tomatoes, etc.). Let the focaccia rest for about 30 minutes and then bake it in a very hot oven, at 200-220°C until nicely golden.
With this quantity of dough you can make 2 focaccias.

For pizza: Put the dough into a lightly oiled baking pan (either round or square one) and flatten it with your hands as thin as you prefer it (very thin for a crunchier crust, slightly thicker for a soft one). Should the dough seem too elastic to flatten let it relax for a minute and then continue. Let the dough rest for 30 minutes.
Puree the pelati tomatoes in a blender or with a food mill, mix them with a couple TBspoons extra virgin olive oil and salt to your taste. Spread a layer of tomato salsa over the dough and bake for 5-7 minutes in a very hot oven (preheated at 250°C) on the lower rack. Take the pizza out and add the pieces of mozzarella cheese. Put the pizza back in the oven placing it on the middle rack and finish baking it.
With this quantity of dough you can make two big square pizzas (30x40cm) or three round ones.


Pizza with sourdough starter

Pizza e focaccia con lievito madre
(adattato dal blog Profumo di lievito)


Pasta:
* 300 g di farina manitoba
* 300 g di semola rimacinata
* 470 g acqua
* 200 g di lievito madre (a 50% di umidità)
* 7 g di lievito di birra fresco
* 14 g sale marino fine
*  20 g di olio extra vergine d'oliva


Condimento per la pizza o focaccia
* olio EVO
* sale grosso 
* pomodorini, olive, cipolle, ecc.
* pomodori pelati, mozzarella


Rinfrescate il vostro lievito madre la sera prima per renderlo attivo.
Mettete 250 g di acqua leggermente tiepida (a 30°C) nella ciotola dell impastatrice. Aggiungete il lievito madre e mescolate con la mano fino a scioglierlo. Aggiungete la farina manitoba e impastate con la foglia a bassa velocità per circa 4 minuti. Aumentate leggermente la velocità e lasciate incordare l'impasto. Montate il gancio e impastate per ancora brevemente. Coprite la ciotola e lasciate lievitare per circa 3-4 ore.
Sbriciolate il lievito in una ciotolina e distribuite il sale sopra. Coprite e lasciate riposare per 30 minuti. Poi aggiungete 20 g d'acqua e mescolate.
Mescolate la semola rimacinata con i restanti 200 g d'acqua, coprite e lasciate riposare per 30 minuti.
Aggiungete la pasta di semola al primo impasto (quello lievitato) e impastate con la foglia per qualche minuto finché i due impasti si saranno ben amalgamati.
Aumentate la velocità, aggiungete il lievito con il sale e lasciate assorbire. Versate molto lentamente l'olio. Una volta che olio è stato assorbito, montate di nuovo il gancio e impastate brevemente.
Sigillate la ciotola e lasciate riposare l'impasto per 45 minuti.
Trasferite l'impasto su una superficie infarinata con la semola e stendetela leggermente con le mani. Poi piegate il terzo superiore verso il centro e ripetete lo stesso con la parte inferiore. Tagliate la pasta in 2 o 3 parti, piegando le parti tagliate verso il centro e formando le palline. Mettetele sul piano infarinato e lasciatele lievitare per 45 minuti coperte con un canovaccio o una ciotola.


Per la focaccia: Stendete la pasta con le mani su una teglia leggermente oleata, a uno spessore di circa 1,5-2 cm. Versate un po' di acqua tiepida e qualche cucchiaio d'olio EVO sulla superficie. Spalmate l'acqua e l'olio con le mani su tutta la superficie e poi premete energicamente con le dita formando le fossette che si riempiranno con l'olio e acqua.
Distribuite sopra un po' di sale grosso, pomodorini tagliati a metà, olive, cipolle o altro a piacere e lasciate lievitare la focaccia per 30 minuti prima di infornarla a 200-220°C.
Con queste quantità vengono due focacce.


Per la pizza: Stendete la pasta con le mani in una teglia leggermente oleata. Lasciate lievitare nella teglia per 30 minuti. Condite la pizza con pomodoro, sale e olio e infornatela nella parte bassa del forno per 5-7 minuti. Toglietela dal forno e distribuite la mozzarella tagliata a pezzettini. Mettetela di nuovo nel forno, posizionando la griglia al centro e finite la cottura.
Con queste quantità di solito preparo 3 pizze tonde o due grandi, rettangolari.


Pizzette with sourdough starter

Pizza i focaccia s kiselim tijestom
(recept s manjim izmjenama preuzet s bloga Profumo di lievito)


Tijesto:
* 300 g brašna za dizana tijesta (tal. manitoba)
* 300 g premljevene krupice durum pšenice (semola rimacinata)
* 470 g vode
* 200 g kiselog tijesta / kvasa (s 50% vlage)
* 7 g svježeg kvasca
* 14 g fine morske soli
*  20 g ekstra djevičanskog maslinovog ulja


Dodaci za focacciu ili pizzu:
* maslinovo ulje
* krupna morska sol
* masline, ružmarin, rajčice, luk, itd.
* pelati, mozzarella itd.


Kvas osvježite večer ranije tako da je aktivan.
Stavite 250 g malo umlačene vode (30°C) u zdjelu stolnog miksera. Dodajte kiselo tijesto i miješajte rukom da se istopi. Dodajte prvo brašno (manitoba) i počnite mijesiti s K nastavkom za tijesto na niskoj brzini 4 minute. Povećajte brzinu i pričekajte da se tijesto počne povezivati tj. odvajati od zdjele.
Stavite kukasti nastavak za tijesta pa još kratko mijesite.
Pokrijte zdjelu i ostavite tijesto da se udvostruči (3 do 4 sata).
U manju zdjelicu namrvite svježi kvasac. Pospite preko njega sol, pokrijte zdjelicu i ostavite da stoji 30 minuta.
Kratko pomiješajte drugo brašno (semola rimacinata) s 200 g vode, oformite tijesto i ostavite pokriveno oko 30 minuta.
Kad je prošlo 30 minuta dodajte preostalih 20 g vode u zdjelicu s kvascem i solju i izmiješajte žličicom da se sol istopi.
Dodajte tijesto sa semolom prvom tijestu s kvasom i miješajte mikserom s K nastavkom, na niskoj brzini, dok se dva tijesta ne povežu.
Povećajte brzinu i u tankom mlazu dodajte kvasac sa solju.
Pričekajte da se tijesto poveže, a zatim jako polako, u tankom mlazu dodajte ulje.
Kad je tijesto upilo ulje, stavite kukasti nastavak za tijesto i dalje još malo mijesite.
Pokrijte zdjelu prozirnom folijom i ostavite da se diže 45 minuta.
Istresite tijesto na pobrašnjenu dasku. Lagano ga rastanjite rukama pazeći da ne istisnete zrak.
Preklopite 1/3 tijesta prema sredini, pa ga preklopite slobodnom preostalom trećinom.
Prerežite tijesto na 2 ili 3 dijela (ovisno koliki komadi tijesta će vam trebati).
Svaki prerezani dio preklopite još jedanput tako što ćete tu prerezanu i njoj suprotnu stranicu preklopiti prema sredini.
Okrenite tijesto da je preklop prema dolje i ostavite pokriveno da se opet diže 45 minuta (pokrijte svaku kuglicu tijesta krpom ili većom zdjelom).
Nauljite pleh u kojem ćete peći focacciu/pizzu.
Stavite tijesto i lagano ga pritiskajući dlanovima i prstima razvucite na željenu debljinu (malo tanje za pizzu, 1,5-2 cm za focacciu).
Ako se tijesto ne da razvući i čini vam se previše elastično, pravite pauze, tijesto se opusti i onda se lakše razvuče.
Za pizzu ostavite da razvučeno tijesto se diže u plehu 30 minuta, a zatim stavite gore umak od rajčice (propasirajte pelate, posolite i dodajte par žlica ulja). Pecite prvih 5-7 minuta na najjačoj temperaturi na najnižoj rešetki. Izvadite i rasporedite komadiće mozzarelle. Vratite u pećnicu na središnju ili višlju rešetku i pecite do kraja.
Od ove količine tijesta dobijete dvije velike pizze (pleh od pećnice) malo deblje, istina, ili 3 ako volite tanju pizzu.


Za focacciu, kad ste tijesto rastanjili, ulijte malo mlačne vode i dosta ulja pa razmažite rukom po cijeloj površini. Energično ispritiskajte prstima cijelu površinu da napravite udubljenja.
Pospite krupnom morskom soli (po želji dodajte i druge dodatke, masline, prepolovljene cherry rajčice, luk). i ostavite da se diže 30 minuta a zatim stavite peći na 200-220°C dok ne dobije lijepu boju odozgor.
Od ukupne količine tijesta možete napravite dvije velike focacce(veliki pleh od pećnice).

Focaccia with sourdough starter


Watermelon granita

$
0
0
Watermelon granita

I don't know if you are hating this heat as much as I am or you are happy with it like my husband. All I know I'm sick tired of sweating all day and night (even with the airconditioning on), not being able to go out of the house (I'm scared I might just faint in the middle of the street). Ok, it's a particular summer for me as well, and for the first time in years we'll be staying at home in August. So that makes it a bit more difficult. Just the idea of being confined in the house and going out only when really necessary makes me scream.
Although I haven't stopped baking, the most required food at the moment, and easiest to prepare, are frozen desserts, ice creams, ice popsicles and similar.
And kids particularly like granita. Two years ago, visiting Sicily, I had an opportunity to taste THE best granitas in the world... actually, their taste is out of this world. Flavors going from fantastic lemon to almond (the flavor I think you can get only there), and all other fruit you can imagine.
Granita is fairly simple to make. All you need is some fruit juice, sugar and water. Mixed, frozen and then reduced to finest ice crystals that melt gradually.
The watermelon granita is even more simple to make, since it's sweet and mainly consisting of water. You may add some flavoring like vanilla, lemon, grapefruit or orange juice to adjust it your taste.

Watermelon granita

Watermelon granita

* 500 g watermelon pulp (seedless)
* 1-2 TBspoons sugar
* 1/2 teaspoon vanilla extract or juice from 1/2 lemon

Ccut the watermelon pulp into cubes and puree in a food processor or a blender. Strain through a mesh sieve just in case there are some seeds left.
Add the sugar and the vanilla extract or lemon juice (adapt the quantity of sugar to your taste and depending on the sweetness of your watermelon). Stir until the sugar has dissolved.
Pour the mixture into a freezer adapt container and freeze. When it's almost frozen take out and grate/stir with a fork.
Put back into the freezer until completely frozen.
Chill the glasses you'll be using to serve granita.
Again, grate the frozen mixture with a fork and fill the glasses - the point is to have very fine ice crystals that will gradually melt.
Add some mini chocolate chips if you like to fake watermelon seeds.


Watermelon granita

Granita all'anguria


* 500 g di polpa di anguria (senza semi)
* 1-2 cucchiai di zucchero
* 1/2 cucchiaino di estratto di vaniglia o succo di 1/2 limone


Tagliate la polpa d'anguria, pulita dalla buccia e semi, a cubetti e frullatela. Setacciatela per togliere eventuali semi rimasti.
Aggiungete lo zucchero (regolatevi in base al gusto personale e alla dolcezza dell'anguria) e l'estratto di vaniglia o succo di limone. Mescolate bene per far sciogliere lo zucchero e trasferite in un contenitore adatto al freezer. Coprite e lasciate congelare. 
Quando la massa si è quasi completamente congelate togliete il contenitore dal freezer e grattatela con una forchetta. Rimettete il contenitore nel freezer e lasciate congelare completamente.
Raffreddate i bicchieri che userete per servire la granita.
Grattate di nuovo la massa ghiacciata con una forchetta e riempite i bicchieri. A piacere aggiungete le gocce di cioccolato fondente come i semi d'anguria finti. Servite subito.
Per variare potete al posto della vaniglia o limone aggiungere il succo di un pompelmo o succo di 2 arance.


Watermelon granita

Granita od lubenice


* 500 g očišćenog mesa lubenice (bez kore i sjemenki)
* 1-2 žlicešećera
* 1/2 žličice čistog ekstrakta vanilije ili  sok 1/2 limuna


Narežite lubenicu na kockice i izmiksajte u blenderu da dobijete pire (ako vidite da vam je ostalo još sjemenki unutra možete dobivenu kašu dodatno procijediti kroz cjedilo).
Dodajte šećer, ekstrakt vanilije ili sok limuna.
Miješajte dok se šećer potpuno ne istopi.
Količinu šećera prilagodite svom ukusu i slatkoći lubenice.
Uspite smjesu u posudu pogodnu za zamrzavanje, pokrijte i stavite u zamrzivač.
Kad se skoro skroz smrzlo izgrebite/izmiješajte vilicom, pa vratite natrag u zamrzivač da se potpuno ščvrsne.
Čaše u kojima ćete posluživati granitu stavite također u zamrzivač.
Izgrebite smrznutu smjesu vilicom i stavite u čaše.
Po želji dodajte kapljice tamne čokolade (lažne sjemenke) i poslužite.
Varijacije: dodajte lubenici iscijeđeni sok 1 grejpfruta ili sok 2 naranče (u tom slučaju povećajte količinu šećera).

Watermelon granita

Tuscan "Scarpaccia"

$
0
0
Tuscan "Scarpaccia"

Days are passing pretty slowly waiting for the baby to decide to come out. And even though it's hot, and I should be spending days resting my swollen feet, I just can't sit still. Particularly because the alternative to cooking dinner every day would simply be take-away pizza, and I don't find that much appealing in this period... or ever, to say the truth.
On the other hand, thanks God it's summer, plenty of fruit and vegetables really help prepare some simple and yet delicious dishes, from soups to desserts.
I'm a little disappointed with my zucchini plants this year. For the first time in four years since I started my own garden, the zucchini plants look really miserable. So far I've been able to collect just a few zucchinis and flowers. For the rest, they start growing and once they've reached some 5 cm they turn yellow and die.
Considering that zucchini are one my favorite vegetables, this is pretty sad for me.
The recipe I'm sharing with you today is typical for Tuscan cuisine, more precisely the area of Camaiore in Versilia. There's also a sweet version of this dish, but I must say I haven't had the opportunity to try that yet.
This recipe, however, once you try it, might become your favourite zucchini recipe this summer. It's really delicious, simple and quick to prepare. Grab a piece!


Tuscan "Scarpaccia"

Tuscan "Scarpaccia"

* 300 g young zucchini (possibly with flowers)
* 2 scallions
* 2 eggs
* 4 TBspoons flour
* 4 TBspoons grated parmigiano cheese
* 75 ml milk
* 1 clove of garlic
* salt and pepper
* extra virgin olive oil

Cut the zucchini into thin slices. Salt them and place into a colander for 20 minutes so they can lose part of the water.
Rinse them and dry on kitchen paper.
Break the eggs into a mixing bowl. Whisk them with flour. Add the milk diluted with enough water to get 125 ml of liquid. You should get a rather thin batter.
Stir in the zucchini, add the zucchini blossoms (cut into strips), the finely sliced scallions, finely chopped garlic, grated parmigiano, salt and peper to your taste.
Pour everything into a shallow 20-centimeter oiled round pan. Drizzle a little more oil on top.

     Tuscan "Scarpaccia"        Tuscan "Scarpaccia"

Bake in the oven preheated to 220°C for about 20 minutes or until golden brown.
Serve with shaves of parmigiano.


Tuscan "Scarpaccia"

Scarpaccia Toscana

* 300 g zucchine novelle (possibilmente con i fiori)
* 2 cipollotti
* 2 uova
* 4 cucchiai di farina
* 4 cucchiai di parmigiano grattugiato
* 75 ml di latte
* 1 spicchio d'aglio
* sale, pepe
* olio extra vergine d'oliva

Tagliate le zucchine a rondelle sottili. Salatele e lasciatele in un colino per una ventina di minuti. Poi asciugatele con la carta da cucina.
Se avete dei fiori, tagliateli a strisce e aggiungeteli alle zucchine.
Mescolate in una ciotola le uova con la farina. Diluite il latte con tanta acqua da ottenere 125 ml di liquido e unite alle uova. Mescolate bene per ottenere una pastella liscia senza grumi.
Aggiungete le zucchine e i fiori alla pastella, unite le cipolline tagliate a rondelle sottili, l'aglio sminuzzato, il parmigiano, sale e pepe.
Mescolate bene e versate il tutto in una teglia oleata di 20 cm di diametro. Il tortino dovrebbe avere uno spessore di massimo 1 cm.
Mettetelo a cuocere nel forno già riscaldato a 220°C per circa 20 minuti o finché dorato in superficie.
Al momento di servire, completate il piatto con delle scaglie di parmigiano non troppo sottili.


Tuscan "Scarpaccia"

Toskanska "scarpaccia"

* 300 g mladih zelenih tikvica (po mogućnosti s cvijetom)
* 2 mlada luka
* 2 jaja
* 4 žlice brašna
* 4 žlice naribanog parmezana
* 75 ml mlijeka
* 1 češanj bijelog luka
* sol, papar
* maslinovo ulje

Odaberite mlade tikvice, da nisu veće od 10 cm.
Narežite ih na tanke kolutiće, posolite i ostavite u cjedilu 20-ak minuta da se ocijedi voda iz njih.
Posušite ih na kuhinjskom papiru.
Ako imate cvjetove narežite i njih.
Razmutite pjenjačom jaja s brašnom, pa dodajte mlijeko koje ste razrijedili s toliko vode da dobijete 125 ml tekućine.
Umiješajte u ovo tekuće tijesto tikvice (i cvjetove), na tanke kolutiće narezan luk, usitnjeni češnjak, parmezan, posolite i popaprite po ukusu.
Istresite smjesu u nauljen okrugli kalup promjera 20 cm - visina tijesta neka bude najviše 1 cm.
Polijte s malo ulja po površini i stavite peći u pećnicu zagrijanu na 220°C, oko 20 minuta odnosno dok ne porumeni na površini.
Pri posluživanju dodajte na površinu listiće parmezana.


Torta Monferina with pumpkin and amaretti cookies

$
0
0
DSC_0446

Long time no see, huh? You're right!
I've been absent for so long from my blog, that most people might have forgotten me? But you also know I've had a good reason for this hiatus.
My little man was born just six days after my last blog post. Beautiful and healthy, an angel baby that everyone could only dream of, but of course, a little baby is above all very time consuming. Not that I complain, on the contrary, I'm enjoying every second I'm spending with him. Confessing... probably enjoying him more than I did with my daughters... perhaps it has to do with the awareness that these moments will pass so quickly (my God, he's already 3 months old) and that I'll never live them again so intensly as now. You know how irresistible the sweet little face can be? How disarming the smile on that little face can be? Beautiful enough to make you forget that's it's been more than three months since last time you slept entire night.
However, I'm never sitting quietly during the day. Every moment I can steal during the mornings is dedicated to cooking and baking. Mornings, of course, because afternoons are frenetic as usual, and once we (me and the little one) have picked up his sisters from school, the house all of a sudden starts looking rather like a luna park.

I know I should stay away from sweets and snacks, but sometimes I just think I couldn't survive the day without that extra sugar charge. There's always time for a diet.
This cake is something that surprised me so positively. My first ever pumpkin cake, don't know if it's going to be the last as well, but it will sure stay on the very top. So tasty, moist, deliciously sweet, and yet you can gobble half of it and not feel heavy. Like, after each slice you feel like you could eat another one. That's more or less what happened when I made it for the first time. Was it the lack of self control or the cake is really so irresistible? You'll have to discover it for yourself. But whether you like pumpkin or not, you'll love this cake originally from Piedmont region, 'cause you won't even know it's there. Trust me, no one guessed the main ingredient.
There are actually many different recipes for Torta Monferina. Usually with apples only, or apples and pumpkin together, but what they all have in common is the addition of amaretti cookies, that add such a particular flavour to the cake, and being made with almonds, substitute the flour. This results in a cake that is so moist that it basicly melts in your mouth.

Torta Monferina with pumpkin and amaretti cookies


Torta Monferina with pumpkin and amaretti cookies

* 600 g pumpkin - butternut or similar
* 300 g amaretti cookies
* 150 g white wine (e.g. Moscato d'asti)
* 100 g sugar
* 4 eggs
* 40 g unsweetened coocoa
* 40 ml rum
* 4 teaspoons baking powder
* a little brown sugar for sprinkling


Peel and slice the pumpkin. Place it in a deep skillet, add wine and cook on low heat until it's so soft you can mash it with a fork. If necessary add a little water after all the wine's been absorbed/evaporated. Mash the pumpkin with a fork and set aside to cool.
Grind the amaretti cookies in a food processor, and then mix them with the mashed pumpkin.


Torta Monferina- preparation Torta Monferina - preparation


Beat the eggs with sugar (you may reduce the quantity of sugar if your pumpkin's quite sweet) until pale. Mix in the pumpkin and amaretti mixture using a hand whisk or a wooden spoon. In the end, add the rum and baking powder sifted together with the cocoa.
Pour the batter into a 26 cm round spring form lined with baking paper.
Bake the cake in an oven preheated to 160°C for about 35 minutes. After approximately 20 minutes, take the cake out for a second and sprinkle the surface with brown sugar.
Let the cake cool in the pan, before cutting and serving.


Torta Monferina with pumpkin and amaretti cookies


Torta Monferina alla zucca e amaretti

* 600 g di zucca (butternut o piacentina)
* 300 g amaretti
* 150 g vino bianco (tipo Moscato d'asti)
* 100 g zucchero
* 4 uova
* 40 g cacao amaro
* 40 ml rum
* 1 bustina di lievito per dolci
* un po' di zucchero di canna

Pulite la zucca e tagliatela a fettine. Mettetela in una casseruola con il vino e fatela stufare a fuoco dolce finché diventi completamente morbida (se necessario, aggiungete un po' d'acqua, ma alla fine deve risultare morbida e abbastanza asciutta). Schiacciatela con una forchetta e lasciate raffreddare la purea.
Tritate gli amaretti e mescolateli alla purea di zucca.
Sbattete molto bene le uova con lo zucchero in una terrina usando uno sbattitore elettrico.
Unite la purea di zucca e amaretti mescolando con una frusta a mano o un cucchiaio di legno.
Alla fine aggiungete il rum e il lievito setacciato insieme al cacao. 
Versate l'impasto in uno stampo a cerniera di 26 cm di diametro.
Infornate la torta a 160°C per 35 minuti circa.  Verso metà cottura circa, estraete la torta per un'attimo e cospargete la superficie con lo zucchero di canna.
Lasciatela raffreddare nello stampo

Torta Monferina with pumpkin and amaretti cookies


Torta Monferina s bundevom i amarettima

* 600 g bundeve (očišćene)
* 300 g amaretta (keksića)
* 150 g bijelog vina
* 100 g šećera
* 4 jaja
* 40 g gorkog kakaa
* 40 ml ruma
* 1 vrećica praška za pecivo
* malo smeđeg šećera za posuti tortu

Očistite bundevu, ogulite koru i narežite je na ploške.
Stavite ploške bundeve kuhati zajedno s vinom na laganoj vatri dok se potpuno ne raskuha i pretvori u pire. Ako je potrebno dodajte i malo vode nakon što vino ispari.
Recept preporučuje Moscato d'Asti, ja ga nisam imala, stavila sam prošek.
Kad se pire od bundeve prohladi dodajte mu izmrvljene amarette i dobro izmiješajte.
Umutite jaja sa šećerom uz pomoć miksera (meni torta nije bila preslatka, ali ako svejedno volite manje slatko, možete slobodno smanjiti količinu šećera, naročito ako vam je bundeva dosta slatka).
Kad su jaja dobro umućena dodajte prvo pire od bundeve s amarettima i izmiješajte polako pjenjačom ili drvenom žlicom.
Dodajte zatim rum i na kraju kakao prosijan s praškom za pecivo.
Uspite smjesu u namašten i pobrašnjen okrugli kalup s obručem, promjera 26 cm.
Stavite peći tortu u pećnicu zagrijanu na 160°C oko 35 minuta. Na otprilike polovici pečenja, izvadite tortu na čas i pospite smeđim šećerom po površini.
Ostavite tortu da se ohladi u kalupu.

*********************************************************

And this is my pumpkin pie... the recipe is a family secret, shhhhhhhhh!


Chickpeas flour focaccia with rosemary and garlic

$
0
0
Chickpeas flour focaccia with rosemary and garlic

I wake up at night at the very first squeeking sound coming from the baby's cot. Without even turning the light on, I take him in my arms and while he's peacefully suckling his milk in an almost completely dark room I glance to my left. Taking advantage of their father being away, the two princesses decided to occupy my bed. I feel like a hen, with all my chicken surrounding me, looking for a little warmth on my side. A couple hours still till dawn, I might manage to sleep for a couple more sweet hours before the next feeding.
If only everything was so peaceful and quiet as the nights, and never mind the fact that I don't even remember what's it like to sleep all night.
The morning instead is grey and cold, it rained all night and doesn't seem like there's even hope it will stop any time soon.
Armed with the baby in one arm and the umbrella in the other, it's time to start a new day.
I swear, one of these days I'll wake up like Hulk. I'm pumping up my arm muscles... and if I don't get any hand made Belgian chocolates tonight to compansate for taking care of three kids and a dog alone for four days, I'll turn green for sure... and those speculoos moulds, too, darling!!!

The best and most useful cure for a stressful, gloomy day is to bake some bread, of course. Don't you agree?
And of course, during these three months and a half I didn't forget my other "baby", the one that sits quietly in the fridge, waiting to be caressed and fed. My sourdough baby is still giving me great satisfaction.
This recipe was originally with fresh yeast but I tried making it with the sourdough starter and it turned out great. Soft and aromatic with rosemary and garlic. I'll pass on the glass of wine, for now, but you feel free get one.
Have a nice day ahead!

Adding this recipe to Girlichef's November Bread basket

Chickpeas flour focaccia with rosemary and garlic


Chickpeas flour focaccia with rosemary and garlic


* 250 g wheat flour (white or whole grain or mixed)
* 75 g chickpea flour
* about 200 ml water
* 100 g sourdough starter with 100% humidity (or 12 g fresh yeast or 3,5 g dry yeast)
* 1 teaspoon salt
* 1 rosemary twig
* 2 cloves of garlic
* 3-4 TBspoons extra virgin olive oil

Dissolve the sourdough starter in water.
Add gradually the two flours that you previously mixed and sifted together, as well as the salt. Knead everything together to get soft, elastic dough. Place it in a clean bowl, cover and let rise for at least 3 hours.
In the meantime chop finely the rosemary leaves with garlic. Mix them with 3-4 TBspoons of good EVOO, warm up lightly and set aside to cool.
Take the dough, add 1/3 of the aromatic oil and knead well again until the dough has absorbed all the oil and has become smooth again. Cover and let rise again for at least 1 hour.
Flatten the dough with your hands on a slightly oiled baking sheet to 1,5 cm thick.
Pour a little lukewarm water on top and the remaining aromatic oil. Mix the two and spread with your hands all over the surface. Then push your fingers energetically into the dough to form the characteristic faucets on top.
Let the focaccia rest again for 45 to 60 minutes and then bake in an oven preheated to 200°C for 20 minutes or until golden brown.
Let it cool on a cooling rack and then cut and enjoy with some cheese and olives or simply to accompany a meal, especially soups.
*note: if using fresh or dry yeast, dissolve it in water first and proceed in the same way as described, letting the dough rise for shorter time, of course: 1,5 hours the first time and 30 minutes the second and third.


Chickpeas flour focaccia with rosemary and garlic


Focaccia con la farina di ceci al aglio e rosmarino


* 250 g farina di grano (bianca o integrale o mista)
* 75 g farina di ceci
* circa 200 ml di acqua
* 100 g di lievito madre con 100% di umidità (oppure 12 g di lievito di birra fresco)
* 1 cucchiaino di sale
* 1 ranetti di rosmarino
* 2 spicchi d'aglio
* olio extra vergine d'oliva

Mettete il lievito madre precedentemente rinfrescato in una ciotola, aggiungete l'acqua e mescolate con la mano o con una frusta a mano per scioglierlo.
Mescolate e setacciate insieme le due farine. Aggiungete gradualmente le farine e poi il sale. Impastate bene, formate una palla e lasciatela lievitare in una ciotola coperta per circa 3 ore.
Tritate molto finemente il rosmarino e l'aglio. Mescolateli con 3-4 cucchiai di olio EVO e scaldate un po'.
Quando l'olio si è raffreddato, aggiungete 1/3 alla pasta e impastate bene di nuovo, finché risulti di nuovo liscia e l'olio è ben assorbito.
Lasciate lievitare di nuovo per un'ora.
Stendete la pasta con le mani in una teglia leggermente oleata allo spessore di circa 1,5 cm.
Versate prima un po' di acqua tiepida e poi il restante olio al aglio e rosmarino sulla superficie della pasta stesa e spalmateli. Poi imprimete con le dita delle fossette premendo energicamente su tutta la superficie.
Lasciate lievitare adesso la focaccia per altri 45-60 minuti.
Infornatela a 200°C per 20 minuti o finché dorata.

*Se al posto del lievito madre usate il lievito di birra, fatelo prima sciogliere nel acqua tiepida e poi impastate con le farine. Potrebbe servirvi un po'di acqua in più. Lasciate lievitare l'impasto 1,5 h la prima volta e 30 minuti la seconda.


Chickpeas flour focaccia with rosemary and garlic


Focaccia od slanutkova brašna s ružmarinom i češnjakom

* 250 g pšeničnog brašna (bijelog, integralnog, ili miješanog)
* 75 g brašna od slanutka
* oko 200 ml vode
* 100 g kvasa sa 100% vlage (ili 12 g svježeg kvasca)
* 1 žličica soli
* 1 grančica ružmarina
* 2 češnja češnjaka
* maslinovo ulje

Osvježeni kvas stavite u zdjelu, dodajte mlačnu vodu i miješajte rukom ili vilicom da se kvas otopi.
Dodajite postepeno oba brašna, pomiješana i prosijana skupa. Kad ste već dodali polovicu brašna, dodajte sol.
Zamijesite meko i glatko tijesto koje se ne lijepi.
Stavite ga u zdjelu i ostavite na toplom oko 3 sata.
Ružmarin operite i posušite, pa sitno nasjeckajte listiće zajedno s očišćenim češnjakom.
Pomiješajte ružmarin i češnjak s 3-4 žlice maslinovog ulja pa zagrijte par minuta. Ostavite ulje da se prohladi.
Dodajte 1/3 ulja tijestu pa ga premijesite dok nije ponovno glatko i ulje je dobro upijeno.
Ostavite da se ponovno diže oko 1 sat.
Zatim tijesto rastanjite rukama na pleh na oko 1 do 1,5 cm debljine.
Na površinu ulijte malo vode i ulje s ružmarinom i češnjakom. Prvo dlanom pomiješajte i rasporedite ulje s vodom, a zatim vršcima prstiju napravite jamice pritiskajući energično tijesto po cijeloj površini.
Pokrijte focacciu i ostavite ponovno da se diže oko 45 - 60 minuta.
Pecite je u pećnici zagrijanoj na 200°C oko 20 minuta.
* Ako radite sa svježim kvascem, prvo ga otopite u mlačnoj vodi pa dalje zamijesite s brašnom. Prvi put ostavite tijesto da se diže 1 sat i 15 minuta, a zatim dva puta po 30 minuta.
* Ja sam stavila pola bijelo a pola integralno pšenično brašno

Cookies with chocolate dulce de leche

$
0
0
Cookies with chocolate dulce de leche

There are times when I try hard to recreate some storebought cookies and they just don't turn right. And there are times when I start out to make something completely different from what I get in the end - a cookie that is, by the way, so similar to my favourite childhood cookie.
The thing is, I'm so satisfied with the outcome this time, that I basicly swept them all.
And now I'm wondering. If I keep doing this to every batch of cookies I bake, how on Earth will I ever get enough cookies to save till Christmas? Definitely hard job, because I always choose those cookies that I like best.

Dulce de leche
Dulce de leche
Let's say that this weekend I needed some extra heat in my kitchen to help my panettone grow nicely, considering the temperature outside, it wasn't an easy job. So an extra batch of cookies was more than an excuse to fill the cookie jar.
And the caramel is just irresistible any time of year, add some chocolate to it and you've got yourself a winner. It really kind of contrasts the sweetness of dulce the leche in a perfect way. Not that I need to be convinced to clean a whole jar  ^_^
What should I say more? A new batch of these cookies has alredy been baked, and a new can of dulce de leche is waiting...
And my panettone? It's resting, and I can't wait till tomorrow morning to see if it came out right. But I'm sending positive vibes... In case things don't turn out right, I'll have my cookies to console with.


Cookies with chocolate dulce de leche


Cookies with chocolate dulce de leche

Dough:
* 380 g flour
* 175 g butter
* 200 g sweetened condensed milk
* 80 g unrefined cane sugar
* 1 teaspoon vanilla extract
* 1 teaspoon baking powder
* 15 g unsweetened cocoa

Chocolate dulce de leche:
* 300 g dulce de leche (homemade or storebought)
* 150 g dark chocolate
* 30 g butter

Cut the butter in small pieces and leave it in a mixing bowl at room temperature to soften.
When it's soft enough to stir with a spoon, add the sugar, the condensed milk and the vanilla extract. Stir well with a wooden spoon until smooth.
Mix the flour with the baking powder and sift them together.
Add 300 g of flour to the batter and stir well.
Divide the dough into two equal parts. Add 50 more grams of flour to one half, and the remaining 30 g of flour mixed with the cocoa to the other half.
Knead both doughs shortly to get smooth and soft dough. Shape each into a ball, flatten it a little, wrap in a piece of plastic wrap and refrigerate for 1 hour.
Roll a small portion of the dough to 3-4 mm thin and cut out round cookies. When working with the white dough make a hole in the middle with a smaller cookie cutter, and leave the dark cookies whole.
Bake the cookies in an oven preheated to 180°C for about 10 minutes or until the edges are slightly golden.
Let them cool for a couple minutes on the baking tray and then move to a cooling rack.

For the chocolate dulce de leche, chop the chocolate, place it in a heat proof bowl together with butter and microwave at 30 seconds intervals until the chocolate's melted (stir well at the end of each 30-second interval).
Add the dulce the leche, cover and microwave again at 50% power for 1 minute.
Take out and whisk until the mixture is smooth.
Put about a teaspoon of chocolate dulce the leche on the bottom side of the dark cookie and cover with a white cookie. Fill the cookies with the cream while it's still a little warm. In case you prepare the chocolate dulce the leche ahead and refrigerate you may want to warm it up shortly in the microwave oven to soften it.


Cookies with chocolate dulce de leche


Biscoti con dulce de leche al cioccolato

Biscotti:
* 380 g farina
* 175 g burro
* 200 g latte condensato zuccherato
* 80 g zucchero di canna grezzo
* 1 cucchiaino di estratto di vaniglia
* 1 cucchiaino di lievito per i dolci
* 15 g cacao

Dulce de leche al cioccolato:
* 300 g dulce de leche (fatto in casa o pronto)
* 150 g cioccolato fondente
* 30 g burro

Tagliate il burro a pezzettini e lasciatelo ammorbidire in una ciotola.
Aggiungete lo zucchero, il latte condensato e la vaniglia e mescolate il tutto con un cucchiaio di legno finché il composto diventi liscio e omogeneo.
Unite 300 g di farina precedentemente mescolata con il lievito e setacciata. Dividete poi la pasta in due parti uguali e aggiungete altri 50 g di farina a una parte, e 30 g di farina mescolata al cacao all'altra.
Formate due palle di pasta, appiattitele un po' e avvolgetele in pellicola. Lasciate riposare la pasta in frigo per 1 ora.
Stendete la pasta un piccolo pezzo alla volta ad uno spessore di 3-4 mm. Tagliate i biscotti con una formina rotonda. Per i biscotti di pasta bianca fate anche un buco con un tagliapasta più piccolo, e lasciate invece interi quelli di pasta al cacao.
Cuocete i biscotti a 180°C per circa 10 minuti. Lasciateli raffreddare qualche minuto sulla placca e poi toglieteli e lasciateli raffreddare completamente.
Per il dulce de leche al cioccolato, spezzettate il cioccolato, mettetelo in una ciotola resistente al calore, unite anche il burro e fateli sciogliere nel forno al microonde in intervalli di 30 secondi - togliendo e mescolando dopo ogni 30 sec. - finché il cioccolato non si sarà sciolto.
Aggiungete allora il dulce de leche, senza mescolare. Coprite con la pellicola adatta al microonde o un pezzo di carta da forno e scaldate di nuovo per 1 minuto a metà potenza. Mescolate bene con una frusta a mano fino a ottenere una crema liscia e morbida.
Spalmate un po' di crema sul biscotto al cacao e copritelo con un biscotto bianco premendo leggermente per distribuire la crema.
La crema si può preparare anche in anticipo e conservare in frigo, per poi riscaldarla un po' prima di usarla per renderla spalmabile.
Il dulce de leche lo preparo facendo bollire un baratolo di latte condensato (non aperto) in una pentola con l'acqua che deve essere sempre sopra il livello del baratolo, per 2,5-3 ore.


Cookies with chocolate dulce de leche


Keksi s čokoladnim dulce de leche

Tijesto:
* 380 g brašna
* 175 g maslaca
* 200 g zaslađenog kondenziranog mlijeka
* 80 g integralnog smeđeg šećera
* 1 žličica vanilije
* 1 žličica praška za pecivo
* 15 g kakaa

za čokoladni dulce de leche:
* 300 g dulce de leche (domaćeg ili kupovnog)
* 150 g tamne čokolade
* 30 g maslaca

Maslac narežite na kockice i ostavite da odmekne na sobnoj temperaturi.
Kad je dovoljno mekan da ga možete miješati žlicom, dodajte kondenzirano mlijeko, šećer i vaniliju, pa sve dobro izmiješajte drvenom žlicom da se sjedini u glatku smjesu.
Dodajte smjesi ovoj smjesi 300 g brašna prethodno prosijanog s praškom za pecivo, pa izmiješajte žlicom.
Podijelite smjesu na dva jednaka dijela.
U prvi dio dodajte još 50 g brašna i izmijesite u glatko i mekano tijesto.
U drugi dio dodajte preostalih 30 g brašna pomiješanih s 15 g kakaa. Izmijesite i ovaj dio u glatko mekano tijesto.
Omotajte oba tijesta prozirnom folijom i ostavite 1 sat u hladnjaku.
Uzimajte manji dio tijesta i razvaljajte ga na 3-4 mm debljine. Okruglim kalupom vadite kekse i stavljajte ih na pleh obložen papirom za pečenje.
Na keksima od svijetlog tijesta napravite manjim kalupom rupu u sredini, a tamne kekse ostavite cijele.
Pecite ih na 180°C oko 10 minuta (dok im rubovi lagano ne porumene).
Izvadite ih iz pećnice, pričekajte da se ohlade par minuta na plehu, a zatim ih premjestite na rešetku da se ohlade do kraja.
* tijesto koje vam preostane nakon rezanja, sakupite i opet ohladite pa tek onda ponovno razvaljajte.

Iskidajte čokoladu na komadiće, stavite je u zdjelu, dodajte maslac i zagrijavajte u mikrovalnoj pećnici u intervalima od 30 sekundi dok se čokolada ne istopi (nakon svakih 30 sekundi izvadite i dobro izmiješajte).
Dodajte dulce de leche otopljenoj čokoladi - ne miješajte, već pokrijte (folijom za mikrovalnu ili komadom papira za pečenje) pa vratite opet u mikrovalnu na 1 minutu na pola snage (kod mene 350W). Izvadite i dobro izmiješajte pjenjačom da kreme postane glatka i sjajna.
Još toplu kremu stavljajte na donju stranu tamnog keksa i poklopite svijetlim keksom.
Ako vam se krema ohladi i postane teška za mazati, zagrijte je opet par sekundi u mikrovalnoj.
Također kremu možete pripremiti unaprijed i ostaviti u hladnjaku, pa malo zagrijati prije upotrebe da se lakše maže.
Dulce de leche pripremam tako što stavim kuhati limenku kondenziranog mlijeka u loncu s vodom koja treba cijelo vrijeme pokrivati limenku, na 2,5 do 3 sata.

Cookies with chocolate dulce de leche

Speculoos spread

$
0
0

Speculoos spread

"An optimist is something that doesn't exist, isn't it true, mommy?"
My little daughter is trying to connect the world of fantasy, fairy tales and video games to the real one. Everything she's never heard of makes her wonder if that really exists.
The song she was listening in the car made her think an optimist is one of those bad, scary characters that she couldn't stand meeting in the street.
Had to explain of course that an optimist is something she doesn't have to be afraid because it has to do with being happy and seing everything pink (her favourite colour). That put a smile back on her face.
I'm neither pessimist nor optimist, I like to have my feet firmly on the ground and judge the facts, swinging sometimes more this or that way. But when things happen in a bad series I start wondering, too.
A computer that breaks all of a sudden when you have finally received some work to do and have to quit it? An oven that breaks for the third time in a year just a week from Christmas? Some idiot that scratches your new car? How many things can happen in just two days and yet not ruin your balance?
If things like that happen to you, too, you need something to pull you out of bad mood and help you not move over to the dark side. Think pink, think pink, think pink!!!

Speculoos cookies

Or... think spices, think Chiristmas, think something like speculoos!
I so love these thin, crisp cookies, in fact I made them myself last year, and this year I couldn't wait to use them in this Speculoos spread recipe that comes from the same author.
So lovely, not perfectly smooth, but that little crunch gives it something special as well, spiced to the right point. It is hard to make it get further from the spoon-mouth route, but if you resist, and if you make a double or triple quantity you may discover it's great in some other things as well.
Sooner or later, I'll find time to give you a recipe for Speculoos parfait that I made with it, but till then prepare a couple jars, one for you, and others perhap as a last minute Christmas gift for a friend or family.


DSC_0475

Speculoos spread
(from Regali golosi, by Sigrid Verbert)

* 150 g speculoos cookies
* 90 g white chocolate
* 60 g honey
* 30 g brown sugar
* 100 ml milk
*  50 ml vegetable oil

Preheat the oven to 150°C.
Place the speculoos cookies on a baking tray and warm them up in the oven for 10 minutes.
Put them in the bowl of a food processor and reduce into fine crumbs.
Mix the cookies with finely chopped or grated chocolate in a mixing bowl.
Warm up the milk with the sugar and honey.
Pour the hot liquid over the cookies and chocolate and stir well until the chocolate's melted. If necessary, use an immersion blender in order to get a smooth mixture.
Stir in the oil and pour the spread into glass jars. Wait until it's cooled down, then close and keep in a cool place (I keep it in the fridge).
Use: you may spread it on a slice of bread, sandwich cookies with it or in many other delicious desserts.


DSC_0262

Pasta di speculoos
(da Regali golosi, di Sigrid Verbert)

* 150 g biscotti speculoos
* 90 g cioccolato bianco
* 60 g miele
* 30 g zucchero di canna
* 100 ml latte
*  50 ml olio

Scaldate il forno a 150°C.
Mettete i biscotti su una placca da forno e infornateli per 10 minuti.
Frullateli nel mixer per ridurli in polvere. Mescolate i biscotti con il cioccolato tagliato a scaglie fini o grattugiato in una ciotola.
Scaldate il latte con lo zucchero e il miele. Versate il liquido molto caldo nella ciotola con i biscotti e cioccolato e mescolate bene finché il cioccolato non si sia sciolto (se necessario frullate un po' con un frullatore a immersione).
Alla fine unite l'olio, mescolate bene per ottenere una crema omogenea e versatela nel baratolo di vetro. 
Lasciatela raffreddare e conservate la crema al fresco.
Uso: spalmata sul pane, per unire i biscotti e tante altre delizie.


Speculoos spread


Speculoos namaz

* 150 g speculoos keksa
* 90 g bijele čokolade
* 60 g meda
* 30 g smeđeg šećera
* 100 ml mlijeka
*  50 ml ulja

Zagrijte pećnicu na 150°C.
Rasporedite kekse na pleh i stavite ih u pećnicu 10 minuta.
Sameljite kekse, stavite ih u zdjelu i pomiješajte s naribanom ili sitno nasjeckanom bijelom čokoladom.
Zagrijte mlijeko zajedno s medom i šećerom.
Vruće mlijeko prelijte preko keksa i čokolade.
Miješajte da se čokolada istopi i sve sjedini u kremu.
Ako vam smjesa nije dovoljno glatka, nakratko sve izmiksajte štapnim mikserom.
Na kraju umiješajte ulje.
Sipajte kremu u staklenke i ostavite da se ohladi na sobnoj temperaturi.
Čuvajte je na hladnom.
Dobiju se dvije manje staklenke.
Upotreba: možete je mazati na kruh, spajati njome kekse i za pripremu raznih drugih delicija.

DSC_0469


Merry Christmas!

$
0
0
Chocolate and ginger soft cookies
It's Christmas Eve and children are anxious to find out whether they really deserved the presents they asked for in the letter they wrote to Santa Claus  ^__^
I know I'm not getting my new oven, at least not now, but after he's tasted my cookies, perhaps Santa will change his mind and come back soon!

Dear friends,
I wish you all a Merry Christmas, joy and happiness, love and respect!
Buon Natale!
Sretan Bozic!


Cookie selection for Christmas
Chocolate Ginger Cookies, Hazelnut Chocolate sticks and pinwheels, Chocolate and fleur de sel sablès,
Canestrelli, Chocolate sandwich cookies with nutella, Chocolate crinkles, Soft cookies with jam filling,

Chocolate and ginger soft cookies

* 150 g butter (softened)
* 75 g powdered sugar
* 40 g milk
* 50 g honey
* 50 g hardboiled egg yolks
* 150 g flour
* 45 g finely ground almonds
* 25 g unsweetened cocoa
* 5 g powdered ginger
* 1 teaspoon vanilla extract
+ silicon mould for mini savarin cakes

Boil the eggs - put them into cold water and cook for 8 minutes from the moment the water starts boiling. Let them cool, then remove the egg yolks and mesh them through a fine mash sieve.
*to get 50 g yolks you'll need 3 or 4 medium sized eggs
Cut the butter into small pieces and let it soften at room temperature. Cream the butter using a wooden spoon. Add the powdered sugar, the vanilla extract and the meshed egg yolks.
Warm up the milk with the honey, just enough for the honey to dissolve.
Add the milk with honey to the batter.
Sift together the flour, the cocoa and the ginger, mix them with the ground almonds and then stir in into the batter.
Transfer the batter into a disposable pastry bag, cut off the tip of the bag and fill the silicone moulds.


cokoladni-vjencici-s-djumbirom
Bake the cookies in an oven preheated to 180°C for about 20 minutes. Let them cool in the moulds and then remove - they are very fragile and will break if you try removing them while still warm.
Let them cool completely before storing them in an airtight container.


Chocolate and ginger soft cookies

Coroncine al cioccolato e zenzero

* 150 g di burro (ammorbidito)
* 75 g di zucchero a velo
* 40 g di latte
* 50 g di miele
* 50 g di tuorli sodi
* 150 g di farina
* 45 g di farina di mandorle
* 25 g di cacao amaro
* 5 g zenzero in polvere
* 1 cucchiaino di estratto di vaniglia
+ uno stampo in silicone per mini savarin

Mettete le uova intere in un pentolino con l'acqua fredda e fatele bollire per 8 minuti dal momento che acqua inizi a bollire. Lasciatele raffreddare e poi estraete i tuorli. Setacciateli attraverso un colino con maglie fitte.
*per ottenere 50 g di tuorli vi serviranno 3 o 4 uova medie
Tagliate il burro a pezzettini e lasciatelo ammorbidire a temperatura ambiente. Lavorate il burro con un cucchiaio di legno finché diventi cremoso. Aggiungete lo zucchero a velo, l'estratto di vaniglia e i tuorli setacciati e mescolate bene.
Scaldate il latte con il miele, giusto quanto serve per far sciogliere il miele. Lasciatelo raffreddare e poi unitelo al composto con il burro.
Setacciate insieme la farina, il cacao e lo zenzero e mescolateli alla farina di mandorle. Unite poi tutto al composto precedente e lavorate giusto il tempo necessario per ottenere un composto uniforme.
Riempite un sacchetto con il composto e riempite i stampini.
Cuocete i biscotti per circa 20 minuti nel forno riscaldato a 180°C.
Lasciateli raffreddare nello stampo e poi sformateli (appena fatti sono troppo morbidi e si spezzano se cercate di toglierli subito dallo stampo). Lasciateli raffreddare completamente prima di metterli in una scatola di latta o altro contenitore.


Chocolate and ginger soft cookies

Čokoladni vjenčići s đumbirom

* 150 g maslaca (sobne temperature)
* 75 g secera u prahu
* 40 g mlijeka
* 50 g meda
* 50 g kuhanih zumanjaka
* 150 g brasna
* 45 g mljevenih badema
* 25 g nezasladenog kakaa
* 5 g djumbira u prahu
* 1 zlicica ekstrakta vanilije
+ silikonski kalup za mini savarin/ mini kuglofiće

Cijela jaja stavite u posudu s hladnom vodom i stavite kuhati. Kuhajte ih 8 minuta od trenutka kad voda provrije. Ohladite, očistite jaja i odvojite žumanjke pa ih protisnite kroz gusto, mrežasto cjedilo.
* za 50 g žumanjaka trebat ce vam otprilike 3 ili 4 jaja, ovisno o veličini
Maslac narežite i ostavite da odmekne na sobnoj temperaturi.
Izmiješajte ga dobro drvenom žlicom, dodajte zatim šecer u prahu, ekstrakt vanilije i propasirane žumanjke.
Dobro izmiješajte.
Zagrijte malo mlijeko s medom, tek toliko da se med otopi. Ostavite da se prohladi, pa onda dodajte u smjesu od maslaca.
Prosijte skupa brašno, kakao i đumbir, pomiješajte s mljevenim bademima pa dodajte u prethodnu smjesu i kratko izmijesajte da dobijete ujednačenu smjesu.
Premjestite smjesu u vrećicu za ukrasavanje (ili običnu plastičnu vrećicu kojoj odrežite jedan kut) pa punite kalupiće smjesom otprilike 1 cm debljine.
Pecite ih 20 minuta na 170°C.
Ostavite ih da se prohlade u kalupu pa ih tek onda vadite jer su jako mekani i lome se ako ih vadite tople.


Chocolate and ginger soft cookies

Panettone to wish you all a Happy New Year

$
0
0

Panettone with chocolate and candied orange peel

For years I avoided Panettone and preferred Pandoro. The reason was fairly simple, I don't like raisins and I don't like candied citrus peels, either. And Panettone, the sweet Christmas bread originally from Milan is simply studded with both. At least that's the traditional version of it. Stores today carry all sorts of modern version of Panettone stuffed with anything and everything.
However, I always had a feeling that Panettone is more flavorful and intriguing than Pandoro.
Considering the prices of industrially produced panettone one must be out of their mind to take on this hard job and make one at home. At least I'm sure that's what my MIL would say. But I am a little bit crazy in that sense and proud of myself to be so.
So I put my sourdough starter on a hard test, made even harder by the fact that my kitchen can never reach 28°C in December (almost making me wish Christmas was in June or July ^__^ ), so the job got even longer than presumed. But all four panettones I made were fast gone and never lived to see Christmas Day. I guess that says a lot about it's goodness.  If only my oven resisted a little bit longer I probably would have made it for the third time, too, as I was eager to use the mini panettone molds I got my hands on.
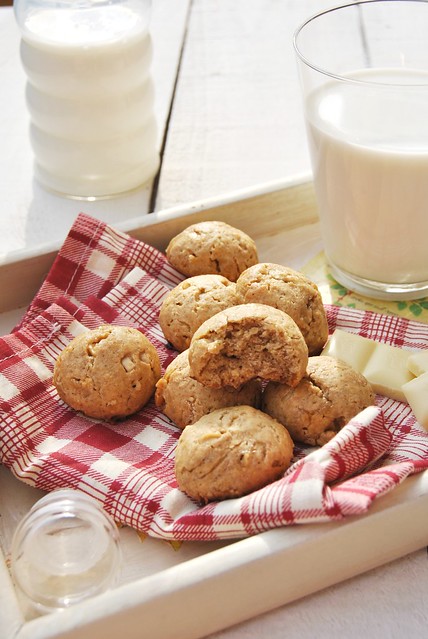
The advantage of making Panettone at home was certainly the fact that I could make it just the way I wanted. So one panettone was completely "empty" as my daughters required (didn't impress me),  and the others with chocolate and some homemade candied orange peel (completely different story).

It's almost the end of 2012 and it's time to thank you all for stopping by and keeping me company here, in my virtual kitchen. All in all it's been a positive year for me on private plan. My family expanded and the arrival of my baby boy got things pretty lively, not that there ever was much calm to be honest. But he's been like a missing piece in a puzzle. The picture is more complete now and we can only hope things stay the way they are or get better. I never make a list of proposals for the new year to come, as I hardly ever stick to any kind of list and also because I prefer looking forward and living each day as a surprise, whether it's positive or negative. I feel that this way there are less disappointments and regrets for things that I fail to acomplish.

Wish you all a Happy, Happy New Year... and don't forget to come back.


Panettone with chocolate and candied orange peel

Panettone with almond sugar glaze

1st dough:
* 280 g strong flour (Italian Manitoba)
* 110 g sourdough starter with 130% hydration
* 55 g egg yolks
* 80 g sugar
* 90 g water
* 80 g butter

2nd dough:
* 120 g strong flour
* 60 g sugar
* 55 g egg yolks
* 4,5 g salt
* 20 g honey
* 2 g barley malt syrup
* 35 g water
* 80 g butter
* 1/2 vanilla bean
* 50 g candied orange peel
* 120 g raisins  (I used chopped dark chocolate)

Glaze:
* 45 g egg whites
* 85 g fine caster sugar
* 40 g finely ground almonds (or hazelnuts)
* 10 g corn starch

* To start preparing this recipe you need some sourdough starter with 100% hydration. You need to refresh it several times over the two days preceeding the first dough to make sure it's well active. You'll also gradually add more water in order to get liquid sourdough starter with 130% hydration.
* For panettone to taste good, make sure you choose best quality ingredients. Especially when it comes to butter (German quality butter is preferable).

SOURDOUGH STARTER:
Day 1:
8:00 am - mix 50 g of sourdough starter with 100% hydration + 50 g water + 50 g flour (use the same flour you'll be using for panettone)
5:00 pm - mix 50 g of previous sourdough starter + 50 g water + 50 g flour
12:00 pm - mix 50 g of previous sourdough starter + 65 g water + 50 g flour (you have the sourdough with 130% hydration now)
Day 2:
10:00 am - mix 50 g of previous sourdough starter + 65 g water + 50 g flour
5:00 pm - mix 50 g of previous sourdough starter + 65 g water + 50 g flour
* while refreshing your sourdough starter you'll have lots of leftovers so use those to make some bread (it's beautifully active and it's a pity to waste it)

10:00 pm - prepare 1st dough.

Day 3
11:00 am - prepare 2nd dough.

1st DOUGH:
Dissolve the sugar in  30 g water.
Cut the butter into pieces and let it soften at room temperature.
Weigh the egg yolks and the sourdough starter.

Put the sourdough starter, the remaining 60 g of water and the flour into the bowl of your stand mixer. Start mixing using the dough hook until the ingredients come together (it looks rather thick and hard at this point).
After 5 minutes, with the mixer still on, add the water with sugar.
Start adding the egg yolks, one at a time, waiting until the first one is absorbed before adding the next one.
Knead for 8-10 minutes until the dough is well connecting and starts coming off the sides of the bowl.
Now start adding the butter, one piece at a time.
After you've added all the butter continue kneading for  20-30 minutes until the dough is smooth, elastic and shiny.

Transfer the dough into a large bowl (I left it in the mixer bowl). Cover with a piece of plastic foil and put in a warm place (you can put it into the cold oven with just the light on) - ideally, the dough shoud be rising at the temperature between 28-30°C , for 12 to 15 hours, during which it will more than double in size.

                          panettone1    panettone2

2nd DOUGH:
The following morning prepare all the ingredients for the 2nd dough + the 1st dough that should have risen real nicely by now.
First thing, soak the raisins in cold water (noone likes raisins in my house so I chopped some good quality dark chocolate).
Dissolve the sugar in 25 g water and the scraped vanilla seeds, and wet the salt with the remaining 10 g water.
Cut the butter into small pieces and let it soften at room temperature.
Separate the egg yolks weighing the necessary quantity.

Put the 1st dough into the bowl of your stand mixer. Add the flour and start mixing using the dough hook on low speed.
Add the sugar dissolved in water and when it's been absorbed by the dough add half of the egg yolks, one at a time waiting for each one to be absorbed before adding the next one.
Knead until the dough comes together.
Now add the honey, the barley malt and in the end salt mixed with water.
Add the remaining egg yolks, one at a time.
Knead until the dough starts coming off the sides of the bowl.
Add the butter, gradually, one piece at a time.
Knead for about 20 minutes - the dough in the end has to be smooth, shiny and very elastic (if you take a small piece of the dough and try streching it it should result very elastic and not tear, at this point you can be sure the dough's been kneaded enough).

                panettone3

Drain the raisins and dry them with a kitchen towel. Put them in a bowl with chopped candied orange peel, sprinkle with a teaspoon of flour, mix and add to the dough. Knead shortly, for about 1/2 minute, just enough to fold in the raisins and the orange peel.
Instead of raisins I added some dark chocolate cut into small squares.
Cover the bowl and let the dough rest for 20 minutes.
Now transfer the dough on a kneading board and divide into two equal parts (for the 750 g panettone molds). Shape each portion of the dough into a ball and cover with with a bowl. Let it rest for 30-40 minutes.
Reshape the dough as it has probably relaxed and spread, and place it into a panettone paper mold.
Cover the molds with a piece of plastic foil and let it proof until the dough's reached up to a couple centimeters from the rim of the mold - it will take hours and hours depending a lot on the temperature in your kitchen and the strength of your sourdough, so 6-8 may be sufficient, but it also may take much longer.

                   panettone4

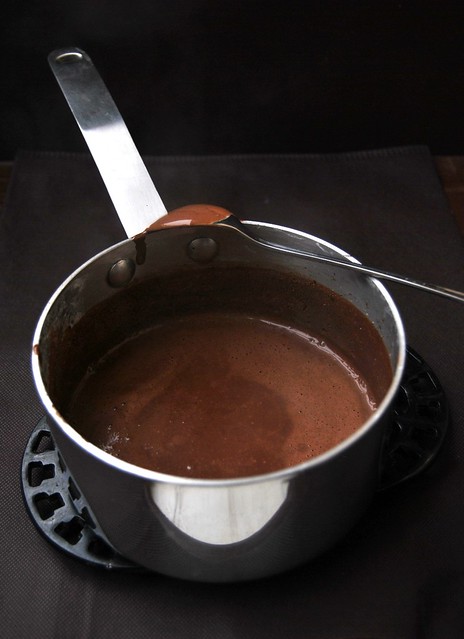
For the almond sugar glaze, simply put all the ingredient into a food processor and mix together or place them in a small mixing bowl and whisk together. Transfer the glaze into a disposable pastry bag and refrigerate until ready to use.
When your panettone has risen enough uncover the mold and let it dry a little, for about 10 minutes.
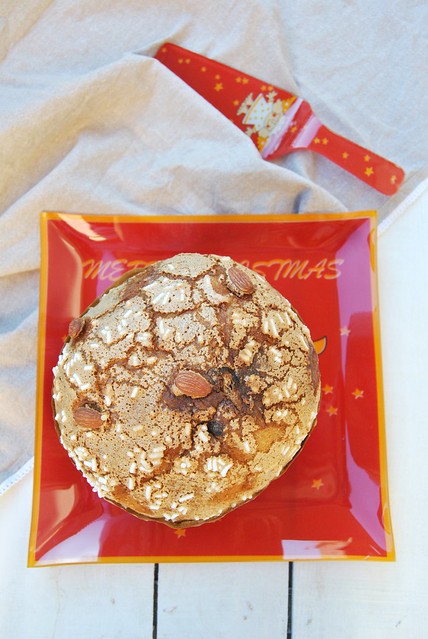
Then pipe the glaze in circles until you've covered the top of the panettone. Sprinkle with some pearl sugar and a couple whole almonds.

panettone5

Put your panettone in an oven preheated to 200°C.
After 5 minutes lower the heat to 180°C and bake for 40-45 minutes.
The baking time may be a little shorter or longer depending on the size of the mold.
In case your panettone starts getting dark too soon, cover it with a piece of aluminium foil, but only after the first 20 minutes. Do not open the oven before that.

Take the panettone out of the oven and stick two long skewers at the bottom of the mold.
Turn the panettone upside down and hang between two chairs for example. This will help the panettone not sink under it's weight and the raisins and the candied orange peel will also remain well distributed and not sink to the bottom.
The panettone should be left to dry in this position for at least 10-12 hours.

                   panettone6        panettone7

After that it can be cut and served, although it's even better if you let it rest for two days, at room temperature, protected by a plastic bag.


Panettone with chocolate and candied orange peel

Ringrazio Cranberry per questa splendida ricetta per il Panettone a lievitazione naturale (con licoli) glassato alle mandorle. L'ho fatto due volte prima di Natale e tutti e quattro sono spariti molto velocemente. La seconda volta ho aumentato le quantità del 50% e ho fatto due panettoni da 1 kg.
Panettone morbido, saporito, non troppo dolce. Ho fatto solo un cambiamento importante, ho sostituito l'uvetta con il cioccolato fondente, che secondo me con la scorza d'arancia candita ci sta una meraviglia (sopratutto perché ho usato le scorzette preparate in casa arrivate mi dalla mia amica in Croazia).
Non avevo mai fatto il panettone prima, nemmeno con il lievito di birra, e devo dire che questo è stato un test importante non solo per me, ma anche per il mio lievito, superato egregiamente, un po' di difficoltà ha creato il freddo nella mia cucina, ma lasciandolo lievitare più a lungo, superato anche quello.
La nota triste è che nessuno dei quattro panettoni ha vissuto fino a Natale, ma da l'altra parte questo vi spiega quanto erano buoni  ^__^

Panettone a lievitazione naturale con la glassa alle mandorle

1° IMPASTO:
* 280 g di farina forte (Manitoba)
* 110 g di lievito madre liquido (idratato al 130%)
* 55 g tuorli d'uovo
* 80 g zucchero
* 90 g acqua
* 80 g burro

2° IMPASTO:
* 120 g farina
* 60 g zucchero
* 55 g tuorli d'uovo
* 4,5 g sale
* 20 g miele
* 2 g malto d'orzo
* 35 g acqua
* 80 g burro
* 1/2 baccha di vaniglia
* 50 g scorza d'arancia candita
* 120 g uvetta  (nel mio caso sostituita con il cioccolato fondente)

GLASSA ALLE MANDORLE
* 45 g albumi
* 85 g zucchero semolato (tipo Zefiro)
* 40 g farina di mandorle
* 10 g amido di mais

Assicuratevi una buona partenza rinfrescando il vostro lievito diverse volte, è infatti molto importate che il lievito (licoli) sia ben attivo. Ho seguito alla lettera le indicazioni nella ricetta:
1°giorno:
ore 8:00 - rinfrescate 50 g di lievito madre (a 100% di idratazione) con 50 g di acqua e 50 g di farina (la stessa farina che userete dopo per l'impasto).
ore 17:00 - mescolate 50 g di lievito precedente con 50 g di acqua e 50 g di farina
ore 24:00 - mescolate 50 g di lievito precedente con 65 g di acqua e 50 g di farina (avete adesso il lievito a 130% di idratazione)

2° giorno:
ore 10:00 - rinfrescate di nuovo 50 g di lievito precedente + 65 g di acqua + 50 g farina
ore 17:00 - rinfrescate 50 g di lievito precedente + 65 g  acqua + 50 g farina
ore 22:00 - preparate il 1°impasto

3°giorno:
ore 11:00 - preparate il 2°impasto

1° IMPASTO:
*Mescolate lo zucchero con 30 g di acqua. 
Tagliate il burro a pezzettini e lasciatelo ammorbidire a temperatura ambiente.
*Mettete il lievito rinfrescato nella ciotola della planetaria, aggiungete i restanti 60 g d'acqua e la farina. Fate incordare con gancio a uncino a bassa velocità. Dopo 5 minuti aggiungete lo zucchero idratato con l'acqua e continuate ad impastare.
*Aggiungete i tuorli, uno alla volta, aspettando che ogni uovo sia ben incorporato prima di aggiungere un'altro.
*Fate incordare l'impasto per circa 8-10 minuti, fino a quando l'impasto inizia a staccarsi dalla ciotola. Unite adesso i pezzettini di burro, poco per volta. Continuate ad impastare per circa 20-30 minuti, fino a quando l'impasto diventi liscio, lucido e elastico.
*Mettete l'impasto in una ciotola, copritela con la pellicola e lasciatelo lievitare in posto caldo, possibilmente a 28°C, per circa 12-15 ore. L'impasto dovrebbe più che raddoppiare.

2° IMPASTO:
* Il giorno successivo preparate tutti gli ingredienti per il 2° impasto. Mettete l'uvetta in amollo nell'acqua fredda (io ho usato il cioccolato e l'ho tagliato a quadratini. Idratate lo zucchero con 25 g d'acqua e unite anche i semi di vaniglia, idratate invece il sale con i restanti 10 g d'acqua. Tagliate il burro a pezzettini e lasciatelo ammorbidire. Separate e pesate i tuorli.
*Mettete il 1° impasto nella planetaria, aggiungete la farina e iniziate ad impastare con il gancio a uncino a velocità minima.
* Unite lo zucchero idratato. Successivamente unite metà dei tuorli, sempre uno volta. Lasciate incordare, e poi unite il miele, il malto e infine il sale idratato.
* Aggiungete i tuorli rimasti e impastate fino a quando l'impasto inizia a staccarsi dalla ciotola. Adesso aggiungete il burro ammorbidito, poco alla volta e lasciate andare la planetaria per circa 20 minuti. L'impasto alla fine deve risultare liscio, lucido e molto elastico.
* Nel frattempo scolate l'uvetta e asciugatela. Mescolatela con la scorza d'arancia candita tagliata a pezzettini, cospargete con 1 cucchiaino di farina e aggiungete all'impasto impastando per ancora 1/2 minuto, giusto il tempo necessario per distribuirli in maniera uniforme.
* Coprite la ciotola con l'impasto e lasciate riposare per 20 minuti. Poi trasferitelo su un piano di lavoro e dividete in due pezzi (io ho fatto due panettoni nei stampi da 750 g). Arrotondate l'impasto con le mani imburrate e copritelo con la ciotola. Lasciate riposare per 30-40 minuti. 
* Passato questo tempo, arrotondate di nuovo gli impasti se nel frattempo si sono rilassati, e poneteli negli stampi. Copriteli con la pellicola e lasciate lievitare in un posto caldo fino a raggiungere un paio di centimetri dal bordo dello stampo. Potrebbero bastare 6-8 ore, ma anche molto più tempo.
* Per la glassa semplicemente frullate tutti gli ingredienti e poi trasferite la glassa in una sac a pocche e tenetela in frigo fino a una mezz'oretta prima di usarla.
* Togliete la pellicola dagli stampi, lasciate asciugare la superficie del panettone per 10 minuti e poi distribuite la glassa su tutto il panettone. Cospargete con la granella di zucchero e qualche mandorla intera.
* Infornate i panettoni a 200°C per i primi 5 minuti, poi abbassate la temperatura a 180°C e continuate la cottura per 40-45 minuti circa. Se dovesse cominciare a scurire troppo presto, coprite il vostro panettone con l'alluminio, ma non prima che siano passati 20 minuti.
* Una volta cotti i panettoni, sfornateli e poi infilzateli con dei spiedini o dei ferri e fateli asciugare a testa in giù. Lasciateli riposare così almeno 10-12 ore prima di mangiarli.


Panettone with chocolate and candied orange peel

Iako mi je panettone lako dostupan i to po prilično pristupačnoj cijeni, oduvijek mi je želja bila isprobati domaći, kao i okušati se u njegovoj pripremi koja nije ni brza ni jednostavna.
Ali nakon četiri panettonea koje smo pojeli u slast i u vrlo kratkom roku, nakon ogromnog oduševljenja moje djece (starija kći se hvalila svima u školi kako je njezina mama pravila panettone), mogu samo reći da je vrijedilo truda.
Razlog  što sam se odlučila baš sad raditi ga je i taj što sam od ove godine ponosna vlasnica domaćeg kvasa kojeg sam nakon ni sama ne znam koliko kruhova, napokon upotrijebila i u pripremi ovog tradicionalnog, slatkog božićnog talijanskog kruha ili kolača.
Od ove količine sastojaka pripremila sam prvi put dva panettonea u kalupima od 750 g, a drugi put sam povećala na 1 i pol smjesu i napravila ih u kalupima od 1 kg.
Za kraj samo kratka uputa za posluživanje. Bonton nalaže da panettone iznesete cijeli pred goste i da si svatko reže komad po želji, ali ne i da ga grizete, već da kidate prstima komadiće i stavljate u usta. Panettone se poslužuje uz nož i vilicu samo ako ga poslužujete uz neku kremu (npr. od mascarponea, čokolade, slastičarsku kremu, itd.). 

Panettone s glazurom od badema

1. TIJESTO
* 280 g brašna za dizana tijesta (po mogućnosti talijanska Manitoba)
* 110 g kvasa sa 130%-tnom hidratacijom
* 55 g žumanjaka
* 80 g šećera
* 90 g vode
* 80 g maslaca

2. TIJESTO
* 120 g brašna
* 60 g šećera
* 55 g žumanjaka
* 4,5 g soli
* 20 g meda
* 2 g ječmenog slada
* 35 g vode
* 80 g maslaca
* 1/2 mahune vanilije
* 50 g ušećerene korice naranče
* 120 g suhih grožđica (kod mene nasjeckana tamna cokolada)

GLAZURA
* 45 g bjeljanjaka
* 85 g sitnog kristal šećera
* 40 g mljevenih badema (ili lješnjaka)
* 10 g škrobnog brašna (gustina)

* Za početak potrebno je krenuti od domaćeg kvasa sa 100%-tnom hidratacijom. Potrebno ga je osvježiti nekoliko puta tijekom dva dana prije nego zamijesite tijesto da bi bili sigurni da je kvas jako aktivan. Također mu se na kraju poveća količina vode da bi dobili kvas sa 130%-tnom hidratacijom.

* za dobar okus panettonea presudna je kvaliteta namirnica. Stoga birajte jako kvalitetne sastojke, naročito kad je u pitanju maslac.

KVAS:
1. dan
8:00 - pomiješajte 50 g kvasa sa 100%-tnom hidratacijom + 50 g vode + 50 g brašna
17:00 - pomiješajte 50 g prethodnog kvasa + 50 g vode + 50 g brašna
24:00 - pomiješajte 50 g prethodnog kvasa + 65 g vode + 50 g brašna
2. dan
10:00 pomiješajte 50 g prethodnog kvasa + 65 g vode + 50 g brašna
17:00 - pomiješajte 50 g prethodnog kvasa + 65 g vode + 50 g brašna (sad već imate kvas sa 130%-tnom hidratacijom)
* ostatke kvasa koji vam ostanu pri osvježavanju ne bacajte nego lijepo sakupite i napravite kruh, jer šteta je ne iskoristiti ga kad je ovako lijepo aktivan

22:00 - zamijesite prvo tijesto
3. dan
11:00 - zamijesite drugo tijesto

1. TIJESTO
*U manjoj zdjelici otopite šećer u 30 g vode.
Narežite maslac na listiće i ostavite ga da odmekne na sobnoj temperaturi.
Izmjerite žumanjke.
Izmjerite potrebnu količinu kvasa.
* Stavite kvas, preostalu vodu (60 g) i brašno u zdjelu stolnog miksera. Miješajte kukastim nastavkom za tijesta dok se tijesto ne poveže.
* Nakon 5 minuta dodajte preostalu vodu sa šećerom i nastavite miješati.
* Dodajite jedan po jedan žumanjak dok mikser i dalje radi i pričekajte dok tijesto ne upije prvi žumanjak prije nego ćete dodati sljedeći.
Mijesite 8-10 minuta dok se tijesto dobro ne poveže i počne odvajati od stranica zdjele.
* Dodajite sad komadić po komadić omekšalog maslaca.
Nakon što ste dodali sav maslac nastavite mijesiti tijesto mikserom oko 20-30 minuta dok tijesto nije glatko, elastično, sjajno i bez grumenčića.
* Tijesto premjestite u čistu (veliku) zdjelu ili ostavite kao ja u zdjeli miksera. Pokrijte prozirnom folijom i ostavite na toplom mjestu, zaštićeno od propuha (može i u pećnici sa samo uključenim svjetlom) - idealno bi bilo na temperaturi od 28-30°C , 12 do 15 sati. Smjesa se treba više nego udvostručiti.

2. TIJESTO
* Sljedećeg jutra pripremite sve sastojke za 2. tijesto + prvo tijesto koje bi dosad trebalo da je lijepo naraslo.
Kao prvo namočite grožđice u hladnoj vodi.
Šećer pomiješajte s 25 g vode i sastruganim sjemenkama vanilije, a sol s preostalih 10 g vode.
Maslac narežite na komadiće i ostavite da odmekne na sobnoj temperaturi.
Odvojite i izvažite žumanjke.
* Stavite 1. tijesto u zdjelu miksera. Dodajte brašno i počnite mijesiti kukastim nastavkom za tijesto na niskoj brzini.
* Dodajte zatim šećer otopljen u vodi, kad ga tijesto upije dodajte polovicu žumanjaka, jedan po jedan čekajući uvijek da tijesto upije prethodni prije nego dodate sljedeći.
Pustite mikser da mijesi dok se tijesto ne poveže.
* Dodajte zatim med i ječmeni slad, a zatim i sol pomiješanu s vodom.
Na kraju dodajte i preostale žumanjke, jedan po jedan.
Mijesite dok se tijesto ne počne odvajati od stranica zdjele.
* Na kraju dodajte omekšali maslac, polako, komadić po komadić.
* Mijesite otprilike 20 minuta - tijesto na kraju mora biti glatko, sjajno i elastično (ako otkinete manji komadić tijesta i pokušate ga razvući rukama mora biti tako elastično da se razvuče tanko poput kore za savijače a da ne puca- tad znate da je dovoljno umiješeno).
* Ocijedite grožđice i posušite. Stavite ih u zdjelu s nasjeckanom kandiranom koricom naranče, pospite sa žličicom brašna, pomiješajte i dodajte u tijesto u mikseru - mijesite kratko, oko 1/2 minute, tek toliko da se rasporede u tijestu.
Ja sam umjesto grožđica stavila tamnu čokoladu nasjeckanu na kockice.
* Pokrijte zdjelu prozirnom folijom i ostavite da odmara 20 minuta.
* Nakon toga istresite tijesto na pobrašnjenu dasku i podijelite ga na dva jednaka dijela (za kalupe od 750 g). Oblikujte tijesto rukama namazanim maslacem. Ostavite na pobrašnjenoj dasci, samo pokrijte svaki dio preokrenutom zdjelom. Neka odmara 30-40 minuta.
* Zatim ga ponovo oblikujte jer se u međuvremenu "opustilo" i stavite u kalupe koje ste stavili na pleh.
Pokrijte kalupe prozirnom folijom i ostavite tijesto da se diže dok ne stigne na par centimetara od ruba - trebat će vam sati i sati, ovisno o jačini kvasa i toplini prostorije, može to biti 6-8 sati, ali i puno više ako vam kuhinja nije jako topla.
* Za glazuru, pomiješajte u multipraktiku kratko ili ručnom pjenjačom sve sastojke da se povežu. Stavite u vrećicu za ukrašavanje i ostavite u hladnjaku do upotrebe.
* Kad je tijesto u kalupima naraslo, otkrijte ga i ostavite da se prosuši 10-ak minuta.
Zatim rasporedite u jednoličnom sloju glazuru, stavite nekoliko cijelih, neoguljenih badema i pospite granuliranim šećerom.
* Pećnicu zagrijte na 200°C.
Stavite peći panettone, nakon 5 minuta snizite temperaturu na 180°C i tako pecite do kraja, otprilike 40-45 minuta.
Vrijeme pečenja može biti duže ili kraće ovisno o veličini i visini kalupa.
Ako vam panettone počne tamniti pokrijte ga komadom aluminijske folije, ali u svakom slučaju ne prije nego prođe prvih 20 minuta.
* Izvadite panettone iz pećnice kad je pečen i odmah pri dnu kalupa provucite dva duga metalna ražnjića ili duge pletaće igle.
Okrenite ga naopako i ostavite da visi u zraku naglavačke tako što ćete štapiće položiti npr. na dvije stolice ili sl.
Panettone se mora ostaviti sušiti u ovom položaju 10-12 sati - ovo je važno da tijesto ne bi palo pod svojom težinom i da kandirano voće i grožđice ne bi pali na dno.
Nakon 12 sati panettone je spreman za jelo, iako je još bolji ako ga ostavite da odmori 2 dana. Čuvajte ga na sobnoj temperaturi, u plastičnoj vrećici.

BILJEŠKA: ako nemate za kupiti kalup, pokušajte ga sami napraviti ovako

Rice, Millet and White Chocolate Cookies

$
0
0

Rice, millet and white chocolate cookies

Hopefully, you won't get bored with me for posting five sweet recipes in a row, and especially now after holidays. But I also hope you didn't eat too much and that you can squeeze in a little healthier cookie.
Healthier but delicious just the same, at least I liked them very much.

Fifteen days at my parents-in-law's are over and we are going back home tomorrow and the kids are starting school on Monday, so good old frenetic rhythm will soon step in. And I just can't face a long day without an energetic start.
With that in mind, we had the last real pizza for now, a couple mozzarellas di bufala and we are ready to start a diet.... one of these Mondays... probably...


Millet flakes
Millet flakes
Rice, Millet and White Chocolate Cookies

(for approx. 30 cookies)
* 2 eggs (free range or organic)
* 100 g unrefined brown sugar
* 6 TBspoons oil
* 100 g rice flour
* 100 g whole wheat flour
* 50 g millet flakes
* 100 g good quality white chocolate

Whisk the eggs with the sugar in a mixing bowl.
Add the oil, one tablespoon at a time, whisking well before adding the next one.
Mix in the rice flour first, then the whole wheat flour, and in the end the millet flakes and the white chocolate cut into small pieces.
Mix everything well with your hands to get a soft dough (in case the dough is too soft, add a bit more flour, and in case it's too hard a little apple juice).
Shape the dough into small balls, size of a walnut, and place them on a baking sheet.
Bake the cookies for 15-20 minutes in an oven preheated to 160°C.
Let them cool completely before storing them in an airtight container.

DSC_0538Rice, millet and white chocolate cookies

Durante le feste natalizie si esagera, quasi sempre. E dopo tanti, troppi dolci, ricchi di grassi, zuccheri e tanto altro, una colazione un po' più sana ci vuole proprio. Senza rinunciare al gusto, naturalmente, che in questi biscottini deliziosi ci sta tutto. 
La ricetta viene da Cucina naturale.

Biscotti di riso e miglio con cioccolato bianco

(per circa 30 biscottini)
* 2 uova (organiche o da allevamento a terra)
* 100 g zucchero di canna integrale
* 6 cucchiai di olio
* 100 g farina di riso
* 100 g farina di grano integrale
* 50 g fiocchi di miglio
* 100 g cioccolato bianco

Con una frusta a mano sbattete bene le uova con lo zucchero.
Aggiungete l'olio, un cucchiaio per volta mescolando bene prima di aggiungere quello successivo.
Unite prima la farina di riso, poi quella integrale e alla fine i fiocchi di miglio e il cioccolato bianco tagliato a pezzettini.
Mescolate bene per ottenere una pasta morbida (se dovesse risultare troppo morbida aggiungete un po' di farina, e nel caso contrario, se dovesse risultare troppo dura un po' di succo di mela).
Formate delle palline grandi quanto una piccola noce e sistematele su una placca da forno ricoperta con la carta da forno.
Infornate i biscotti per circa 15-20 minuti a 160°C.
Lasciateli raffreddare e poi trasferiteli in una scatola di latta.
Ottimi con una tazza di latte.


Rice, millet and white chocolate cookies

Nakon obilnih blagdanskih objeda, tijekom kojih slatko, torte, kolači i keksi sigurno nisu nedostajali, činit će  vam se možda suvišnom i sama pomisao na još jedne kekse. Ali kod mene keksi uz jutarnju kavu nikad ne smiju nedostajati. Zapravo tri, četiri keksa i bijela kava moj su najčešći doručak. 
Stoga vam i predlažem danas ovaj ne tako nezdrav recept za kekse, zbilja posebnog okusa.

Keksići od riže i prosa s bijelom čokoladom

(za 30-ak keksića)
* 2 jaja
* 100 g integralnog smeđeg šećera
* 6 žlica ulja
* 100 g rižinog brašna
* 100 g integralnog pšeničnog brašna
* 50 g pahuljica od prosa
* 100 g bijele čokolade

Ručnom pjenjačom razmutite jaja sa šećerom.
Dodajte jednu po jednu žlicu ulja i svaki put dobro izmiješajte prije nego dodate sljedeću.
Umiješajte prvo rižino brašno, zatim integralno, i na kraju pahuljice prosa i sitno nasjeckanu bijelu čokoladu.
Izmiješajte sve dobro rukama da dobijete mekano tijesto (po potrebi dodajte još malo brašna ako je premekano, ili malo soka od jabuke ako je previše tvrdo, mrvičasto).
Oblikujte kuglice veličine manjeg oraha i stavljajte ih na pleh obložen papirom za pečenje.
Pecite kekse 15-20 minuta u pećnici zagrijanoj na 160°C.


Rice, millet and white chocolate cookies

A cup od real hot chocolate

$
0
0

Hot Chocolate


I was going to be a good girl today.
I wasn't going to write another sweet recipe.
I wasn't even going to prepare any sweets for at least a week (fingers crossed).
I was going to share a recipe for a delicious, light and healthy meat loaf with you today.
I was going to to tell you how it was colourful and kind of reminded me of summer when I first prepared it and how I needed little sunshine after endless gloomy, rainy days.
I was... But I'm not.
Because the real winter has just knocked on our door.
And the day started with cleaning the car from snow that came down last night. And even the snowflakes seemed cushions rather than gracious little snowflakes.
Who can blame me then for thinking only about a hot cup of chocolate goodness.
It cures everything, cold, depression, you name it   ^__^
Are you ready to join in?

Hot Chocolate

The "Real" Hot Chocolate
(from Peccati al cioccolato by Luca Montersino)


(for 2-3 cups) 
* 450 ml whole fat milk
* 100 ml fresh heavy cream (35% fat)
* 200 g dark chocolate with 70% cocoa
*1/2 vanilla bean
* spices like chili pepper, cardamom or cinnamon if desired

Combine the milk and the cream in a sauce pan. Add the scraped vanilla seeds and the empty vanilla pod.
Heat to the boiling point, then remove from heat, cover and let infuse for 1/2 hour.
Remove the vanilla pod and heat the milk again.
I wanted an extra kick, so I added a little speculoos mix (cinnamon, cardamom, ginger, white pepper and cloves).
Add the chopped chocolate and blend everything with an immersion blender until smooth.
Pour into cups and serve hot with some whipped cream if you like or just plain.


Hot Chocolate


Da quando ho provato questa ricetta di Luca Montersino, la cioccolata calda la preparo solo in questo modo. Troppo buona e veramente la vera cioccolata calda.
E da voi, è arrivata la neve?

La "vera" cioccolata calda 
(di Luca Montersino, Peccati al cioccolato)

(per 2-3 tazzine) 
* 450 ml di latte fresco intero
* 100 ml panna fresca
* 200 g cioccolato fondente con 70% di cacao
*1/2 baccello di vaniglia
* spezie (se vi piacciono)

Mettete il latte e la panna in un pentolino. 
Aggiungete i semi e il baccello vuoto di vaniglia. Scaldate fino a far bollire. Spegnete fuoco, coprite e lasciate in infusione per 1/2 ora.
Scaldate di nuovo il latte. Aggiungete il cioccolato spezzettato o tagliato a pezzettini e frullate con un frullino a immersione.
A piacere aggiungete anche un po' di peperoncino, cannella, cardamomo (non è obbligatorio) - io ho aggiunto un po' di miscela di spezie per speculoos  (cannella, cardamomo, pepe bianco, zenzero e chiodi di garofano).
Servite subito accompagnandola con la panna montata se vi piace.


Hot Chocolate

Čokoladna topla čokolada u pravom smislu. Jednostavna. Bez dodatka šećera, a ipak dovoljno slatka. I s mirisnim dodacima po želji.

"Prava" topla čokolada
(iz knjige Peccati al cioccolato, Luca Montersino)

(za 2-3 šalice) 
* 450 ml punomasnog mlijeka
* 100 ml svježeg slatkog vrhnja za šlag s 35% m.m. 
* 200 g čokolade sa 70% kakaa
*1/2 mahune vanilije
* začini po želji i ukusu (neobavezno)

Pomiješajte mlijeko i slatko vrhnje u lončiću.
Prerežite mahunu vanilije uzduž pa nožem sastružite sjemenke. Dodajte sjemenke i prazne mahune u mlijeko.
Zagrijte mlijeko do vrenja.
Maknite s vatre, pokrijte i ostavite da odstoji 30 minuta.
Izvadite mahunu vanilije pa ponovno zagrijte mlijeko.
U vrelo mlijeko dodajte sitno nasjeckanu čokoladu.
Izmiksajte štapnim mikserom.
Poslužite toplo.
Po želji umiješajte začine poput cimeta, kardamoma, čilija, i sl.
(ja sam stavila speculoos mješavinu iz domaće izrade - cimet, đumbir, bijeli papar, kardamom, klinčić)


Hot Chocolate

Chicken and Ricotta Meatloaf

$
0
0
Chicken and Ricotta Meatloaf with zucchini

I started writing this post the other day saying what a relief it was to see some sunshine after weeks of fog, mist, rain and clouds. The sky was actually so blue that day that it almost felt like spring was here to stay.
And then to my surprise I woke up with snow two days ago. I admit it, the winter's been pretty kind to us this year, but decided to show it's teeth in February, as usual.
As much as I love comforting, warm winter food, there are moments when I wish the spring was already here, to bring something lighter to the table. For spring vegetables to find their way to my kitchen.
Well, with this Chicken and ricotta meatloaf I took a step out and as much as I love to eat seasonal food, every now and then I reach fot that hint of warmer season. I really liked it. It's delicate and tastes light. It tastes fine even the following day, I made myself a great sandwich with the leftovers.
It definitely makes a great summer dish, but I can't resist making it over and over again.
It is not a cold remedy, but it might help brighten your day.
And save you from eating cookies and milk for breakfast, lunch and dinner ^__^
What has that got to do with this meatloaf?
I'll tell you. My almost-6-year-old said today: Santa Claus lives on the North Pole, right? So, there's snow everywhere and he can't grow any vegetables in his garden, right? He can't do any gardening. The only thing there is to eat are cookies and milk. He eats that for breakfast, lunch, and dinner. That's why he's so fat.
Since I don't want to get as fat as him, I'll have my portion of winter zucchini.
By the way, we had one question in this story unresolved, how does all the milk Santa Claus needs get transported so far?

Chicken and Ricotta Meatloaf with zucchini

Chicken and Ricotta Meatloaf

Meatloaf:
* 500 g boneless chicken breast
* 1 slice of bread
* 50 g ricotta cheese
* 1 egg
* 1 TBspoon grated parmigiano cheese
* 1 zucchini
* 3-4 thin slices of prosciuttto cotto ( cooked ham)
* salt, pepper
* a little milk

Zucchini sauce:
* 1 small zucchini
* a handfull of fresh basil leaves
* 1 TBspoon of pinenuts or almonds
* extra virgin olive oil
* salt and pepper

Cook the zucchini in boiling, lightly salted water for 5 minutes. Drain and let cool. Cut it lenghtwise into sticks.
Roughly crumble the bread slice (crust removed), put it in a bowl and pour the warm milk over. Let it soften then squeeze well.
Clean the meat from bones, skin or cartilage. Grind it in a meat grinder or in a food processor (be careful though if using a food processor not to reduce it into patè). In alternative you may buy already ground chicken or turkey meat. Also, to add some more flavour you may substitute 100 g of meat with turkey sausage.
Put the meat into a bowl. Add the well squeezed bread (you don't want the mixture to be too wet from milk), the ricotta, the grated parmigiano, the lightly beaten egg, and season with salt and pepper. Mix it all well with your hands.
Drop the meat mixture on a piece of lightly oiled baking paper. Spred it with your hands forming a 1 cm thick rectangle.
Cover the meat with the slices of ham.
Arrange the zucchini sticks at approx. 2 cm distance from each other parallel to the shorter side of the rectangle.
Roll everything up starting from the shorter side (the paper underneath should make it easier).
Once you've obtained a compact roll, wrap it with the same baking paper you used before and tie the ends so that the juices don't leak out during baking.
Place the wrapped meat roll on a  baking dish and bake in an oven preheated to180°C for 30 minutes.
Take it out of the oven and let cool still wrapped - that way the meat will stay moist.
Serving: this meat loaf is good both when warm and cold. Simply slice it and serve either with a vignarette (mix well 6 TBspoons or extra virgin olive oil with apple vinegar- quantity to taste, a little salt and pepper) and sliced cherry tomatoes or prepare the zucchini salsa.
For the zucchini salsa you may use either a raw zucchini (if nice small and young) or shortly boiled (just a couple minutes). Purèe the zucchini in a food processor or using a stick blender, together with washed and dried fresh basil leaves, the pine nuts, a little salt and pepper and a couple TBspoons of extra virgin olive oil.
It's also great for sandwiches.

Chicken and Ricotta Meatloaf with zucchini


Polpettone di pollo e ricotta

Polpettone:
* 500 g petto di pollo
* 1 fetta di pane raffermo
* 50 g di ricotta
* 1 uovo
* 1 cucchiaio di parmigiano gratuggiato
* 1 zucchina
* 3-4 fette di prosciutto  cotto
* sale e pepe
* un po' di latte

Salsa di zucchine:
* 1 zucchina piccola
* 1 manciata di foglioline di basilico
* 1 cucchiaio di pinoli o mandorle
* olio extra vergine d'oliva
* sale e pepe

Sbollentate la zucchina per 5 minuti nell'acqua leggermente salata. Scolatela e lasciatela raffreddare. 
Tagliatela prima a fettine nel senso di lunghezza e poi a bastoncini.
Spezzettate il pane, mettetelo in una ciotola e versateci sopra il latte leggermente caldo. Quando il pane si è ammorbidito strizzatelo bene.
Tritate la carne (io lo faccio nel robot da cucina). Potete anche comprare la carne di pollo o tacchino già tritata, e potete anche sostituire 100 g di carne con la stessa quantità di salsiccia di pollo e tacchino.
Mettete la carne in una terrina, aggiungete il pane strizzato, l'uovo, la ricotta, parmigiano grattugiato, sale e pepe. Mescolate bene con le mani.
Stendete l'impasto di carne su un foglio di carta da forno leggermente oleato, premendolo con le mani inumidite, formando un rettangolo di circa 1 cm di spessore.
Ricoprite la superficie con le fettine di prosciutto cotto. Distribuite sopra il prosciutto i bastoncini di zucchina partendo dal lato più corto e mettendoli a distanza di circa 2 cm uno dal altro. 
Arrotolate poi la carne aiutandovi con il foglio di carta partendo dal lato più corto del rettangolo.
Alla fine avvolgete il polpettone nello stesso foglio di carta da forno e legati gli estremi del rotolo con un po' di spago da cucina.
Mettetelo a cuocere nel forno già caldo a 180°C, per circa 30 minuti.
Una volta cotto, toglietelo dal forno e lasciatelo avvolto nella carta fino al momento di servirlo.

Per la salsa di zucchine, frullate la zucchina cruda (o sbollentata per 2-3 minuti), insieme alle foglioline di basilico, lavate e asciugate, un po' di sale e pepe, e un paio di cucchiai di olio EVO.

Tagliate il polpettone a fettine e servitelo con la salsa di zucchine.
Al posto della salsa potete invece servirlo con una vignarette preparata mescolando 6 cucchiai di olio EVO con aceto di mele (quantità secondo i vostri gusti), e un pizzico di sale e pepe.

Questo polpettone e buono sia caldo che raffreddato a temperatura ambiente, quindi si può preparare anche in anticipo.


Chicken and Ricotta Meatloaf with zucchini


Pileća štruca s ricottom i tikvicama

Štruca:
* 500 g pilećih prsa (bez kosti)
* 1 kriška (starog) kruha
* 50 g ricotte
* 1 jaje
* 1 žlica naribanog parmezana
* 1 zelena tikvica
* 3-4 tanke kriške kuhane šunke
* sol, papar
* malo mlijeka

Umak od tikvica:
* 1 mlada zelena tikvica
* šaka listića svježeg bosiljka
* 1 žlica pinjola ili oguljenih badema
* maslinovo ulje
* sol i papar

Stavite kuhati tikvicu u kipuću, malo posoljenu vodu, 5 minuta, a zatim je izvadite i ostavite da se prohladi.
Narežite je uzdužno na prutiće.
Krišku kruha (bez korice) nakidajte na komadiće, stavite u zdjelicu i prelijte toplim mlijekom pa ostavite da odmekne.
Meso očistite od kostiju i žilica pa sameljite (ja ga sameljem u multipraktiku u kratkim intervalima, da se ne pretvori baš u paštetu). Možete također kupiti već gotovu mljevenu piletinu ili puretinu. Za nešto ukusniju varijantu možete 100 g mesa zamijeniti svježom purećom kobasicom.
Stavite meso u zdjelu. Dodajte dobro ocijeđen kruh, jaje, ricottu, parmezan, sol i papar.
Dobro izmijesite rukama.

Istresite smjesu na malo nauljen veći komad papira za pečenje.
Rastanjite smjesu u oblik pravokutnika otprilike 1 cm debljine.
Prekrijte meso tankim kriškama šunke.
Rasporedite štapiće tikvice paralelno s kraćom stranicom pravokutnika.
Uz pomoć papira, smotajte meso u rolnicu počevši od kraće stranice.
Ovako oblikovanu štrucu omotajte istim papirom i stisnite krajeve ili sve uvežite kuhinjskom špagom.
Stavite peći u pećnicu zagrijanu na 180°C oko 30 minuta.
Izvadite iz pećnice i ostavite da se prohladi zamotano u papiru.

Za umak izmiksajte tikvicu (prijesnu ili je prvo prokuhajte 2-3 minute) u blenderu ili štapnim mikserom, zajedno s opranim i posušenim listićima bosiljka, pinjolima (ili bademima), malo soli i papra, i par žlica maslinovog ulja.

Narežite štrucu na kriške i poslužite je uz umak od tikvica i svježe rajčice.
Po želji umjesto umaka od tikvica možete pripremiti umak vignarette uz štrucu: pomiješajte 6 žlica maslinovog ulja s octom od jabuka (dodajte po ukusu), malo soli i papra.

Štrucu možete poslužiti toplu, ali i kad se potpuno ohladi na sobnoj temperaturi. Tako da je možete pripremiti i unaprijed.
Viewing all 183 articles
Browse latest View live