Quantcast
Channel: Baker's corner...somewhere in my kitchen
Viewing all 183 articles
Browse latest View live

Chicken Rolls with Ham and Cheese

$
0
0
Chicken Rolls with Ham and Cheese

These chicken rolls are simple and totally delicious meal that everyone will like. Pinky promise.
I've tried serving them in different occasions, from weeknight family dinners to weekend dinner parties with friends. Haven't found a single person yet who didn't like them. More likely comments like, "This chicken... is... mmmmm, rather good," are heard. That ususally gives me a hint that a person who spoke isn't much into chicken.
And there isn't much messing about them. You can prepare the rolls ahead and cook them last minute, it takes less then 10 minutes from the moment you start cooking to the moment you bring them to the table.
The white, sour cream based sauce, is their perfect companion, since chicken breast can easily cross on a dry side of the road. Most of the cheese you put into the rolls will melt and that will make the sauce even richer and tastier.

If you don't hear from me for the rest of the week, give me a shout. I'll probably be burried amongst the boxes, dust and dreaming of the things I'd rather be cooking or baking.
Have a wonderful week, everyone.

Chicken Rolls with Ham and Cheese


Chicken Rolls with Ham and Cheese

* 8 thin chicken cutlets 
* 8 slices of ham
* 8 slices of cheese (e.g. Edamer)
* 3 TBspoons sour cream
* 1 1/2 teaspoons corn starch
* 1/2 glass white wine
* 1/2 glass chicken or vegetable stock
* salt and pepper
* 1/2 TBspoon butter
* 2 TBspoons extra vergin olive oil
* fresh parsley for garnish


                                 Chicken Rolls with Ham and Cheese   Chicken Rolls with Ham and Cheese  Chicken Rolls with Ham and Cheese

Cover the cutlets with a piece of plastic wrap and pound them a little.
Season them with salt and pepper on both sides.
Place a slice of ham and a slice of cheese.
Roll everything together and fasten with a toothpick or with a piece of cooking twine.
Put the butter and oil in a large skillet and heat on medium heat.
Add the chicken rolls and cook them until they are lightly brown on all sides.
Add the wine and let it evaporate. Then add the chicken stock, cover and cook for a couple minutes to make sure the meat is cooked inside but not too long to avoid overly dry meat.
Dissolve the corn starch in sour cream. Dilute with a TBspoon of water.
Remove the chicken rolls from the skillet and remove the toothpicks or twine that you used to hold the rolls together.
Add the sour cream to the skillet, stir well and then add the chicken rolls back.
Let it simmer for a minute, then sprinkle with finely chopped parsley and serve.
Serve with potatoes, other vegetables or just simply a mixed salad of your choice.


Chicken Rolls with Ham and Cheese


Involtini di pollo con prosciutto e formaggio

* 8 fettine sottili di petto di pollo
* 8 fettine di prosciutto cotto
* 8 fettine di formaggio (tipo Edamer o simile)
* 3 cucchiai di panna acida
* 1 cucchiaino e mezzo di amido di mais
* 1/2 bicchiere di vino bianco secco
* 1/2 bicchiere di brodo di pollo o vegetale
* sale e pepe
* 1/2 cucchiaio di burro
* 2 cucchiai di olio extra vergine d'oliva
* un mazzetto di prezzemolo per guarnire

Coprite le fettine di pollo con un pezzo di pellicola alimentare e assottigliatele un po' con un batticarne. 
Salatele e pepatele secondo i propri gusti.
Appoggiate una fettina di prosciutto e una di formaggio su ogni fettina di pollo e poi arrotolate tutto insieme. Fermate gli involtini con uno stuzzicadenti o con un pezzettino di spago da cucina.
Scaldate insieme il burro e l'olio in una padella abbastanza larga da contenere tutti gli involtini.
Aggiungete gli involtini e cuoceteli a fuoco medio su tutti i lati.
Sfumateli con il vino e lasciatelo evaporare.
Unite il brodo, coprite e lasciate cuocere per pochi minuti, giusto il tempo necessario perché la carne sia cotta anche dentro.
Mescolate l'amido con la panna acida e diluite poi con un cucchiaio di acqua fredda.
Togliete gli involtini dalla padella, rimuovete lo stuzzicadenti o lo spago usati per tenerli fermi, e teneteli in caldo.
Versate la panna acida nella padela, mescolate e poi rimettete gli involtini nel sugo.
Cuoceteli sul fuoco basso per un minuto ancora, aggiungete il prezzemolo tritato finemente e servite.
Potete accompagnarli con le patate, altre verdure o semplicemente un'insalata mista.


Chicken Rolls with Ham and Cheese


Pileće rolnice sa šunkom i sirom

* 8 tankih pilećih odrezaka (od prsa)
* 8 kriški prešane/kuhane šunke (ili praške)
* 8 tankih kriški sira (edamer ili sl.)
* 3 žlicekiselog vrhnja
* 1 i pol žličicaškrobnog brašna
* 1/2 čaše suhog bijelog vina
* 1/2 čaše pilećeg ili povrtnog temeljca
* sol, papar
* 1/2 žlice maslaca
* 2 žlice maslinovog (ili dr.) ulja
* svežnjićperšinovog lista

Odreske stavite u plastičnu vrećicu (za zamrzavanje) i malo ih istucite s obje strane.
Začinite ih po ukusu.
Na svaki odrezak stavite krišku šunke i krišku sira.
Zarolajte i učvrstite komadom kuhinjske špage ili čačkalicom.
U dubljoj širokoj tavi (dovoljno velikoj da u nju stanu sve rolnice) zagrijte ulje i maslac.
Popržite rolnice sa svih strana na srednje jakoj vatri.
Dodajte vino i pustite da ispari.
Dodajte juhu, poklopite i kuhajte par minuta na laganoj vatri.
Škrobno brašno pomiješajte s kiselim vrhnjem, pa razrijedite s jednom žlicom hladne vode.
Izvadite rolnice iz tave na tanjur i izvadite čačkalice ili skinite konac.
U tavu dodajte prvo kiselo vrhnje sa škrobom, promiješajte, pa vratite rolnice i još kratko prokuhajte.
Dodajte sitno nasjeckan list peršina i poslužite.
Poslužite ih uz prilog po želji, od krumpira, kuhanog povrća do svježih sezonskih salata po izboru.

Chicken Rolls with Ham and Cheese


Creamy Vanilla Rice Pudding with Peaches

$
0
0
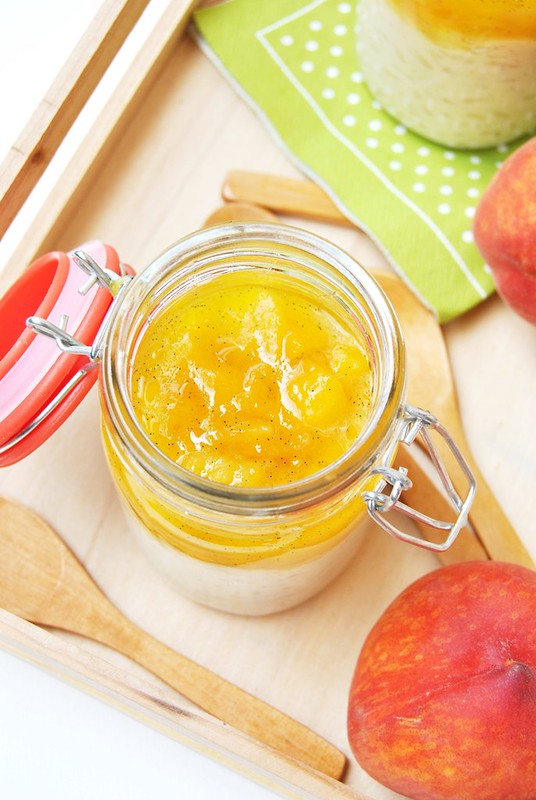
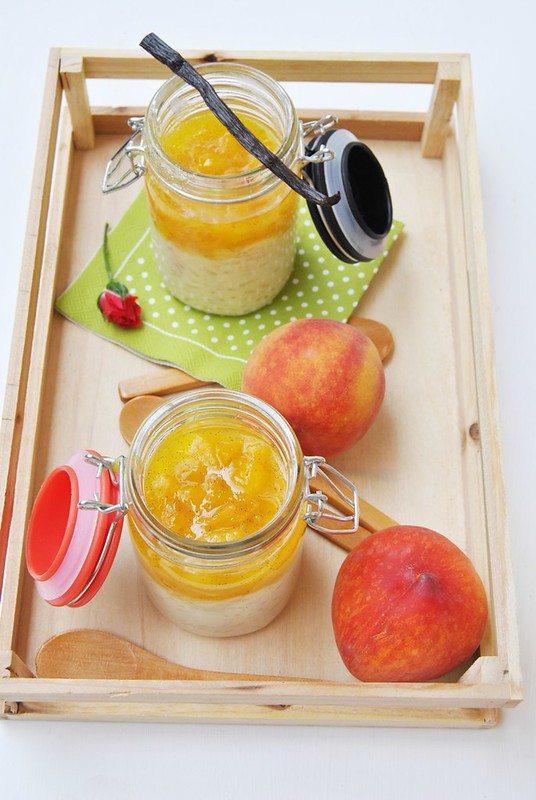
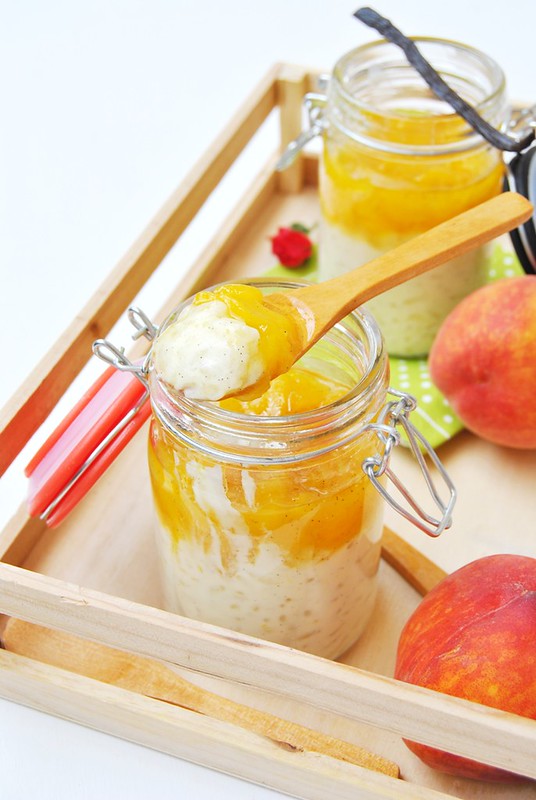
Creamy Rice Pudding

Peaches are not in season, I know... at least not on the northern hemisphere. But as you remember, I've been emptying my blog draft folder since my camera was being repaired (and it got home safely only yesterday evening) and I couldn't photograph any new dishes I've been preparing (at least non in a decent manner, considering the compact camera I have).
And so I came upon these cheerful, sunny pictures. And I remembered how good this tasted when I made it. And I thought it would be a pity not to share the recipe only because that one time I photographed it, the pudding was topped with peaches that are way out of season at this point.
And not only. I was suddenly overtaken by the idea that I had to have some rice pudding. And rushed to make some. Two servings that I made dissappeared while still warm. With the generous help of my 15-month-old boy. We didn't have time to cook any fruit to top it with. We couldn't even wait to get some homemade jam from the cellar either. But I did put both lemon and orange zest in and it smelled and tasted wonderful.
And if you eat it when it's still warm, you'll enjoy its incredible creaminess more than when it gets completely cold or after it's been refrigerated.
I think we both needed this caress yesterday. The little one, not feeling so well and me slightly depressed for the ugly weather outside. And he continued reaching for the empty glass... just didn't want to let it go even after it was empty. He liked it for sure ;)
Peaches or not, give this pudding a go, try it with some other fresh fruit or jam or compote.

There's one more thing. It's Friday today, and I'd like to participate in Gluten Free (Fri)Day organized by Gluten Free Travel&Living with this recipe.


Creamy Rice Pudding

Creamy Vanilla Rice Pudding with Peaches
(recipe adapted from here)

Rice pudding:
* 500 ml milk
* 500 ml heavy cream
* 1 vanilla bean
* 75 g sugar
* 130 g rice
* finely grated zest of an organic lemon or orange (or both)

Combine milk, heavy cream, sugar, scraped vanilla seeds + empty vanilla bean and the grated lemon/orange zest in a pot and bring to a boil. Lower the heat and let simmer for 10 minutes.
Add the rice and cook for 30-40 minutes or until the rice is cooked and creamy stirring often.
Remove the vanilla bean and distribute the pudding in 4 serving glasses or jars.
Top with some cooked peaches or jam or fruit compote before serving.

Steam cooked peaches:
* 300 g peeled and chopped peaches
* 40 g sugar
* 20 g butter
*1/2 vanilla bean

Combine peaches with sugar, butter and the vanilla seeds + empty vanilla bean in a sauce pan.
Seal the sauce pan tightly with a piece of aluminium foil.
Cook the peaches on low heat for 15 minutes without opening.
Let them cool completely and than mash with a fork or leave the pieces whole if you prefer.
This quantity is sufficient for 4 servings of pudding.
You can try cooking other types of fruit this way depending on what's in season. I've tried strawberries and apricots, for example. But I'd love to try pears or apples adding some cinnamon or ginger.


Creamy Rice Pudding

Budino di riso alla vaniglia con pesche

* 500 ml di latte
* 500 ml di panna fresca
* 1 baccello di vaniglia
* 75 g di zucchero
* 130 g di riso
* scorza finemente grattugiata di un limone o arancia non trattati 

Mettete insieme il latte, la panna, lo zucchero, i semi e il baccello vuoto di vaniglia in un pentolino.
Portate a bollore, abbassate la fiamma e lasciate sobbollire per 10 minuti. Aggiungete il riso e continuate la cottura per circa 30-40 minuti o finché il riso non risulta cotto e cremoso. Mescolate spesso per evitare che il riso si attacchi sul fondo.
Distribuite il budino in 4 bicchieri o coppette e lasciatelo raffreddare a temperatura ambiente.
Prima di servirlo completate i bicchieri con le pesche cotte al vapore (o altra frutta),  marmellata o composta di frutta a piacere.

Pesche cotte al vapore:
* 300 g di pesche sbucciate e tagliate a pezzettini
* 40 g di zucchero
* 20 g di burro
*1/2 baccello di vaniglia

Mescolate le pesche con lo zucchero, il burro e semi + baccello vuoto di vaniglia in un pentolino.
Chiudete bene con un pezzo di alluminio e cuocete a fuoco basso per 15 minuti senza mai aprire.
Lasciatele poi raffreddare completamente, togliete il baccello di vaniglia e volendo schiacciate le pesche con una forchetta.
Questa quantità è sufficiente per 4 porzioni di budino.
Al posto delle pesche potete provare a cuocere nello stesso modo altra frutta di stagione. Io ho provato con le fragole e albicocche, ma vorrei provare anche con le mele e pere aggiungendo anche un po' di cannella o zenzero.


Creamy Rice Pudding

Kremasti puding od riže s vanilijom i breskvama

* 500 ml mlijeka
* 500 ml slatkog vrhnja
* 1 mahuna vanilije
* 75 g šećera
* 130 g riže
* korica neprskanog limuna ili naranče (ili oboje)

Pomiješajte mlijeko, slatko vrhnje, šećer, sastrugane sjemenke vanilije i sitno naribanu koricu limuna i kuhajte na laganoj vatri 10 minuta. Dodajte rižu i kuhajte oko 40 minuta miješajući često dok riža nije kuhana i postane kremasta. Izvaditi mahunu vanilije.
Ulijte puding u čaše ili zdjelice i ostavite da se prohladi na sobnoj temperaturi.
Stavite odozgor kuhane breskve ili po želji neki pekmez, ukuhano voće ili slično.

Kuhane breskve:
* 300 g oguljenih i nascjeckanih bresaka
* 40 g šećera
* 20 g maslaca
*1/2 mahune vanilije

Breskve pomiješati s šećerom, maslacem i vanilijom (nastrugane sjemenke i prazni komadići mahune) staviti u manju posudu za kuhanje koju čvrsto pokriti aluminijskom folijom, i staviti kuhati na laganoj vatri 15 minuta, bez otvaranja. Ostaviti da se potpuno ohladi, izvaditi mahunu vanilije, po želji malo vilicom smrviti u kašu ili ostaviti cijele komadiće.
Ova je količina dovoljna za 4 porcije pudinga
Osim breskve možete probati na ovaj način i drugo voće. Ja sam kuhala jagode i marelice, a voljela bih probati jabuke ili kruške s dodatkom cimeta ili đumbira.

Creamy Rice Pudding

Blueberry (Billberry) Ricotta Muffins

$
0
0
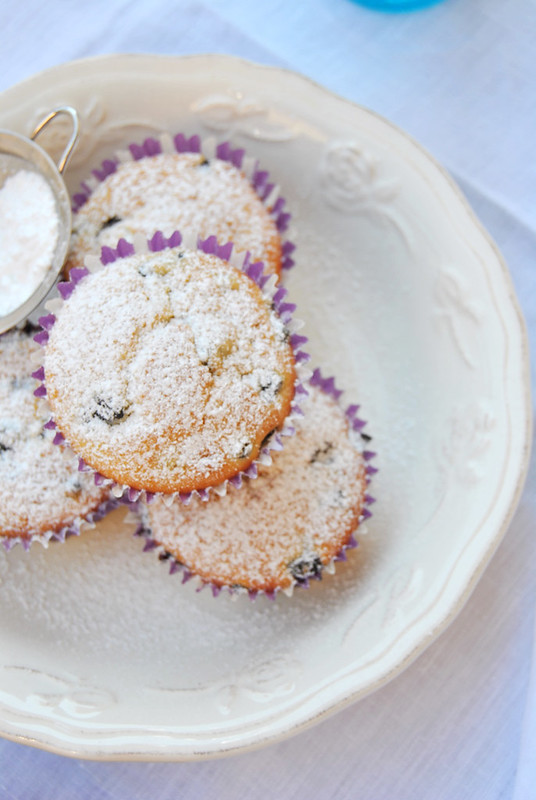
Blueberry Ricotta Muffins

I'll never refuse a good muffin, especially a fruit studded one. Any time of the day, in the morning, after lunch, in the mid-afternoon. There's always a good excuse to have one.
I won't lie, though, and say my kids went crazy for these. They'll take into consideration only chocolate ones. But I keep telling them they have no idea what they're missing. The little man is the only copy cat in this house. Whatever I'm eating... he must have it. Whether it's peas or bread or a fruit muffin. I hope he won't lose this good habit as his sisters did.


DSC_0444

As far as I'm concerned, this is the most beautiful recipe for soft and cloud-light fruit muffins.
I find it especially suitable for berries - blueberries or billberries that I used this time, but also blackberries, raspberries, red currants etc. I guess it's because of ricotta. Whatever the reason, I keep coming back to this recipe.


Blueberry Ricotta Muffins


Blueberry Ricotta Muffins

* 300 g flour 
* 3 teaspoons baking powder
* 300 g ricotta cheese
* 4-6 TBspoons milk
* 200 g sugar 
* 3 eggs
* 100 ml sunflower oil 
* finely grated zest of 1 organic lemon
* 200 g blueberries 

Preheat the oven to 180°C (350F)
Line a muffin pan with paper cups.
Whisk or sift together the flour with the baking powder.
In a separate bowl, whisk together the ricotta cheese with sugar until creamy.
Add the finely grated lemon zest, the oil and the eggs and whisk shortly again.
Stir in the flour and add milk if the batter should result too dense (it depends a lot on the ricotta you have, if it's creamy and moist you may need a couple tablespoons of milk or none at all, but if it's a good quality ricotta it's usually denser and drier so you may need 4-6 tablespoons to get the right consistency).
Put the bowl with muffin batter in the fridge for 15 minutes.
Then stir in the blueberries very delicately and distribute the batter between the prepared muffin cups filling them up to 2/3.
Bake the muffins for 15-20 minutes or until a toothpick comes out dry.


Blueberry Ricotta Muffins


Muffin ai mirtilli e ricotta

* 300 g di farina 00
* 1 bustina di lievito per dolci
* 300 g di ricotta
* 4-6 cucchiai di latte
* 200 g di zucchero
* 3 uova
* 100 ml di olio di girasole
* scorza finemente grattugiata di 1 limone non trattato 
* 200 g di mirtilli

Accendete il forno a 180°C.
Foderate uno stampo per muffin con dei pirottini di carta.
Setacciate insieme la farina con il lievito.
In un altra ciotola mescolate la ricotta con lo zucchero usando una frusta a mano fino a renderla cremosa.
Unite la scorza di limone finemente grattugiata e le uova e mescolate sempre con una frusta a mano.
Aggiungete la farina e mescolate con un cucchiaio. Diluite se necessario con il latte per ottenere un composto non troppo denso, ma neanche troppo liquido (dipende molto dal tipo di ricotta che usate, a volte non serve proprio aggiungere il latte se la ricotta è umida e cremosa, ma può essere necessario aggiungere anche 4-6 cucchiai di latte se la ricotta è asciutta).
Trasferite la ciotola con il composto per i muffin nel frigo e lasciatelo riposare 15 minuti.
Aggiungete i mirtilli mescolando molto delicatamente per non romperli.
Riempite i stampini per i muffin fino a 2/3 di altezza.
Cuoceteli per 15-20 minuti facendo la prova con uno stuzzicadenti per vedere se sono cotti.


Blueberry Ricotta Muffins


Muffini s ricottom i borovnicama

* 300 g brašna

* 1 vrećica praška za pecivo
* 300 gricotte
* 4-6 žlica mlijeka
* 200 gšećera
* 3 jaja
* 100 ml ulja
* 1 neprskani limun (naribana korica)
* 200 g borovnica (ili drugog šumskog voća poput ribizli, malina, kupina)

Uključite pećnicu na 180°C.
Kalup za muffine obložite papirnim košaricama.
Pomiješajte i prosijte brašno s praškom za pecivo.
Pjenjačom izmiješajte ricottu sa šećerom dok ne postane kremasta.
Dodajte sitno naribanu koricu limuna, ulje i jaja.
Umiješajte brašno u smjesu miješajući drvenom žlicom. Dodajte mlijeko po potrebi dok ne dobijete srednje gusto tijesto (ovisit će dosta o ricotti koju imate, nekad je jako mekana i vlažna i treba manje ili nikako mlijeka, ako je čvršća i suha malo više).
Stavite posudu sa smjesom u hladnjak na 15 minuta.
Pažljivo i što kraće miješajući, umiješajte voće u smjesu, pa je rasporedite u kalup za muffine, napunite ih do 2/3.
Pecite muffine 15-20 minuta (provjerite čačkalicom jesu li pečeni).

Blueberry Ricotta Muffins

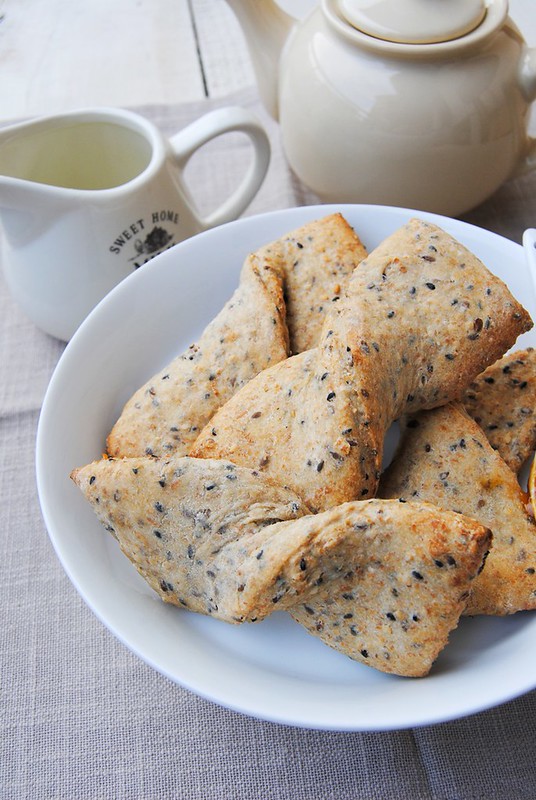
Morning Bow Ties

$
0
0
Morning Bow Ties

Year after year, we arrived to number 12 together. And it seems like it all started only yesterday.
Our knot got tied even tighter with our three gorgeous kids. One could not ask for more but good health so we can walk down this road for many more years to come.
This year, anniversary is a little bit out of the center of our attention, because things are really frenetic at the moment. We set the moving for the end of the next week, so we decided to spend a quiet evening at home, there will be time to celebrate once we are settled.
And we are not so formal about presents either. Jokingly, my husband bought me the garage (the only part of the new house that we have already paid) and I gave him... wait... a book... for myself really, but a book about bread, thinking of how much he likes bread :)))))

This is the first recipe I chose from my new cookbook (Pane, Dolci & Fantasia, by Sara Papa). And there are many others I can't wait to try.
However, due to lack of some ingredients I changed the recipe slightly: didn't have enough whole wheat flour so I changed the original proportions from 350 (whole wheat): 160 (white flour) to 260:260. The recipe also called for puffed rice (80 g) and raisins (80 g), but I had none and honestly, don't really care about either of the two, so I simply omitted them. Maybe that's why I needed a few tablespoons of flour more than indicated in the recipe. And I used half golden, half black sesame seeds.
Anyway, I was really, really happy about this recipe. The buns look so nice, and the taste is fantastic. They are slightly crunchy on the outside and soft on the inside.
I found them equally delicious in the morning with some jam as at lunch time with a bowl of vegetable soup. But the best thing is, they taste great on their own. If you just pack one to take with you as a snack, it will be better than any of those energy bars or anything similar. Trust me, I know enough about those moments when energy goes down quickly and you need an instant refill.
I may try adding the ingredients I didn't have on hand yesterday, but for now, I'll put down the recipe as I prepared it.

#All you knead is love!

Have a lovely day, everyone!


Morning Bow Ties


Morning Bow Tie Buns

* 260 g whole wheat flour
* 260 g white flour (+ more for kneading if necessary)
* 330 g water
* 200 g sourdough starter or 15 g fresh yeast
* 100 g quick cooking oats
* 60 g flaxseeds
* 60 g sesame seeds
* 120 g dry white wine
* 60 g extra virgin olive oil
* 30 g honey
* 15 g salt

                                   DSC_0461   Morning Bow Ties   Morning Bow Ties

*Before you start, remember to feed your sourdough starter and then take 200 g necessary for this recipe.
Put the sourdough starter into the bowl of your stand mixer with the paddle attachment. Add the water and mix on low speed until the starter has softened and dissolved partially.
Add the honey and the mix of oats and seeds.
Continue mixing on low while pouring in the white wine.
Now start adding the flour (both types mixed and sifted or whisked together).
In the end add the salt and the olive oil pouring it in a tiny streak.
Continue mixing until the dough is smooth. If it should result to wet and sticky, add a little more flour (a tablespoon at a time).
Transfer the dough on a floured kneading board and knead shortly.
Form a ball and place it in a lightly oiled bowl.
Let the dough rest, covered, for 40-60 minutes in a warm place
Roll the dough out using a rolling pin to 2 cm thick.
Cut it into 6x12 cm stripes using a pizza wheel or a sharp knife.
Take each piece of the dough with both hands and twist it once like you would do with a candy.
Place the bow tie buns on baking trays lined with parchment paper.
Mix a couple tablespoons of olive oil with the same quantity of water (put them in a small glass jar with a lid and shake well) and brush the buns. Cover the pans with some plastic foil and let the buns rise again for 30-40 minutes.
Bake them in an oven preheated to 200°C for 20-25 minutes.
Let them cool at room temperature.
Store them in zip lock bags. You may warm them up in an oven preheated to 120°C for 5-7 minutes before serving.


Morning Bow Ties


Papillon del mattino

* 260 g di farina di grano integrale
* 260 g di farina bianca "0"
* 330 g di acqua
* 200 g di lievito madre o 15 g di lievito di birra fresco
* 100 g di fiocchi d'avena
* 60 g di semi di lino
* 60 g di semi di sesamo
* 120 g di vino bianco
* 60 g di olio extra vergine d'oliva
* 30 g di miele
* 15 g di sale

*Ricordatevi di rinfrescare il LM prima di cominciare. Quando pronto, prelevate la quantità necessaria per la ricetta.
Mettete il LM nella ciotola della planetaria, aggiungete l'acqua e cominciate a far andare la macchina a bassa velocità usando la foglia.
Quando il LM inizia ad ammorbidirsi e sciogliersi, aggiungete il miele e in seguito il misto di fiocchi d'avena e i semi.
Continuando a mescolare versatevi il vino e poi le farine (mescolate e setacciate insieme) un cucchiaio alla volta.
Unite alla fine il sale e aggiungete l'olio versandolo a filo.
Se la pasta dovesse risultare troppo umida e appiccicosa, aggiungete un'altro po' di farina, poco alla volta.
Trasferite l'impasto su una spianatoia infarinata e lavoratelo brevemente. Formate una palla e mettete l'impasto a lievitare in una ciotola leggermente unta di olio. Coprite e lasciate al caldo per 40-60 minuti.
Con un mattarello stendete la pasta allo spessore di 2 cm.
Con l'aiuto di una rotellina per la pizza o un coltello, tagliate la pasta in strisce di 6x12 cm.
Prendete ogni pezzo di pasta con le mani e ruotate le estremità in direzione opposta come per chiudere una caramella.
Mettete i papillon sulle placche da forno rivestite con la carta da forno.
Preparate un'emulsione con un paio di cucchiai di olio e altrettanta acqua e spennellate delicatamene la superficie dei papillon.
Coprite le placche con la pellicola alimentare e lasciate lievitare per 30-40 minuti.
Infornate a 200°C per 20-25 minuti.
Lasciateli raffreddare a temperatura ambiente.
Conservateli nei sacchetti di plastica. Potete scaldarli nel forno riscaldato a 120°C per 5-7 minuti prima di servirli.


Morning Bow Ties


Jutarnje mašnice

* 260 g integralnog pšeničnog brašna
* 260 g bijelog brašna (+ po potrebi)
* 330 g vode
* 200 g kiselog tijesta (kvasa) ili 15 g svježeg kvasca
* 100 g zobenih pahuljica
* 60 g lanenih sjemenki
* 60 g sezama
* 120 g bijelog vina
* 60 g ekstra djevičanskog maslinovog ulja
* 30 g meda
* 15 g soli

Stavite osvježeni kvas u zdjelu stolnog miksera, dodajte vodu pa miješajte na niskoj brzini lopaticom za tijesta.
Kad se kvas malo otopio, dodajte med, a zatim zobene pahuljice i sjemenke. Nastavite miješati.
Ulijte polako vino.
Dodajte postepeno brašno (prethodno pomiješajte i prosijte skupa oba brašna), žlicu po žlicu.
Dodajte sad sol i na kraju ulijte u tankom mlazu ulje. Pričekajte da tijesto upije ulje i postane glatko. Ako vidite da je još uvijek dosta vlažno i ljepljivo dodajte još brašna (žlicu po žlicu).
Istresite tijesto na pobrašnjenu površinu i kratko izmijesite rukama.
Stavite tijesto u malo nauljenu posudu i ostavite ga da se diže na toplom 40-60 minuta.
Razvaljajte tijesto valjkom na 2 cm debljine. Kotačićem za rezanje pizze ili nožem narežite tijesto na trake 6x12 cm.
Uzmite svaku traku rukama i uvrnite jedanput kao papir od bombone.
Rasporedite mašnice na plehove obložene papirom za pečenje.
Pomiješajte malo ulja s vodom i time premažite mašnice uz pomoć kista. Pokrijte plehove prozirnom folijom i ostavite peciva da se dižu 30-40 minuta, a zatim ih stavite peći u pećnicu zagrijanu na 200°C, 20-25 minuta.
Ostavite ih da se ohlade na sobnoj temperaturi.
Čuvajte ih u plastičnoj vrećici za zamrzivač. Možete ih ugrijati 5-7 minuta u pećnici zagrijanoj na 120°C prije posluživanja.

Morning Bow Ties

Ricotta and polenta chips with sage salt for Gluten Free (Fri)Day

$
0
0
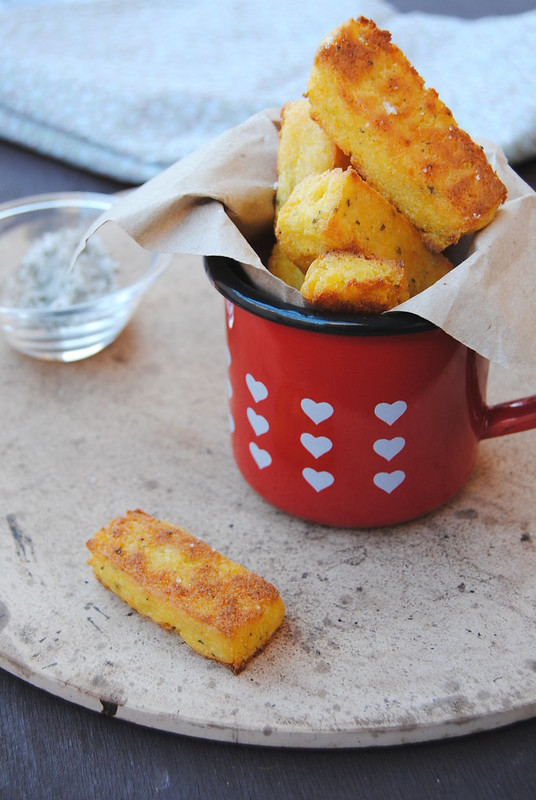
Ricotta and polenta chips with sage salt

When I was a child my mother often prepared polenta in the evening. We loved it. Especially my younger brother who always made sure there was some of it left for second helping. Unlike most people who serve polenta as a side dish with meat stews or fish, we always had polenta with some milk poured over or sour cream smeared on top of a plate full of steaming yellow polenta. I loved the contrast of cold milk with the hot polenta.
And now, polenta is so rarely on our menu. If I ever make it, it's for myself. You should see the faces of my husband and children if I only mention it.
However, when I saw this recipe for polenta sticks by Donna Hay, I knew I'd be making it, the sooner the better.
Kids complained it smelled strange and wouldn't go anywhere near. Their loss again.
These are so good. Crunchy on the outside and soft on the inside. And one thing you absolutely mustn't omit is the sage salt on top. That's the best touch you can imagine. A final kick that will make you reach for one more stick and one more again, licking your fingers.


This Friday I'm participating again in 100% Gluten Free (Fri)Day event organized by Gluten Free Travel & Living to raise awarness towards people suffering from celiac desease and help provide ideas for all the people who have to cook gluten free for themselves or family and friends.

Ricotta and polenta chips with sage salt

Ricotta and polenta chips with sage salt
(by Donna Hay)

* 500 ml chicken stock
* 150 g instant polenta
* 80 g finely grated parmigiano cheese
* 25 g butter
* leaves of 1 rosemary twig finely chopped
* sea salt and cracked black pepper
* 200 g ricotta
* olive oil for frying
- sage salt:
* 1 TBspoon sea salt flakes
* 1 TBspoon chopped sage leaves

Ricotta and polenta chips with sage salt Ricotta and polenta chips with sage salt Ricotta and polenta chips with sage salt Ricotta and polenta chips with sage salt Ricotta and polenta chips with sage salt

Mix the finely chopped fresh sage leaves with freshly ground sea salt and set aside.
Pour the stock into a large saucepan, add a little salt and butter and bring to a boil over medium heat.
Add slowly the polenta stirring continuously and cook for 2-3 minutes.
Remove the saucepan from heat. Add the grated parmigiano cheese, pepper and finely chopped rosemary leaves.
Wait for polenta to cool for 10 minutes and then stir in the ricotta cheese.
Transfer the polenta and press into a 20x20 cm cake pan. Put the pan in the fridge and let the polenta set and cool.
Remove the polenta from the pan and cut it into sticks.
Fry the polenta sticks in a skillet with hot olive oil, turning them to cook evenly on all sides, until golden brown. Remove on several layers of kitchen paper to absorb excess oil.
In alternative, place the sticks on a large baking pan lined with baking paper and drizzled with oil, and bake in an oven preheated to 180°C, flipping them to cook evenly on all sides.
Serve the polenta sticks sprinkled with sage salt.


Ricotta and polenta chips with sage salt

Bastoncini di polenta con ricotta e sale aromatizzato alla salvia
(ricetta di Donna Hay)

* 500 ml di brodo di pollo
* 150 g di polenta per cottura istantanea
* 80 g parmigiano grattugiato
* 25 g burro
* 1 rametto di rosmarino, tritato
* sale marino e pepe nero
* 200 g di ricotta
* olio di oliva per friggere
- sale aromatizzato alla salvia:
* 1 cucchiaio di sale
* 1 cucchiaio di foglie di salvia tritate

Mescolate le foglie di salvia finemente tritate con il sale e mettete da parte.
Versate il brodo nella pentola, aggiungete un pizzico di sale e il burro e portate a ebollizione.
Versate la polenta a pioggia e mescolando continuamente fatela cuocere per 2-3 minuti.
Spegnete il fuoco e aggiungete il parmigiano grattugiato, il pepe e le foglie di rosmarino tritate.
Aspettate 10 minuti e poi unite anche la ricotta mescolando bene.
Versate la polenta in uno stampo quadrato 20x20 cm e mettete in frigo perché si raffreddi completamente per poterla poi tagliare.
Una volta fredda, togliete la polenta dalla teglia e tagliatela a bastoncini.
Friggeteli in una padella con olio molto caldo, pochi alla volta, girandoli per farli diventare dorati e croccanti su tutti i lati.
Lasciateli scolare sulla carta da cucina.
In alternativa, scaldate il forno a 180°C, sistemate i bastoncini di polenta su una placca da forno rivestita con la carta da forno unta con un po' di olio e cuoceteli, girandoli, finché dorati e croccanti.
Servite i bastoncini cosparsi con un po di sale aromatizzato alla salvia.


Ricotta and polenta chips with sage salt


Štapići od palente s ricottom i aromatičnom solju s kaduljom
(recept Donne Hay)

* 500 ml pilećeg temeljca
* 150 g instant palente
* 80 g sitno naribanog parmigiana
* 25 g maslaca
* grančica ružmarina, sitno nasjeckanog
* morska sol i crni papar
* 200 g ricotte
* maslinovo ulje za prženje
- sol s kaduljom:
* 1 žlica morske soli
* 1 žlica nasjeckanih listića kadulje

Sitno nasjeckajte listove kadulje i pomiješajte ih sa svježe samljevenom morskom solju. Ostavite sa strane dok pripremate palentu.
Uspite temeljac u lonac, dodajte malo soli i maslac pa zagrijte do vrenja.
Uspite polako palentu i kuhajte miješajući 2-3 minute.
Maknite palentu s vatre i dodajte naribani parmigiano, svježe mljeveni papar i sitno nasjeckani ružmarin.
Pričekajte da se prohladi 10 minuta, a zatim umiješajte i ricottu.
Istresite palentu u četvrtasti pleh 20x20 cm, poravnajte i stavite u hladnjak da se palenta potpuno ohladi i stisne da je možete rezati.
Izvadite palentu iz pleha i narežite na štapiće.
Pržite štapiće u tavi s vrućim maslinovim uljem, okrećući ih da sa svih strana dobiju zlatno-smeđu boju i postanu hrskavi.
Izvadite ih na nekoliko slojeva upijajućeg kuhinjskog papira da se ocijedi višak masnoće.
Ili ako ih ne želite pržiti, zagrijte pećnicu na 180°C. Obložite pleh papirom za pečenje i nauljite ga. Rasporedite na pleh štapiće palente e stavite ih peći u toplu pećnicu. Okrećite ih tijekom pečenja tako da se ravnomjerno ispeku. 
Štapići su vrlo nježni stoga pazite da ih okrećete (i pri prženju i pri pečenju) tek kad se uhvatila hrskava korica s donje strane. Ako ih pržite, stavljajte ne više od 3-4 štapića istovremeno.
Poslužite štapiće posute aromatičnom solju s kaduljom.


Ricotta and polenta chips with sage salt

Hot Milk Sponge Cake

$
0
0
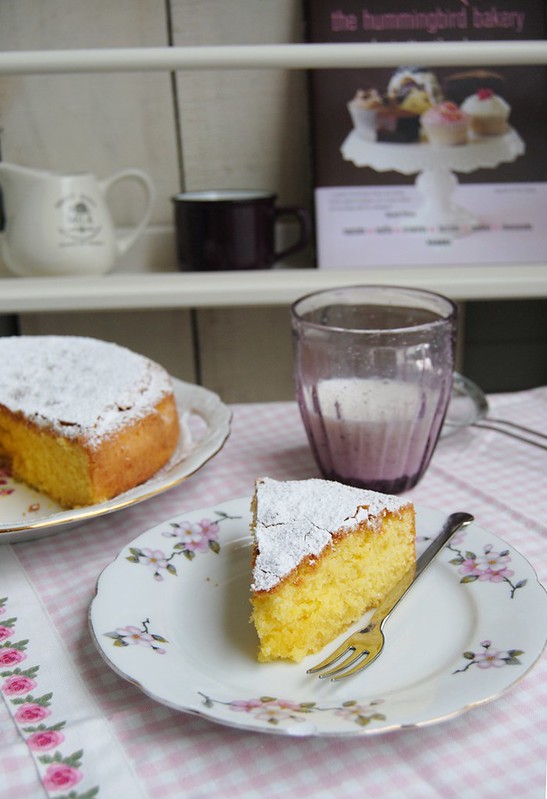
Hot Milk Sponge Cake

There are moments when we all seem to be running headless around. And yet I don't won't to renounce something nice and homemade to have in the morning with the first morning coffee or in the afternoon when I start feeling hungry because I had just a quick lunch and it's still too early for dinner. Or simply I need a cup of hot steaming tea or cocoa because it suddenly started to be freezing outside, and one can't fill one's stomach with liquids only. Right?
This cake is so nice and soft, it seems rather a piece of cloud (Ok, mine must be a winter cloud :))) than a cake. And it comes together in no time using few simple ingredients that I'm sure everyone's got at home, eggs-butter-milk-flour. The secret: hot, boiling hot milk. I didn't believe it until I tried it myself.


Hot Milk Sponge Cake

Hot Milk Sponge Cake
(from The Cake Book by Tish Boyle)

* 120 ml milk
* 60 g butter
* 165 g flour
* 6 g baking powder
* 165 g sugar
* 3 eggs (at room temperature)
* 1 teaspoon pure vanilla extract
* finely grated zest of 1 organic lemon or orange
*  a pinch of salt

Put the milk and the butter in a saucepan and heat until the butter's melted completely. Remove from heat.
Mix and sift together the flour and the baking powder with a pinch of salt.
Finely grate the zest of a lemon or an orange and mix it with the sugar (I substituted white caster sugar from the original recipe with raw cane sugar, that's why my cake is brown and not white).
Put the eggs into a mixing bowl and start mixing with an electric mixer for 1 minute.
Start adding the sugar with the zest gradually and continue mixing for 10 minutes or until the mixture has tripled, its pale and foamy.
Add the sifted flour in three times and fold it in delicately, using a rubber spatula or a hand whisk.
Heat the milk again until it reaches a boiling point.
Add it to the batter in two addings stirring with a spatula or a whisk after each addition.
Pour the batter into a greased and floured 20-22 cm springform or other that you prefer (loaf pan for example).
Bake the cake in an oven preheated to 175°C for 25-30 mintues or until a toothpick inserted in the center comes out clean and dry.
Let the cake cool on a cooling rack before serving it dusted with some powdered sugar.


Hot Milk Sponge Cake

Una torta semplicissima ma buonissima che vi conquisterà con la sua squisita sofficità. 


Torta al latte caldo
(da The Cake Book di Tish Boyle)

* 120 ml di latte
* 60 g di burro
* 165 g di farina
* 6 g di lievito per dolci
* 165 g di zucchero
* 3 uova (a temperatura ambiente)
* 1 cucchiaino di puro estratto di vaniglia
* scorza grattugiata di un limone o 1 arancia (non trattati)
*  un pizzico di sale

Mettete il latte e il burro in un pentolino e scaldateli finché il burro non si sarà sciolto.
Spegnete il fuoco.
Mescolate e setacciate insieme la farina, il lievito e il sale.
Grattugiate la scorza di limone o arancia e mescolatela con lo zucchero (a differenza della ricetta originale che prevede lo zucchero bianco, ho usato lo zucchero di canna integrale che ha conferito un colore bruno alla torta).
Mettete le uova in una ciotola e sbattetele con lo sbattitore elettrico per 1 minuto.
Unite lo zucchero con la scorza di limone o arancia e continuate a sbattere per 10 minuti o finché l'impasto si sarà triplicato e diventi chiaro e spumoso.
Aggiungete in tre volte la farina setacciata usando una frusta a mano o la spatola con movimenti delicati da su a giù.
Scaldate di nuovo il latte portandolo a bollore. Versatelo in due volte al composto di uova e farina mescolando di nuovo delicatamente con la spatola o la frusta a mano.
Versate il composto in uno stampo tondo da 20-22 cm o unto lungo (io usato quello per amor polenta).
Infornate la torta nel forno già caldo a 175°C per 20-25 minuta, fate la prova stecchino. 
Lasciate raffreddare la torta su una gratella per dolci e servitela cosparsa con un po' di zucchero a velo.


Hot Milk Sponge Cake

Vrlo jednostavan kolač koji možete pripremiti i bez neke posebne prigode, za svaki dan. Prijat će i odraslima i djeci, uz kavu, čaj ili šalicu mlijeka. Osvojit će vas svojom mekoćom.

Kolač s vrućim mlijekom
(iz knjige The Cake Book, Tish Boyle)

* 120 ml mlijeka
* 60 g maslaca
* 165 g brašna
* 6 g praška za pecivo
* 165 g šećera
* 3 jaja (sobne temperature)
* 1 žličica ekstrakta vanilije
* 1 neprskani limun ili naranča (naribana korica)
*  prstohvat soli

Stavite mlijeko i maslac u lončić pa zagrijavajte dok se maslac ne otopi. Maknite s vatre.
Brašno pomiješajte i prosijte s praškom za pecivo i malo soli.
Koricu limuna ili naranče sitno naribajte i pomiješajte sa šećerom.
*po originalnom receptu ide bijeli šećer, ja sam koristila integralni smeđi šećer, zato je kolač smeđe boje, inače bi bio bijel.
Stavite jaja u zdjelu za mućenje i mutite mikserom oko 1 minutu.
Dodajte zatim postepeno šećer s koricom limuna/naranče.
Nastavite mutiti još 10-ak minuta, dok se smjesa otprilike ne utrostruči, svijetla je i pjenasta.
Dodajte prosijano brašno u tri navrata miješajući ručnom pjenjačom ili spatulom pokretima od gore prema dolje.
Zagrijte ponovno mlijeko s maslacem skoro do točke vrenja.
Dodajte ga iz dva puta u tijesto miješajući ponovno pjenjačom ili spatulom.
Uspite tijesto u namašten i pobrašnjen kalup promjera 20-22 cm (ili duguljasti kalup kao ja),
pecite kolač u pećnici zagrijanoj na 175°C, 25-30 minuta.

Hot Milk Sponge Cake


Sourdough crackers

$
0
0
                                         

Ten more days and I'd be counting two months absence from blogging. Lots of things happened in the meantime... we moved to a new appartment finally, and above all it took ages to have the phone line installed and connected... and that not being enough, the day after we got the phone line back, the computer broke and it got repaired just a day or two before we left for Christmas holidays.
It was also a strange Christmas from baking point of view, I've never baked less as back in time as I can remember. Although most of the stuff has been in it's place, it's still often difficult to find things. And I kind of wasn't in the right mood.
But one thing that couldn't be forgetten is my "baby", my sourdough starter. It needs to get fed regularly, and now that it's really in great shape I couldn't let it sit and die. Of course not. The first thing I baked in my new house was bread, and then bread again and again.
But I managed to squeeze in some crackers and sweet buns as well.
The lovely book I mentioned in one of my previous posts is full of beautiful recipes and ideas, and these crackers were adapted from there, too.
I really liked them and can't wait to make them again.


Scented (sourdough) crackers
(adapted from Pane, dolci & fantasia, by Sara Papa)

* 500 g all purpose flour
* 250 g water
* 150 g sourdough starter (or 20 g fresh yeast)
* 20 g acacia honey
* 90 g extra virgin olive oil
* 12 g salt
* crushed pink pepper or dried herbs (e.g. rosemary) for topping
for brushing:
* 25 g water
* 25 g extra virgin olive oil
* 5 g salt

Refresh your sourdough starter and take the necessary quantity.
Tear it into pieces and leave in a mixing bowl with all 250 g of water. Let it soften for 20-30 minutes and then mix it with a hand trying to dissolve it.
Add the honey and oil, and then mix in the flour. Add the salt in the end and knead the dough until smooth.
Shape the dough into a ball and place it on a floured kneading board and cover with a large bowl or a clean cotton cloth. Let it rise until it's doubled in volume.
Take 1/4 of the dough and roll it out on a piece of baking paper to 3 mm thick. Punch the dough with a fork. Using a pizza wheel, cut the dough into little squares.
Put the oil, the water and salt into a small jar with a lid. Shake well for all the ingredients to mix, then brush the mixture all over the dough.
Sprinkle some crushed pink pepper or dried herbs over and let the crackers rest for 30 minutes.
Repeat with the remaining dough.
Bake the crackers in an oven preheated to 200°C until golden brown.
Once they are cold you can store them in zip lock bags for a week or freeze for up to a month.


Cracker profumati (con LM)
(adattato da Pane, dolci & fantasia, di Sara Papa)

* 500 g di farina "00"
* 250 g di acqua
* 150 g di lievito madre (o 20 g di lievito di birra fresco)
* 20 g di miele di acacia
* 90 g di olio extra vergine di oliva
* 12 g sale
* pepe rosa o erbe aromatiche secche (per esempio, rosmarino) per guarnire
salamoia:
* 25 g di acqua
* 25 g di olio extra vergine di oliva
* 5 g sale

Rinfrescate il lievito madre e poi prelevate la quantità che serve.
Spezzettatelo e mettete in una ciotola con 250 g di acqua. Lasciatelo ammorbidire per 20-30 minuti e poi mescolate con le mani cercando di farlo sciogliere.
Aggiungete il miele e l'olio, poi la farina e infine il sale.
Impastate bene, formate una palla e lasciate lievitare sulla spianatoia coperto con un canovaccio o la ciotola a campana fino al raddoppio del volume.
Prelevate 1/4 del impasto lievitato e con l'aiuto di un mattarello stendetelo allo spessore di 3 mm direttamente su un foglio di carta da forno. Bucherellate la pasta con una forchetta e ritagliatela con la rotellina per la pizza in quadratini.
Mettete l'acqua, l'olio e i il sala per la salamoia in una bottiglietta o vasetto con il coperchio e scuotete energicamente per emulsionare bene. Spennellate poi la salamoia sulla superficie dei crackers. Cospargete con il pepe leggermente pestato o le erbe secche. Lasciateli lievitare per 30 minuti e poi infornateli a 200°C finché diventino dorati.
Una volta raffreddati, conservateli nei sacchettini di plastica (per 1 settimana) oppure congelateli (per 1 mese).


Mirisni krekeri (s kiselim tijestom)

Tijesto:
* 500 g brašna
* 250 g vode
* 150 g kvasa/kiselog tijesta (ili 20 g kvasca)
* 20 g meda
* 90 g ekstra djevičanskog maslinovog ulja
* 12 g soli
* ružičasti (ili drugi) papar, suho mirisno bilje (ružmarin, i sl.) za posipanje
za premazivanje:
* 25 g vode
* 25 g ekstradjevičanskog maslinovog ulja
* 5 g soli

Kvas prethodno nahranite/osvježite pa odvojite potrebnu količinu.
Nakidajte ga na komadiće i stavite u zdjelu s vodom (250 g). Ostavite 20-30 minuta da odmekne, a zatim ga rukom izmiješajte da se što je moguće više otopi.
Dodajte med i ulje, a zatim i brašno. Dodajte sol tek pred kraj i dalje dobro izmijesite da tijesto postane glatko.
Stavite ga na pobrašnjenu dasku/radnu površinu i pokrijte preokrenutom zdjelom ili čistom pamučnom krpom. Ostavite tijesto da se diže dok se ne udvostruči.
Uzmite 1/4 tijesta i razvaljajte ga izravno na komadu papira za pečenje veličine velikog pleha na debljinu od 3 mm.
Nabockajte vilicom cijelu površinu, a zatim kotačićem za pizzu narežite na kvadratiće željene veličine.
Stavite ulje, vodu i sol u bočicu s poklopcem i energično protresite da se dobro pomiješaju.
Premažite ovom smjesom uz pomoć kista krekere.
Pospite ih grubo izmrvljenim paprom ili mirisnim biljem po želji.
Ostavite krekere da se dižu 30 minuta, a zatim ih stavite peći na 200°C dok ne dobiju zlatno smeđu boju.
*Ohlađene krekere čuvajte do tjedan dana u plastičnoj vrećici, a možete ih i zamrznuti do mjesec dana.


Fettine Langarole

$
0
0
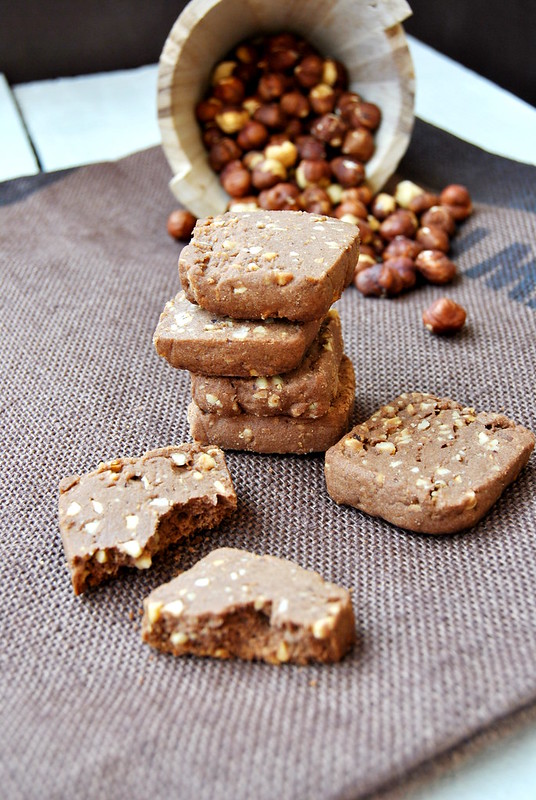
Fettine Langarole

This household cannot survive without cookies. They can change shape, ingredients, taste, but the sight of an empty cookie jar creates immediate panic and triggers the brainstorming process: What ingredients do I have ready in my pantry? What can I make? What? There's only 300 g of flour...NO way! I will half the recipe if there's no time to go grocery shopping, but the cookie making must start immediately.
Each and every member of my family has their favourites. Guess who's the only one that won't complain... ever... and will gobble and munch on anything I bake... besides myself, naturally... You'll find the answer if you scroll the pictures down...

Oh, and the recipe for these cookie! It's one of those that you'll keep coming back to in any occasion. Once you've made and tasted them. Promise. So don't wait too long before you give them a go.
Have a nice and sweet day!
                                                   

Fettine Langarole (Hazelnut Slices)
(by Luca Montersino)

* 250 g butter
* 110 g powdered sugar
* 45 g heavy cream
* 25 g unsweetened cocoa
* 400 g flour
* 135 g hazelnuts
* vanilla (scraped seeds from 1/3 vanilla bean or 1 teaspoon extract)

Using an electric mixer, beat softened butter with powdered sugar, salt and the vanilla.
Add heavy cream, and then flour sifted or whisked together with the cocoa.
In the end stir in the roughly chopped toasted hazelnuts.
Line a plastic or metal rectangular or square container (e.g a 12x20 cm or you could use several mini loaf pans) with a piece of plastic wrap. Transfer the dough in the container and level with a spoon or spatula.
The dough needs to be placed inside a container or square metal ring because it's very soft. Cooling it in the fridge it will become hard enough to be sliced.
Refrigerate the dough for a couple hours or until completely firm.
Cut the dough into 4 cm wide pieces and then slice each into 1 cm thick slices.
Place them on a baking sheet lined with baking paper.
Bake the cookies at 175°C for 18-20 minutes.
Cool them on a cooling rack and store in an airtight container.

Pan di stelle

* Pan di stelle are famous Italian cookies. My daughter loves the original ones, so I adapted the recipe for Fettine Langarole to make them in home-made version. Kids loved them.

* Instead of roughly grinding the hazelnuts, keep running your food processor until they start releasing oil and turn into smooth paste (hazelnut butter). Add the hazelnut paste to the cookie dough. Divide the dough in 3 or 4 parts and shape each into round 4-5 cm wide log. Wrap in a piece of plastic wrap and refrigerate until firm. Cut into 5 mm thick slices and bake for 15-18 minutes. Let them cool and then decorate with a little royal icing forming little stars on top of each cookie. Let the icing set before storing them in an airtight container.
*Tip: since the dough is very soft in the beginning, to help the rolls keep nice round shape, try putting them inside some kind of round shaped mould, for example an empty kitchen paper towel roll.


Fettine Langarole
(di Luca Montersino)

* 250 g burro
* 110 g zucchero a velo
* 45 g panna fresca
* 25 g cacao amaro
* 400 g farina "00"
* 135 g nocciole
* vaniglia (semi di 1/3 di bacello o 1 cucchiaino di estratto)
* un pizzico di sale

Con uno sbattitore elettrico lavorate il burro con lo zucchero a velo, il sale e la vaniglia. Aggiungete la panna versandola a filo e poi aggiungete la farina e il cacao setacciati insieme. Unite alla fine le nocciole ridotte in granella.
Rivestite un contenitore rettangolare o un anello d'acciaio (circa 12x20 cm) con la pellicola alimentare. Trasferite l'impasto al interno e livellatelo con una spatola o cucchiaio (l'impasto è molto morbido).
Trasferite l'impasto nel frigorifero e fatelo rassodare bene.
Togliete poi l'impasto dal contenitore e tagliatelo a strisce larghe 4 cm, poi ritagliate ciascuna a fettine spesse circa 1 cm.
Sistematele su una placca da forno rivestita con la carta da forno.
Cuocete i biscotti per circa 18-20 minuti a 175°C.
Sfornateli, lasciateli raffreddare su una griglia e conservateli in un contenitore di latta.

Pan di Stelle

* Le mie figlie non hanno gradito molto i biscotti originali, perché a differenza di me, non vogliono sentire pezzettini di nocciole dentro. Così ho fatto una piccola modifica e le bimbe sono letteralmente impazzite e biscotti... non ci si sono più.

* Invece di ridurre le nocciole in granella, continuate a tritarle nel mixer/frullatore finché cominciano a rilasciare olio e diventano una crema/pasta. Aggiungete la pasta di nocciole nel impasto dei biscotti. Dividete l'impasto in 3 o 4 parti, formate dei rotoli di 4-5 cm di diametro, avvolgeteli nella pellicola alimentare e lasciate rassodare in frigo. Tagliate i rotoli a fettine di 5 mm di spessore e cuoceteli per 15-18 minuti a 175°C. Una volta raffreddati decorateli con un po' di glassa di zucchero disegnando delle stelline.
* Consiglio: siccome la pasta è molto morbida, per aiutare i rotoli di pasta a mantenere la forma arrotondata inseriteli dentro qualcosa che possa servire come stampo, anche un cartoncino del rotolo di carta assorbente da cucina può essere molto utile.


Fettine Langarole (Ploške s lješnjacima)

* 250 g maslaca
* 110 g šećera u prahu
* 45 g slatkog vrhnja za šlag
* 25 g gorkog kakaa
* 400 g brašna
* 135 g lješnjaka vanilija (sjemenke 1/3 mahune ili 1 žličica ekstrakta)
* prstohvat soli

Izradite mikserom omekšali maslac sa šećerom u prahu, solju i vanilijom.
Dodajte prvo u tankom mlazu slatko vrhnje, a zatim brašno prosijano zajedno s kakaom.
Na kraju umiješajte krupno mljevene ili nasjeckane, prethodno popržene lješnjake (ja ih sameljem u multipraktiku, tako da ostanu krupniji komadići).
Obložite četvrtastu posudu prozirnom folijom i stavite smjesu unutra i poravnajte. Moja je (plastična) posuda dimenzija 12x20 cm. Trebali biste dobiti sloj debljine 3-4 cm.
Smjesu je potrebno staviti u kalup (može biti i samo metalni četvrtasti obruč) jer je jako mekana, ali hlađenjem se stisne tako da nemojte dodavati više brašna.
Stavite u hladnjak par sati da se dobro ščvrsne.
Izvadite smjesu iz kalupa i izrežite po dužini na tri komada širine 4 cm.
Izrežite svaki dio na ploške debljine 1 cm i stavljajte ih na pleh obložen papirom za pečenje.
Pecite kekse na 175°C otprilike 18-20 minuta.
Ostavite ih da se ohlade na rešetki, a zatim ih spremite u metalnu posudu.


Pan di stelle

* Pan di stelle jedni su od omiljenih keksa moje mlađe kćeri. Kad sam napravila Fettine Langarole, glavna zamjerka koju su imale moje kćeri bili su komadići lješnjaka u njima (ono što se meni najviše svidjelo kod njih). Stoga sam napravila malu izmjenu u receptu i za njih pripremila ovu neodoljivu varijantu.

* Kad stavite miksati lješnjake u mikseru/blenderu/multipraktiku nemojte se zaustaviti na grubo mljevenim komadićima, već nastavite miksati dok lješnjaci ne počnu otpuštati ulje i dobijete skoro sasvim glatku kremu/pastu od lješnjaka. Dodajte ovu pastu od lješnjaka u tijesto. Oblikujte od tijesta 3 ili 4 rolnice promjera 4-5 mm, omotajte ih prozirnom folijom i stavite u hladnjak da se dobro ohlade da ih možete rezati. Izrežite rolnce na ploške debljine 5 mm i pecite ih oko 15 do 18 minuta na 175°C. Kad se ohlade ukrasite ih s malo šećerne glazure (royal icinga) crtajući zvjezdice. Nakon što se glazura osuši možete kekse spremiti u metalnu posudu s poklopcem.
* Savjet: Budući da je tijesto jako mekano prije hlađenja, da bi rolnice zadržale lijep okrugao oblik stavite ih u nekakav "kalup", npr. obična kartonska rolnica od kuhinjskog papira može savršeno poslužiti svrsi.


Roasted Cauliflower

$
0
0
                       

This winter hasn't been really winter, so far. Too warm. Kids complain about absence of snow. 
Even the little snow that we had two days ago were rather "much noise about nothing". The moment it stopped snowing, all the snow melted away. My younger daughter coming out of school was almost crying, "It's all fault of the Sun. Now I can't even make a snowman."
There was however one beautiful moment. Just when it stopped snowing I opened the windows in my bedroom and was so pleased to breathe that clean, fresh, crisp air. In this town, so polluted, it was really such a rare thing. It's one of the reasons I wish it would snow more often, although I do hate all the disadvantages it brings along. Especially now that I have to cross the town from one end to the other to take kids to school. 


To break the monotony of winter months, I thought this purple cauliflower was so cute. And picked up two heads the moment I saw them at the grocery store. There's so little colour, besides white and green. But there's always the problem of "bad smell" in the kitchen when cauliflower is being boiled or steamed. NO more.
I believe you have all by now tried roasting it, but I often ignore trends or arrive late. Better late than never.
It's super easy. I prepared it very simle, with just a little salt and paprika, but do feel free to add other spices or herbs. Experiment. Find your own formula. For example I added some cardamom once. Loved it.
And I'm particularly happy that a compliment I recieved was, "Next time, make sure you don't bring just a handful of these to the table." It's not my fault, actually. They shrink a lot when roasted, keep that in mind, and don't roast just a few florets. Even the baby enjoyed it. That says it all.
Instead of dividing the cauliflower into florets, like (I think) all recipes say, I sliced it. I don't know why, but I liked the result so I continued doing it every time. Slicing the cauliflower you get some nice pieces, that look almost like flowers, easy to serve as a side dish, and can be used to decorate your plate as well. And you get some crumbs, too that are excellent to add to pasta or soup for example, or to be picked by little hands. Either way, give it a try... if you haven't done so already.

For now, here's the basic recipe for how I roast cauliflower. And how I used it in a delicious, fingerlicking and gourmet (as my hubby defined it). But I have another one, for a soup coming. So... 


Roasted Cauliflower with Paprika

* 1 head of cauliflower (white, purple or green)
*  salt
 * paprika
 * extra virgin olive oil
 * butter

Remove the external leaves and wash carefully the cauliflower. If it's a rather big one divide it into big florets first and then slice each into 1/2 cm thick pieces. Otherwise, for a smaller head, you can slice it whole.
Line a baking pan with parchment paper and drizzle a little olive oil over it. 
Toss the cauliflower with salt and paprika and arrange on the bottom of the prepared baking pan. 
Distribute a few pieces of butter on top and bake in the oven preheated to 180°C. 
Depending on how you like your cauliflower, crunchy or soft, it will take sometime between 15-20 minutes or a little longer. Stir a couple times so that the cauliflower roasts evenly.


Pasta with roasted cauliflower and bread crumbs

(for 4 servings):* 320 g pasta (penne, tortiglioni, fusili etc.)
* 2-3 slices of old bread
* roasted cauliflower 
* 2 cloves of garlic
* extra virgin olive oil
* 2 TBspoons sesame seeds

Bring a large pot of water to a boil.
Add pasta and salt and cook until the pasta is al dente.
In the meantime, grind the bread in a food processor to get rough bread crumbs.
Warm up 2-3 TBspoons of olive oil with whole cloves of garlic in a large skillet. Add the bread crumbs, and toast them stirring often.
Drain the pasta when cooked and add it to the skillet with condiments. 
Add the cauliflower, and toss everything together. 
Sprinkle some toasted sesame seeds on top and serve immediately.


Cavolfiore arrostito

* 1 testa di cavolfiore (bianco, verde o viola)
*  sale
 * paprika (peperone rosso macinato)
 * olio extra vergine d'oliva
 * burro

Tagliate via delle foglie esterne e lavate il cavolfiore. 
Divitelo in cime più grandi e poi affettatele oppure tagliate direttamente la testa a fettine di spessore di 1/2 cm. 
Raccogliete tutto, le fettine intere e le briciole e condite con il sale e un po' di paprika.
Foderate una teglia con la carta da forno e versateci un filo di olio EVO sul fondo. 
Distribuite il cavolfiore in uno strato uniforme e infornatelo nel forno già caldo a 180°C.
Regolate il tempo di cottura secondo i propri gusti, circa 15-20 minuti se vi piace croccante o un po' di più se lo preferite morbido. 
Rigirate un paio di volte per facilitare una cottura più uniforme.


Pasta con cavolfiore arrostito e briciole di pane

(per 4 porzioni)* 320 g di pasta  (penne, tortiglioni, fusili ecc.)
* 2-3 fette di pane raffermo
* cavolfiore arrostito
* 2 spicchi d'aglio
* olio extra vergine d'oliva
* 2 cucchiai di semi di sesamo (leggermente tostati)

Mettete a bollire una pentola d'acqua per la pasta.
Mentre la pasta si cuoce, tritate il pane in un robot da cucina.
Scaldate 2-3 cucchiai di olio EVO in una padella insieme ai spicchi interi d'aglio.
Aggiungete le briciole di pane e tostatele mescolando.
Scolate la pasa quando è cotta al dente e aggiungetela nella padella con le briciole.
Unite anche il cavolfiore e saltate tutto insieme.
Cospargete con i semi di sesamo e servite subito.


Pečena cvjetača

* 1 glavica cvjetače (nije važna boja ;))
*  sol
 * mljevena crvena paprika
 * maslinovo ulje
 * maslac

Cvjetaču očistite od vanjskih listova.
Možete je prvo podijeliti na veće cvjetove, ili ako je glavica manja izravno narezati na "kriške" debljine 1/2 cm.
Na pleh stavite komad papira za pečenje, malo ga nauljite pa rasporedite narezanu cvjetaču.
Posolite i pospite paprikom.
Preko cvjetače stavite listiće maslaca.
Pecite u pećnici zagrijanoj na 180°C (vrijeme pečenja prilagodite svojem ukusu - može biti 15-20 minuta ako volite da je cvjetača hrskavija, ili malo duže ako volite da je skroz mekana). Tijekom pečenja par puta promiješajte i preokrenite cvjetaču da se ravnomjernije ispeče.


Tjestenina s pečenom cvjetačom i mrvicama

(za 4 osobe):* 320 g tjestenine po izboru (penne, tortiglioni, fusili itd.)
* 2-3 kriške starog kruha
* pečena cvjetača (količina po želji)
* 2 češnja bijelog luka
* maslinovo ulje
* 2 žlice sjemenki sezama

Stavite veći lonac s vodom da provrije.
U ključalu vodu ubacite tjesteninu i posolite.
Dok se tjestenina kuha, smrvite u sjeckalici kruh da dobijete krupnije mrvice.
Zagrijte u tavi 2-3 žlice maslinovog ulja s cijelim češnjakom, dodajte mrvice kruha i popržite miješajući.
Ocijedite kuhanu tjesteninu i dodajte u tavu s mrvica, sve skupa zagrijte i izmiješajte na vatri.
Dodajte pečenu cvjetaču (možete odvojiti veće komade cvjetače i poslužiti kao prilog, a one sitnije, "izmrvljene" dodati u tjesteninu).
Pospite prethodno na suho poprženim sjemenkama sezama i poslužite.


A Slice of Paradise

$
0
0
Torta Paradiso

There are moments of a day when everyone need a caress. Or a slice of Paradise maybe.
With this cake you get both.
Shut the door. Take your favourite cup from a cupboard. Fill it with coffee or tea. Get warm and enjoy a sweet moment of quiet... if you have a privilege to have one during the day. Mine is usually in the early afternoon, after lunch, when the baby is finally having a nap and I'm not getting him off chairs and tables or putting away the mess he's created.


Torta Paradiso

I had this recipe on my "to try" list for way too long. I knew I'd like it but simply kept forgetting about it.
Torta Paradiso is one of those classics in Italy that everyone's probably got the "right" recipe for. But I trusted one of my favourite pastry chefs, Mr Giovanni Pina. His book is like a pastry bible to me. I'm glad I trusted him one more time.
What is so special about this simple cake? Apart from the name that is attractive enough on its own?
It's delicious. It's soft. It melts in your mouth. Believe it or not. All you need is a glass of milk (I prefer it cold) or a cup of tea or coffee to complete the moment of enjoying it.
I admit, I've exaggareted a bit eating this cake, but I can't help it. Every time I look out of the window and see it's still raining I reach for another slice  ^__^


Torta Paradiso


Torta Paradiso ("Paradise Cake)

* 160 g clarified butter
* 150 g powdered sugar
* 50 g egg yolks
* 125 g whole eggs
* 50 g caster sugar
* 10 g candied orange honey cream
* 100 g flour
* 75 g potato starch
* 2 g baking powder (1/2 teaspoon)
***50 g of egg yolks are approx. 3 medium sized egg yolks
***125 g of eggs are approx. 2,5 medium 2 large eggs

** I prepared candied orange honey cream mixing 135 g or candied orange slices with 135 g acacia honey and the seeds from 1/2 vanilla bean with a stick blender. Stored in a glass jar it keeps quite long in the fridge and can be used for cookies, cakes or creams.
** In this recipe, you can substitute Candied orange honey cream with 5 g of honey + orange zest + vanilla extract.

Chop the clarified butter and let it soften at room temperature. Whip the softened butter until creamy and pale. Add the powdered sugar and continue whipping until really fluffy. Cover with a cotton cloth and set aside.
*for my personal taste the cake results a little bit too sweet, so I'd decrease the quantity of powdered sugar next time, but it's really personal. What's too sweet for me may be perfect or ok for someone else.
Put whole eggs, Candied orange honey cream (or just honey and zest) and the caster sugar in a mixing bowl and beat with an electric mixer until foamy and pale. Add the egg yolks and continue mixing until the batter is foamy and stable.
Mix and sift together the flour, the potato starch and the baking powder.
Add the egg batter and the flour mixture to the butter and sugar mixture alternating them and stirring with a hand mixer with slow up and down folding movements.
Pour the batter into a prepared, greased and floured 22 cm spring form.
Bake the cake for about 40 minutes (start checking with a toothpick or a wooden skewer after the first 30 mins.) in an oven preheated to 170° (150°C if using fanned oven).
Remove the cake from the oven and from the pan, let it cool on a wire rack.
You can sprinkle some powdered sugar on top before serving.
In my opinion, this cakes tasted much better the following day, so I think it's better to leave it rest overnight before cutting it.
Serve with a glass of milk, coffee or tea.


Torta Paradiso

La ricetta è tratta dal libro Dolci, manuale pratico di pasticceria di G. Pina. Ho fatto una piccolissima modifica alla ricetta originale aggiungendo al posto di 5 g di miele 10 g di crema al arancia candita e miele (e ringrazio a Federica per l'ispirazione).
Questa ricetta di torta Paradiso è più che squisita. Grazie al burro chiarificato, i tuorli in più rispetto le uova intere e la fecola di patate la torta è caratterizzata da una morbidezza e "scioglievolezza" straordinari. Provare per credere.
L'unica cosa che cambierei è la quantità di zucchero. Personalmente l'ho trovata un po' troppo dolce, tenetelo in mente se come me preferite dolci con una quantità di zucchero moderata.
Per tutto il resto le mie raccomandazioni infinite.
Servitela come merenda ai bambini con una tazza di latte, non lasceranno neanche una briciola.  Ma voi potete anche godervela con una tazza di caffè o tè, o un liquore dopo cena, perché no?

Torta Paradiso

* 160 g di burro chiarificato 
* 150 g di zucchero a velo
* 50 g di tuorli d'uovo
* 125 g di uova intere
* 50 g di zucchero semolato
* 10 g di crema profumata alle arance candite e miele**
* 100 g di farina 00
* 75 g di fecola di patate
* 2 g di lievito in polvere per dolci (1/2 cucchiaino)
***50 g di tuorli sono circa 3 tuorli di uova medie
***125 g di uova intere sono circa  2,5 uova medie o 2 uova grandi

** per la crema di arance candite e miele ho frullato 135 g di fettine di arance candite con  135 g di miele d'acacia e semi di 1/2 baccello di vaniglia. Posta in un vasetto di vetro si conserva a lungo nel frigorifero. Potete usarla per aromatizzare torte, biscotti, panettone ecc.
** In questa ricetta potete sostituirla con 5 g di miele + scorza grattugiata d'arancia + extratto di vaniglia.
Tagliate il burro a pezzettini e lasciatelo ammorbidire a temperatura ambiente.
Con uno sbattitore elettrico lavorate il burro finché diventi chiaro e spumoso. Aggiungete lo zucchero a velo e continuate a lavorateli bene insieme. Coprite la ciotola e mettetela da parte.
*Personalmente ho trovato la torta un po' troppo dolce, quindi la prossima volta sicuramente diminuirò la quantità di zucchero a velo. Ma, naturalmente regolatevi secondo i propri gusti.
In un'altra ciotola riunite le uova intere, la crema di arance candite e lo zucchero semolato. Lavorate con uno sbattitore elettrico fino a ottenere una massa spumosa. Aggiungete i tuorli e continuate a sbattere finché la massa e ben gonfia e stabile.
Mescolate e setacciate insieme la farina, la fecola di patate e il lievito.
Aggiungete il composto di uova e le farine alla massa di burro alternandoli e mescolando con una frusta a mano con i movimenti lenti da su a giù.
Versate il composto in una tortiera da 22 cm con cerniera, imburata e infarinata.
Infornatela per circa 40 minuti a 170°C (150 per il forno ventilato).
Sformate la torta e lasciatela raffreddare su una griglia.
Potete cospargerla con lo zucchero a velo prima di servirla.
Il sapore e consistenza della torta migliorano molto il giorno dopo, quindi, possibilmente lasciatela riposare prima di tagliarla.


Torta Paradiso

Recept je iz knjige Dolci, manuale pratico di pasticceria, G. Pina. Moj dodatak ili izmjena je krema od kandirane naranče s medom. Inače u originalnom receptu ide samo 5 g meda.
Druga stvar recept je predviđao da se od ove smjese ispeku 2 torte od 18 cm, ja sam stavila sve u kalup od 22 cm, produžila pečenje za 10 minuta (40 umjesto 30) i meni je ovako bila odlična visinom i obujmom.
Tortu preporučujem najiskrenije, jer ovako fino tijesto, meko i koje se jednostavno topi u ustima nisam još nikad kušala ni pravila. Samo bih, kako sam naglasila i dolje u receptu smanjila količinu šećera. Za moj ukus je mrvicu preslatka. Preporučujem da ne mijenjate krumpirov škrob drugim vrstama škrobnog brašna (npr. kukuruzni ili pšenični) jer je upravo ovaj škrob odgovoran za izuzetnu mekoću i topivost kolača. Druge vrste škrobnog brašna učinit će tijesto mekim i elastičnim, ali neće dati identičan rezultat.
Poslužite je uz čašu mlijeku klincima i sigurna sam da će pojesti sve do zadnje mrvice. A vi se slobodno prepustite užitku uz šalicu kave ili čaja... ili uz neki fini liker poslije večere, zašto ne?


Torta Paradiso ("Rajska torta")

* 160 g pročišćenog maslaca
* 150 g šećera u prahu
* 50 g žumanjaka
* 125 g cijelih jaja
* 50 g kristal šećera
* 10 g mirisne kreme od kandirane naranče s medom
* 100 g brašna
* 75 g krumpirovog škrobnog brašna 
* 2 g praška za pecivo (1/2 žličice)
***50 g žumanjaka su otprilike 3 srednje velika žumanjka
***125 g jaja su otprilike 2,5 srednja ili 2 velika jajeta

** kremu od kandirane naranče pripremila sam tako što sam smrvila štapnim mikserom 135 g kandiranih kriški naranče i pomiješala sa 135 g meda od bagrema + sjemenke 1/2 mahune vanilije. Spremljena u staklenku i pohranjena u hladnjaku, krema može dugo stajati. Koristite je po potrebi.
** Ovdje kremu možete zamijeniti s 5 g meda i naribanom koricom naranče.

Ostavite maslac da omekša na sobnoj temperaturi a zatim ga umutite mikserom dok ne postane pjenast i posvijetli.
Dodajte šećer u prahu i opet dobro umutite.
Pokrijte čistom krpom i ostavite sa strane.
* Ja bih ubuduće smanjila količinu šećera u prahu, jer mi je torta malo preslatka. Iako je slatkoća manje naglašena nakon što se torta dobro ohladi.
U drugu zdjelu stavite cijela jaja, mirisnu kremu od kandirane naranče (ili samo med i koricu) i kristal šećer, pa mutite mikserom da dobijete pjenastu smjesu. Dodajte žumanjke pa nastavite mutiti dok ne dobijete čvrstu, pjenastu smjesu.
Umiješajte umućenom maslacu naizmjenično smjesu od jaja i prosijano brašno (pomiješajte i prosijte skupa brašno, škrobno brašno i prašak za pecivo), u nekoliko dodavanja.
Miješajte ručnom pjenjačom, polako, pokretima od dolje prema gore.
Sipajte smjesu u namašten i pobrašnjen kalup promjera 22 cm.
Pecite tortu 40 minuta na 170°C (150 u ventiliranoj pećnici).
Izvadite na rešetku da se ohladi.
Po želji pospite šećerom u prahu prije posluživanja.
Okus i konzistencija ove torte puno su bolji sljedećeg dana, stoga, ako je moguće, ostavite je da odmori prije nego ćete je rezati i posluživati.


Torta Paradiso


                                                   Candied orange slices Candied orange honey cream


White Beans and Roasted Cauliflower Cream of Soup

$
0
0
White beans and roasted cauliflower cream of soup

The flu just won't leave this house. I've been nursing around for the third week in a row, and hoping I won't be the next victim.
That leaves little time for cooking, of course. Because as much as kids don't want you around when they're feeling well, they ask for your attention constantly when ill.
That's when a meal like this comes in as handy as it can possibly be. Rich, and yet simple, warm and smooth.
I have a habit of cooking legumes at home, chickpeas and beans especially. Once they are cooked, I divide them into portions I usually need for one meal and freeze. I prefer the home cooked, frozen legumes much more compared to store bought, canned ones. But, of course, if you decide to prepare this soup, use the ones you have. The only condition to have a quick meal is that you have some precooked beans. The rest is really question of minutes.
I could have also just added the cauliflower to the rest and cook everything together, but there's just so much more taste to roasted cauliflower (plus no bad smell around the house), that you shouldn't really be sorry for turning the oven on and spending a few more minutes to roast them first.


White beans and roasted cauliflower cream of soup


 White Beans and Roasted Cauliflower Cream of Soup

(2-3 servings)
* 1 scallion
* 1 leek
* 2 medium sized potatoes
* 250 g precooked white beans (cannellini)
* 1/2 head of white cauliflower
* salt, pepper
* paprika
* 2 pods of cardamom
* about 1 liter vegetable stock
* 1 dl milk

Remove external leaves from the cauliflower head and wash it. Slice the cauliflower into 1/2 cm thick slices. Toss the cauliflower in a mixing bowl seasoning it with salt, pepper, paprika and crushed cardamom seeds.
Line a baking sheet with a piece of baking paper. Drizzle it with a little extra virgin olive oil and distribute the cauliflower slices and bits. Roast it for about 20 minutes at 180°C.
In the meantime, finely chop the onion and slice the leek. Cook them with 2 TBspoons of extra virgin olive oil over low heat until soft. Add the potatoes cut into small cubes and the beans drained from their liquid. Season with a little salt, add the stock, cover and cook on medium-low heat for about 20-30 minutes or until the potatoes are cooked.
When the cauliflower is roasted and soft, leave one part of smaller florets aside and add the rest to the pot. Add the milk and cook for 5 minutes.
Puree the soup in a blender or with a stick blender to get a smooth cream.
Pour it back into the pot and adjust the density to suit your taste (add more stock if too dense, or let simmer for a few more minutes if too thin.
Serve the soup adding the florets you left whole and sprinkling some finely chopped parsley on top.
 Add some bread crostini if you like.


White beans and roasted cauliflower cream of soup


Crema con cannellini e cavolfiore arrostito

(2-3 porzioni)
* 1 scalogno
* 1 porro
* 2 patate medie
* 250 g cannellini precotti
* 1/2 testa di cavolfiore (o 1 piccola intera)
* sale, pepe
* paprika (peperone rosso macinato)
* 2 bacche di cardamomo
* circa 1 litro di brodo vegetale
* 1 dl di latte
* olio extra vergine d'oliva
* burro
* prezzemolo 


Togliete le foglie esterne del cavolfiore, lavatelo e affettatelo. Riunite il cavolfiore tagliato in una ciotola e conditelo con il sale, pepe, paprika e i semi di cardamomo tritati.
Rivestite una teglia con la carta da forno leggermente oleata. Distribuite il cavolfiore e aggiungete qualche fiocchetto di burro sopra. Mettete a cuocere il cavolfiore nel forno già caldo a 180°C per 20 minuti circa.
Nel frattempo, tritate la cipolla e affettate il porro. Rosolateli in una pentola con 2 cucchiai di olio EVO. Aggiungete le patate tagliate a dadini e i fagioli scolati dal loro liquido. Coprite il tutto con il brodo, salate leggermente e lasciate cuocere per circa 20-30 minuti o finché le patate saranno cotte.
Quando il cavolfiore è arrostito, mettete da parte un po di cimette piccole e aggiungete il resto nella zuppa. Unite il latte e lasciate insaporire tutto insieme per 5 minuti.
Frullate la zuppa usando il frullatore per ottenere una crema liscia. Versate la crema nella pentola e aggiustate la densità. Se troppo densa diluite con un po' di brodo, se troppo liquida lasciatela sobbollire per qualche minuto ancora.
Distribuite la crema nei piatti, aggiungete le cime di cavolfiore lasciate intere e cospargete con il prezzemolo tritato.
Volendo servite la crema con i crostini di pane.


White beans and roasted cauliflower cream of soup


Krem juha s bijelim grahom i pečenom cvjetačom

(2-3 porcije)
* 1 glavica ljutike
* 1 poriluk
* 2 srednje velika krumpira
* 250 g kuhanog bijelog graha (cannellini)
* 1/2 glavice cvjetače
* sol i papar
* mljevena crvena paprika
* 2 mahune kardamoma
* oko 1 litar povrtnog temeljca
* 1 dl mlijeka
* maslinovo ulje
* maslac
* list peršina

Očistite cvjetaču od vanjskih listova i operite je. Narežite glavicu na ploške. Stavite cvjetaču u zdjelu i začinite s malo soli, papra, crvene mljevene paprike i smrvljenim sjemenkama kardamoma.
Pleh obložite papirom za pečenje i malo ga nauljite. Rasporedite cvjetaču i stavite odozgor listiće maslaca. Pecite cvjetaču u pećnici zagrijanoj na 180°C 20-ak minuta.
U međuvremenu narežite luk i poriluk i pirjajte ih na par žlica maslinovog ulja na laganoj vatri da odmeknu.
Dodajte na kockice narezan krumpir i ocijeđeni grah. Kratko propirjajte pa zalijte temeljcem. Posolite i kuhajte pokriveno na srednje jakoj vatri 20-30 minuta (dok krumpir nije kuhan).
Kad je cvjetača pečena, odvojite jedan dio manjih cvjetića, a ostatak dodajte u juhu. Dodajte mlijeko i kuhajte sve skupa 5 minuta.
Smiksajte juhu u kremu uz pomoć blendera ili štapnog miksera. Vratite u lonac i podesite gustoću prema ukusu, tj. ako vam je pregusta dodajte još temeljca i kratko prokuhajte, ako vam je prerijetka ostavite da kuha lagano dok se ne zgusne.
Rasporedite juhu u tanjure, dodajte u svaki prethodno odvojene cvjetiće cvjetače i sitno nasjeckan peršin.
Po želji juhu poslužite uz kockice preprženog kruha.


White beans and roasted cauliflower cream of soup


Masala Chai

$
0
0
Chai

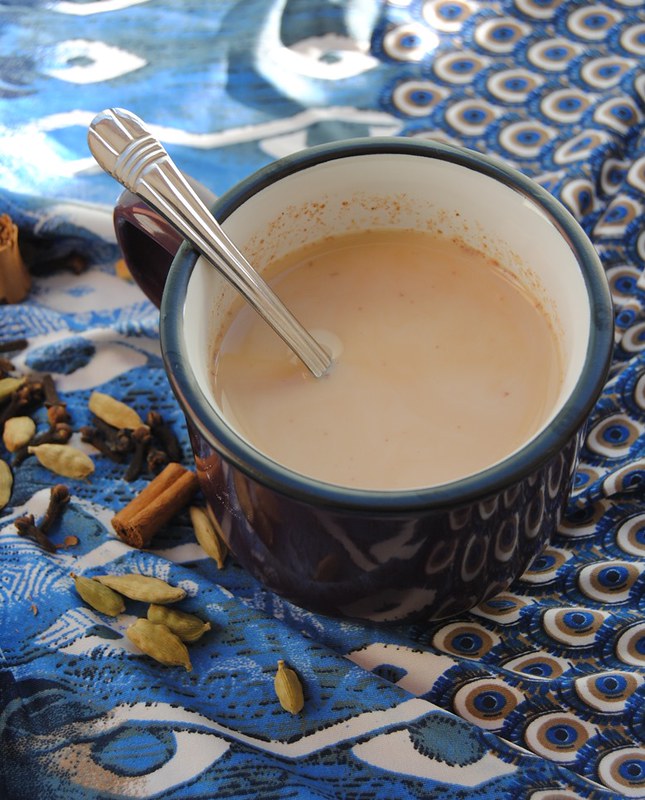
Just as much a big cup of Italian moka in the morning, a cup of chai has become important for me in the afternoon. Both serve as a fuel to carry the day on. I love my coffee but rarely drink any in the afternoon. Instead, since I learned how to prepare a cup of good Masala Chai, I've been enjoying it a lot. Warm and spicy, it realy lifts your spirit and gets you to a new level of energy. And trust me, I need a lot of energy, my days sometimes seem to be never ending. And don't get fooled by it being tea, it's just as strong as a cup of good coffee. So better not having it too late in the afternoon, if you have problems getting to sleep.
I've checked several recipes around the internet. But I really liked the one I'm copying here for you. You can find the original article here.
Masala chai is a warm beverage made with black tea, milk and spices. But mind you, it's not just a cup of tea with milk. Tea is actually steeped in a mixture of water and milk along with the spices. Most common spices used are ginger, cardamom, cinnamon, cloves and black pepper. But most people personalize it according to personal tastes. The word 'masala' is a generic term for spices and the word 'chai' means tea.
Apart from demerara sugar you can use other sweeteners like honey for example. I personally like to add raw cane sugar sometimes, it adds darker color and the hint of caramel to it.


Chai


Masala Chai
(for 4 cups of tea)

* 2 Cups of water
* 1/2 teaspoon fresh ginger, grated
* 1/8 teaspoon freshly ground black peppercorns
* 4 whole cloves
* 4 cardamom pods 
* 1 cinnamon stick
* 2 Cups whole milk
* 2 TBspoons demerara sugar
* 2 TBspoons loose black tea

Bring water, ginger, pepper, cloves, cardamom pods and cinnamon to boil.
Add the milk and the sugar and bring to a boil again.
Remove from heat and add loose black tea (if using tea in teabags open them and add tea leaves directly without bag).
Cover and let steep for 4-6 minutes.
Strain and serve.


Chai

Masala Chai ('masala' = spezie, 'chai' = tè) è una bevanda proveniente dal sud asiatico fatta con il tè nero, latte e un misto di spezie. Fate attenzione, però, non si tratta della solita tazza di tè al latte. In questo caso l'infusione del tè avviene appunto nel acqua e latte portati a bollore insieme alle spezie.
Si trovano in commercio i Chai in bustine già pronti, ma provate a farlo a casa con le spezie fresche e noterete una bella differenza.
L'uso delle spezie è abbastanza personalizzabile, si possono togliere alcune o aggiungere altre, anche se di base non dovrebbero mancare zenzero, cannella, pepe nero, chiodi di garofano e cardamomo.
Non fatevi ingannare dal fatto che questa è una bevanda a base di tè, è abbastanza forte e quindi in principio sarebbe meglio evitare di berlo la sera se avete problemi a prendere sonno. Ma nei momenti di maggior bisogno di energia, io lo preferisco al caffè.

Masala Chai 
(per 4 tazze di tè)

* 2 tazze (500 ml) di acqua
* 1/2 cucchiaino di zenzero fresco, grattugiato 
* 1/8 di cucchiaino di pepe nero macinato fresco
* 4 chiodi di garofano
* 4 bacche di cardamomo
* 1 bastoncino di cannella
* 2 tazze (500 ml) di latte intero
* 2 cucchiai zucchero demerara 
* 2 cucchiai di tè nero (o 2 bustine svuotate)

Mettete a bollire l'acqua con zenzero, pepe, chiodi di garofano, cardamomoe cannnella.
Quando comincia a bollire, aggiungete il latte e lo zucchero e portate di nuovo a bollore su fuoco medio.
Togliete dal fuoco, aggiungete il tè, coprite e lasciate in infusione per 4-6 minuti.
Filtrate il tè attraverso un colino e servitelo caldo.


Chai

Masala Chai ('masala' = mješavina začina, 'chai' = čaj) južno azijski je napitak pripremljen s crnim čajem, mlijekom i mješavinom začina. Nije u pitanju uobičajeni čaj s dodatkom mlijeka. Radi se naime o tome da se crni čaj stavi u infuziju u ključalu vode s mlijekom zajedno sa začinima. Rezultat je mirisni napitak, dubokog, jakog okusa. Neka vas ne zavara to što se radi o čaju, učinak je jednak šalici dobre kave. Zapravo u Indiji ga i piju umjesto kave. Stoga ako imate problema zaspati uvečer, izbjegavajte piti ga kasno poslijepodne ili navečer. Ali zato u trenucima kad vam treba energični poticaj, posegnite radije za šalicom ovog mirisnog napitka, nećete požaliti.
Vrsta začina može se svakako prilagoditi osobnom ukusu, možete oduzeti neke od začina s popisa dolje ili dodati druge, vama drage. Iako u principu u mješavini začina za chai ne bi trebali nedostajati đumbir, cimet, cardamom, crni papar i klinčići.

Masala Chai
(za 4 šalice čaja)

* 2 šalice (500 ml) vode
* 1/2 žličice svježeg đumbira (naribanog)
* 1/8 žličice svježe mljevenog crnog papra
* 4 cijela klinčića
* 4 mahune kardamoma
* 1 štapić cimeta
* 2 šalice (500 ml) punomasnog mlijeka
* 2 žlice demerara šećera
* 2 žlice crnog čaja (ili sadržaj dvije vrećice, ispražnjene)

Stavite vodu s đumbirom, paprom, klinčićima, kardamomom i cimetom da provrije.
Kad provrije dodajte mlijeko i šećer i na srednje jakoj vatri zagrijte ponovno do vrenja.
Maknite s vatre i dodajte čaj. Poklopite i ostavite u infuziji 4-6 minuta, ovisno koliko jak čaj želite.
Procijedite i poslužite.


Chai

Coconut Chocolates

$
0
0
Coconut Chocolates


Kids birthday parties can be so exhausting. But I've survived one more of those. Still carring the consequencies and longing for a nice massage, but trying to go on.
The important thing is my daughter had fun with her friends. Turning ten is special for every little princess. It's incredible how fast she's been growing. She's almost as tall as myself, and she'll probably start stealing my shoes any time now.
I had the kids decorate some cupcakes at the party and that was so much fun. They were so excited, they kept exchanging different colour frostings I prepared for them, and they all ended up with multi colored cupcakes. None of them dared eating them, they wanted to take them home so they could show their work to everyone. That was so cute that I promised them we would certainly repeat the experience as a little cupcake workshop one day.

Now, tired or not, I can't sit still. And in this dreary weather there's really little to do but sit at home.
The coconut filled chocolates have been on my mind for a while now. I tried a couple recipes in the past, but didn't find them particularly satisfactory. So I finally took things in my own hands, and came up with these.
Delicate milk chocolate shell, hiding a soft chocolate coconut filling. I'm pretty satisfied this time. And since the little human cub running around this house had to have a small piece and expressed his satisfaction, too,  I hid them where noone can find them. Can't stand the competition when it comes to chocolates *_* 

Coconut Chocolates


Coconut Chocolates

(for about 25 small bars)
* 200 g good quality white chocolate
* 85 g coconut milk
* 150 g sweetened condensed milk
* 20 g butter
* 80 g dried shredded coconut
+ about 300 g milk chocolate

Put the coconut milk and the condensed milk in a small saucepan and warm them up almost to the boiling point.
Put the finely chopped white chocolate in a glass mixing bowl. Pour the hot milk over and stir well until the chocolate's melted completely.
Add the softened butter and in the end the dried shredded coconut.
Cover the bowl and let the mixture cool down completely then put it in the fridge for a couple hours.
Transfer the coconut mixture into a pastry bag with a round tip and squeeze out little sticks, the size you prefer. Form the coconut sticks on a piece of baking paper placed over a tray or a baking tin.
Leave them in the fridge for several hours, or, even better, overnight.
Melt and temper (instructions HERE) the milk chocolate.
Dip the coconut stick into milk chocolate and leave on a piece of baking paper to set.
Once they are set and dry, they can be stored in a cool and dry place, protected from humidity.


Coconut Chocolates


Cioccolatini al cocco

(per circa 25 cioccolatini)
* 200 g di cioccolato bianco di buona qualità
* 85 g di latte di cocco
* 150 g di latte condensato zuccherato
* 20 g di burro
* 80 g di cocco essicato
+ circa 300 g di cioccolato al latte

Riunite il latte di cocco e quello condensato e scaldateli quasi fino a ebollizione.
Mettete in una ciotola il cioccolato bianco tritato finemente e versateci sopra il latte caldo.
Mescolate finché il cioccolato non si sarà sciolto completamente.
Aggiungete il burro precedentemente lasciato ammorbidire e alla fine il cocco.
Coprite la ciotola e lasciate raffreddare il composto a temperatura ambiente, e successivamente anche in frigo se dovesse risultare ancora troppo morbido.
Trasferite il composto al cocco in una tasca da pasticcere con la punta tonda liscia e formate su un foglio di carta da forno tanti bastoncini di grandezza che preferite.
Copriteli con un foglio di pellicola e lasciate rassodare in frigo per qualche ora, o ancora meglio, tutta la notte.
Fate sciogliere e poi temperate il cioccolato al latte (istruzioni QUI).
Immergete i bastoncini al cocco nel cioccolato e poi lasciateli asciugare su un foglio di carta da forno.
Una volta asciutti conservateli in un luogo fresco e asciutto, protetti dal umidità.


Coconut Chocolates


Čokoladice s kokosom

(za oko 25 čokoladica)
* 200 g kvalitetne bijele čokolade
* 85 g kokosovog mlijeka
* 150 g zaslađenog kondenziranog mlijeka
* 20 g maslaca
* 80 g kokosovog brašna
+ oko 300 g mliječne čokolade                                        

Zagrijte kokosovo mlijeko pomiješano sa zaslađenim kondenziranim mlijekom skoro do vrenja.
U zdjelu stavite sitno nasjeckanu bijelu čokoladu. Prelijte je vrućim mlijekom i miješajte žlicom dok se potpuno ne istopi.
Umiješajte maslac, a zatim i kokosovo brašno.
Kad ste dobro sjedinili smjesu ostavite je da se potpuno ohladi na sobnoj temperaturi, a po potrebi kasnije i u hladnjaku.
Premjestite smjesu u slastičarsku vrećicu s okruglim otvorom (ili obično plastičnu vrećicu kojoj odrežite vrh).
Oblikujte uz pomoć vrećice na komadu papira za pečenje ili plehu obloženom prozirnom folijom, prutiće veličine po želji.
Stavite ih u hladnjak na nekoliko sati ili još bolje preko noći, da se stisnu i malo prosuše.
Otopite i temperirajte mliječnu čokoladu (UPUTE za temperiranje čokolade.
Uvaljajte oblikovane kokos prutiće u otopljenu čokoladu i stavljajte ih na papir za pečenje da se čokolada stegne. Ako ste čokoladu pravilno temperirali ona će se sama osušiti na sobnoj temperaturi bez potrebe da čokoladice poslije stavljate u hladnjak.
Čuvajte ih na suhom i ne previše toplom mjestu.


Coconut Chocolates

Coconut Milk Cake

$
0
0
Coconut Milk Cake

As soon as I made the coconut filling for Coconut chocolates the other day, a big question mark appeared in my eyes. And now what? All that coconut milk I'm left with can only last three days in the fridge. If I don't find something to do with it soon, I'll have to throw it away. And that would be such a waste.
Making more chocolates would be a bad idea. Not because they were bad, but for exactly opposite reason. Dangerously good would be a more appropriate description.
That same evening, reading through my Bloglovin feed, a perfect recipe came to my rescue. That was exactly what I was looking for. A simple, soft, moist cake that I could have with my coffee in the morning beforing running off to take kids to school, but also in the afternoon with a cup of tea (or Chai, maybe).
Oh, and let me tell you... I'm so glad I made it. The day yesterday started in a most stressful way. With my younger daughter having one of her theatrical scenes when she wakes up strange, no,  actually, she refuses to wake up, and makes the already difficult, busy routine even more difficult. We got to school late, I had to run in the rain fearing as always I'd crash at some point.
But going back home to find the cake on my table, and prepare a quick cup of hot chocolate milk, sit down and relax for a moment trying to come up with a strategy to avoid scenes like that, was priceless.
The cake is really unusual, although the few ingredients necessary to make it are nothing special. I'm sure you have all or most ingredients at home even now. My little addition had the form of Candied orange and honey cream, but that's simply because I didn't have any organic oranges/lemons or (even better) limes and I thought one of those would simply be necessary and perfect with coconut flavour. And because I've become addicted to this cream and have been adding it everywhere, cookies, cakes, creams, whatever I'm making.
Why is the cake unusual then? Well check the preparation. Personally, I've never made a cake batter in this way. I found it totally different. But the result is excellent. Apparently, the recipe originates from Samoa Islands.
As I said already, the cake is soft and moist, it has delicate coconut flavour, but it's very simple and I'm sure that, like myself, you won't stop at just one piece.


Coconut Milk Cake


Coconut Milk Cake
(recipe slightly adapted from the blog La tana del coniglio)

* 160 g coconut milk
* 2 eggs
* 200 g flour
* 180 g sugar
* a pinch of salt
* 2 1/2 teaspoons baking powder
* 100 g butter
* 1 teaspoon vanilla extract
* 20 g candied orange honey cream

Preheat the oven to 180°C.
Line a 20x20 cm square pan or a 22 cm round springform with baking paper.
Put the eggs, 50 g of coconut milk, the vanilla extract and the candied orange honey cream in a mixing bowl and beat with an electric mixer until smooth and foamy.
Whisk together the flour, the sugar and the baking powder in another bowl.
Add the softened butter and the remaining 110 g of coconut milk. Beat with an electric mixer or in a stand mixer with the paddle attachment for about 3 minutes or until smooth, thick and pale.
Add the beaten eggs to the butter and flour mixture in three additions.
Pour the batter into a prepared cake pan, level the surface with a spoon or a spatula and bake for about 30-40 minutes. Check with a toothpick/wooden skewer inserted in the middle if the cake is done - the toothpick should come out clean.
Let the cake cool in the pan for 10 minutes, then remove from the pan (if using a square pan simply lift the baking paper ends to remove the cake from the pan).
When the cake's cooled down, cut it into squares and dust with powdered sugar.
* I prepared the candied orange honey cream by pureeing 135 g of candied sliced oranges with 135 g of honey and the seeds from 1/2 vanilla bean. You can substitute it in this recipe adding 10 g of honey and the grated orange or lemon zest, or omit completely, as in original recipe, and add 200 g sugar only.


Coconut Milk Cake


Torta al latte di cocco
(la ricetta tratta e leggermente adattata dal blog La tana del coniglio)

* 160 g di latte di cocco
* 2 uova
* 200 g di farina
* 180 g di zucchero
* un pizzico di sale
* 2 1/2 cucchiaini di lievito per dolci
* 100 g di burro
* 1 cucchiaino di estratto di vaniglia
* 20 g di crema di arance candite e miele

Preriscaldate il forno a 180°C.
Foderate una teglia quadrata (20x20 cm) o una tonda (da 22 cm) con la carta da forno.
Mettete le uova, 50 g di latte di cocco, l'estratto di vaniglia e la crema di arance candite in una ciotola e sbattete con uno sbattitore elettrico fino a ottenere un composto liscio e spumoso.
In un'altra ciotola prima mescolate insieme con una frusta a mano la farina, lo zucchero e il lievito per i dolci. Poi aggiungete il burro ammorbidito e il restante latte di cocco (110 g). Sbattete il tutto con uno sbattitore elettrico oppure in una planetaria con la frusta K per circa 3 minuti, fino a ottenere un composto denso, liscio e chiaro.
Unite le uova in tre volte lavorando l'impasto per un minuto dopo ogni aggiunta.
Versate l'impasto nella teglia, livellate con un cucchiaio o una spatola e infornate nel forno già caldo per circa 30-40 minuti.
Controllate la cottura inserendo uno stuzzicadenti o uno spiedino di legno al centro della torta - deve uscire asciutto.
Lasciate raffreddare la torta nella teglia per 10 minuti e poi sformatela e lasciatela raffreddare completamente.
Tagliate la torta a tranci/quadretti e spolverizzatela con lo zucchero a velo.
* Ho preparato la crema di arance candite e miele frullando 135 g di fettine di arancia candita con 135 g di miele e i semi di 1/2 bacca di vaniglia. In questa ricetta potete anche sostituirla con 10 g di miele e la scorza finemente grattugiata di un'arancia o limone, oppure omettere come nella ricetta originale aumentando lo zucchero a 200 g.


Coconut Milk Cake


Kolač s kokosovim mlijekom
(recept preuzet uz manje izmjene s bloga La tana del coniglio)

* 160 g kokosovog mlijeka
* 2 jaja
* 200 g brašna
* 180 g šećera
* prstohvat soli
* 2 1/2 žličice praška za pecivo
* 100 g maslaca
* 1 žličica ekstrakta vanilije
* 20 g kreme od kandirane naranče i meda

Uključite pećnicu na 180°C.
Pripremite četvrtasti (20x20 cm) ili okrugli (22 cm) pleh tako što ćete ga obložiti papirom za pečenje.
Stavite u zdjelu jaja, 50 g kokosovog mlijeka, ekstrakt vanilije i kremu od kandirane naranče i meda. Mutite mikserom dok smjesa ne postane glatka i lagano se zapjeni.
U drugoj zdjeli pomiješajte brašno, šećer i prašak za pecivo. Lagano ih promiješajte ručnom pjenjačom.
Dodajte omekšali maslac i preostalih 110 g kokosovog mlijeka. Mutite električnim mikserom ili u stolnom mikseru s lopaticom oko 3 minute, odnosno dok smjesa ne postane ujednačena, glatka i svijetla.
Dodajte jaja u tri dodavanja muteći 1 minutu nakon svakog dodavanja.
Istresite smjesu za kolač u pripremljen pleh i poravnajte površinu žlicom ili špatulom.
Pecite kolač oko 30-40 minuta u zagrijanoj pećnici.
Provjerite je li kolač pečen tako što ćete ubosti čačkalicu ili drveni štapić u sredinu kolača - mora izaći suh.
Ostavite kolač da se ohladi u kalupu 10 minuta, a zatim ga izvadite iz kalupa i ostavite da se potpuno ohladi.
Narežite kolač na kocke i pospite ga šećerom u prahu.
* Kremu od kandirane naranče s medom pripremila sam tako što sam smiksala u kremu štapnim mikserom 135 g kriški kandirane naranče sa 135 g meda i sjemenkama 1/2 štapića vanilije. U ovom receptu možete je zamijeniti s 10 g meda i sitno naribanom koricom naranče ili limuna, ili, kao u originalnom receptu izostaviti u potpunosti i povećati šećer na 200 g.


Coconut Milk Cake


Quinoa and Vegetable Patties

$
0
0
Quinoa and Vegetable Patties

An alternative to a meat burger? And really tasty? Get on board and check for yourself.
This was one of the very first recipes I tried with quinoa, and I loved them from the first bite.
Over time, I've slightly modified the recipe to adapt it to my taste. And I still like them a lot.
Whenever I feel like having a meatless, healthy meal, I reach for this recipe. In fact, quinoa is rich in protein, as well as dietary fiber, phosphorus, magnesium and iron. Adding some vegetables, low fat cheese like ricotta and eggs, completes them as a meal. They can be shallow fried in a skillet, but I prefer baking them in the oven, for lighter preparation.
Quinoa is also gluten-free, and this recipe can easily be turned into a gluten-free one by substituting regular breadcrumbs with gluten-free ones or some gluten free flour.


Quinoa and Vegetable Patties


Quinoa and Vegetable Patties

* 100 g quinoa (1/2 cup)
* 250 ml water (1 cup)
* 1 leek
* 1 scallion
* 1 carrot
* 1 zucchini
* a handful of small broccoli florets
* 100 g ricotta cheese (1/2 cup)
* 30 g grated Parmigiano cheese (1/2 cup)
* 1 egg
* 2-3 TBspoons breadcrumbs
* extra virgin olive oil
* 1 twig of fresh thyme or a pinch of dry thyme
* salt and pepper

                 Quinoa and Vegetable Patties    cooked quinoa   Quinoa and Vegetable Patties   Quinoa and Vegetable Patties

                 Quinoa and Vegetable Patties   Quinoa and Vegetable Patties   Quinoa and Vegetable Patties   Quinoa and Vegetable Patties


Put the quinoa into a strainer and rinse it well under cold running water.
Put the quinoa and water into a saucepan, bring to a boil, add a little salt, then cover and let simmer until the water's been absorbed. Remove from heat and let sit covered for 5 minutes. Than transfer the cooked quinoa onto a large plate, fluff it with a fork and let it cool down.
Chop finely the scallion and the the leek. Cut the zucchini into very tiny cubes or shred it. Shred the carrot. Cut the broccoli florets into small pieces.
Heat a spoonful of extra virgin olive oil in a large skillet, add the vegetables and cook them on low heat, stirring often for about 10 minutes.
Combine the cooked quinoa, the sauteed vegetables, the ricotta, the Parmigiano cheese and the egg in a bowl. Season with a little salt and freshly ground pepper. Add the thyme leaves and mix everything well. Add the breadcrumbs. The mixture should be soft and wet but compact enough to form patties.
Take spoonfuls of the mixture and form balls with wet hands.
Place them on a baking sheet lined with a slightly oiled baking paper.
Pres each ball with the palm of your hand to forma 1 to 1,5 cm thick patty.
Drizzle a little oil over the patties and bake them in the oven preheated to 180°C for about 20 minutes (flip them half way through so that they get evenly golden on both sides.
Serve them with salad, tomatoes, yogurt or sour cream. My favourite way to serve these patties is with some flatbread (like focaccia or pita) and tzatziki.


Quinoa and Vegetable Patties


Schiacciatine di quinoa e verdure

* 100 g di quinoa (1/2 tazza)
* 250 ml di acqua (1 tazza)
* 1 porro
* 1 cipollotto
* 1 carota
* 1 zucchina
* una manciata di broccoli
* 100 g di ricotta
* 30 g di Parmigiano grattugiato
* 1 uovo
* 2-3 cucchiai di pangrattato
* olio extra vergine d'oliva
* 1 rametto di timo fresco o un pizzico di timo secco
* sale e pepe

Mettete la quinoa in un colino a maglie fitte e sciacquatela bene sotto l'acqua corrente fredda.
Mettetela poi a cuocere in un pentolino con 250 ml di acqua. Portate a ebollizione, poi aggiungete un po' di sale, coprite e lasciate sobbollire finché tutta l'acqua non sarà assorbita. Togliete il pentolino dal fuoco e lasciate riposare 5 minuti. Poi trasferite la quinoa su un piatto largo a raffreddare.
Tagliate finemente il cipollotto e il porro. Tagliate la zucchina a cubetti piccolissimi oppure grattugiatela. Grattugiate la carota con una grattugia a fori grossi. Tagliate i broccoli a pezzettini piccoli.
Scaldate un cucchiaio d'olio in una padella larga. Saltate le verdure a fuoco basso per 10 minuti circa mescolando spesso.
Unite in una ciotola la quinoa, le verdure intiepidite, la ricotta, il Parmigiano e l'uovo. Mescolate bene, poi condite con il sale e pepe, e le foglioline di timo. Aggiungete il pangrattato. Il composto deve essere morbido e un po' appiccicoso, ma abbastanza compatto da formare le schiacciatine.
Prelevate un cucchiaio di composto e con le mani umide formate prima delle palline. Sistematele su una teglia ricoperta con la carta da forno. Poi schiacciatele con la mano a uno spessore di 1 - 1,5 cm.
Cuocete le schiacciatine nel forno già caldo per circa 20 minuti, girandole a metà cottura.
Servitele con l'insalata fresca di stagione, pomodori, yogurt o panna acida. Il mio modo preferito e con focaccia o pane pita e tzatziki.


Quinoa and Vegetable Patties


Burgeri od quinoe s povrćem

* 100 g quinoe (1/2 šalice)
* 250 ml vode (1 šalica)
* 1 poriluk
* 1 mladi luk
* 1 mrkva
* 1 zelena tikvica
* šaka manjih cvjetova brokule
* 100 g ricotte
* 30 g naribanog Parmigiana
* 1 jaje
* 2-3 žlice krušnih mrvica
* ekstra djevičansko maslinovo ulje
* 1 grančica svježeg ili prstohvat suhog timijana

Stavite quinou u mrežasto cjedilo i isperite dobro pod mlazom hladne vode.
Stavite kuhati quinou s vodom, kad provrije malo posolite, poklopite i kuhajte na niskoj temperaturi dok sva voda nije upijena. Maknite s vatre i ostavite quinou poklopljenu 5 minuta. Zatim je istresite na široki tanjur i rastresite vilicom.
Mladi luk i poriluk sitno nasjeckajte. Tikvicu narežite na što manje kockice ili je naribajte na krupni ribež. Mrkvu naribajte. Cvjetove brokule sitno nasjeckajte.
Zagrijte u tavi veliku žlicu ulja i dodajte povrće pa sve pirjajte na niskoj temperaturi, često miješajući, oko 10 minuta, tek toliko da povrće malo odmekne.
Pomiješajte u zdjeli quinou, prohlađeno povrće, ricottu, naribani parmigiano i jaje. Posolite i popaprite po ukusu, te dodajte listiće timijana.
Dobro izmiješajte i onda dodajte krušne mrvice. Smjesa treba biti mekana ali kompaktna.
Grabite veliku žlicu smjese i vlažnim rukama oblikujte kuglicu. Stavljajte kuglice na pleh obložen malo nauljenim papirom za pečenje. Dlanom pritisnite kuglice tako da dobijete burgere debljine 1 do 1,5 cm.
Malo ih nauljite odozgor i stavite peći u pećnicu zagrijanu na 180°C oko 20 minuta. Preokrenite ih na polovici pečenja tako da dobiju lijepu zlatnu boju s obje strane.
Poslužite ove vege burgere uz sezonsku salatu, rajčice, jogurt ili kiselo vrhnje. Meni su najdraži uz focacciu ili pita kruh uz dodatak tzatzikija.


Quinoa and Vegetable Patties


Almond and Apple Puff Rolls

$
0
0
Almond and Apple Puff Rolls

"You should have made these with chocolate."
(Yeah, right, as if everything I bake must be with chocolate).
"But they are horribly good, anyway", he adds with his mouth full and his free hand reaching for the second one.
("horrible" is the top compliment I can get from him for a dessert).

If you happen to have a sheet of ready puff pastry, a handful of almonds and an apple, you can have a delicious dessert in a matter of seconds.
A weeknight dinner, an afternoon tea, sudden guests, a snack for kids, or simply a delicious treat in any occasion.


Almond and Apple Puff Rolls


Almond and Apple Puff Rolls

* 1 sheet of puff pastry (prerolled)
* 100 g blanched, peeled and toasted almonds (or the same quantity of almond meal)
* 60 g + 2 TBspoons unrefined cane sugar
* 1 egg white
* 1 apple 
* juice from 1/2 lemon
* 1/2 teaspoon ground cinnamon

Almond and Apple Puff Rolls (prep) Almond and Apple Puff Rolls (prep) Almond and Apple Puff Rolls (prep) Almond and Apple Puff Rolls (prep) Almond and Apple Puff Rolls (prep)

Peel the apple and shred it using a grater with large holes. Drizzle the shredded apple with lemon juice and place in a colander/strainer over a bowl to lose some of it's liquid.
Put the peeled and toasted (8-10 minutes in the oven preheated to 170°C) almonds in a food processor and grind until reduced into fine powder. You can even continue running the food processor until almonds release oil and are reduced into creamy, almond butter.
Add 60 g of brown sugar and the egg white. Mix until combined and creamy.
Unroll the puff pastry (if using prerolled one, or roll out with a rolling pin).
Spread the almond filling evenly all over the pastry sheet, leaving only 1 cm margins empty.
Distribute the shredded apple over the almond filling.
Mix the remaining 2 TBspoons of brown sugar with cinnamon and sprinkle it over the apples.
Roll the puff pastry up without pressing it hard, if layers are properly spaced it will spread better while baking.
Wrap the prepared roll and put it in the fridge for 15-20 minutes.
Cut the roll into 1,5 cm thick slices and place them on baking sheet lined with baking paper with cut side up.
Bake in the oven preheated to 200°C for 15 minutes.
Leave the rolls to cool before serving them.


Almond and Apple Puff Rolls


Girelle alle mandorle e mele

* 1 rotolo di pasta sfoglia
* 100 g di mandorle pelate e tostate
* 60 g + 2 cucchiai di zucchero di canna integrale
* 1 albume d'uovo
* 1 mela
* succo di 1/2 limone
* 1/2 cucchiaino di cannella in polvere

Grattugiate la mela sbucciata con una grattugia a fori grossi. Mescolatela con il succo di limone e poi mettetela in un colino in modo che scoli il succo che la mela rilascerà.
Tritate le mandorle sbucciate e leggermente tostate (8-10 minuti nel forno a 170°C) con un robot o mini pimer fino a ridurle in polvere finissima. Aggiungete lo zucchero (60 g) e l'albume. Azionate di nuovo il mixer fino a ottenere una crema liscia e morbida.
Srotolate la pasta sfoglia (o stendetela da soli formando un rettangolo) e spalmatela con la crema di mandorle, lasciando liberi i bordi (1 cm).
Distribuite la mela grattugiata sopra il ripieno di mandorle e cospargetele con i restanti 2 cucchiai di zucchero aromatizzato con la cannella in polvere.
Arrotolate la sfoglia senza stringere troppo. Avvolgete il rotolo con la pellicola o la carta da forno e mettete in frigo per 15-20 minuti.
Scaldate il forno a 200°C.
Tagliate il rotolo ripieno a fettine spesse circa 1,5 cm. Adagiatele su una placca da forno rivestita con la carda da forno, con la parte tagliata verso l'alto.
Infornate le girelle nel forno già caldo e lasciatele cuocere per circa 15 minuti.
Sfornatele e lasciatele raffreddare prima di servirle.


Almond and Apple Puff Rolls


Lisnate rolnice s bademima i jabukama

* 1 list lisnatog tijesta
* 100 g oguljenih, tostiranih badema
* 60 g + 2 žlice integralnog smeđeg šećera
* 1 bjeljanjak
* 1 jabuka
* sok 1/2 limuna
* 1/2 žličice cimeta

Ogulite jabuku i naribajte na krupni ribež. Prelijte naribanu jabuku sokom od limuna, pa je stavite u cjedilo iznad zdjele da se ocijedi sok koji će ispustiti.
Stavite oguljene i tostirane bademe (8-10 minuta na 170°C) u električnu sjeckalicu i sameljite ih u fini prah. Dodajte 60 g šećera i bjeljanjak pa opet izmiksajte dok ne dobijete kremu.
Odmotajte lisnato tijesto (ako koristite već razvaljano, ili ga sami razvaljajte na pravokutnik).
Premažite tijesto kremom od badema, ostavite prazne rubove (oko 1 cm).
Preko kreme od badema rasporedite naribanu jabuku. Pospite preko jabuke preostale 2 žlice šećera pomiješane s cimetom.
Zamotajte tijesto u rolnicu ne stišćući je previše jer će se onda lisnato ljepše raširiti u pečenju.
Zamotajte rolnicu u plastičnu foliju ili papir za pečenje pa stavite u hladnjak 15-20 minuta.
Oštrim nožem izrežite rolnicu na kriške debljine 1,5 cm.
Stavljajte narezane rolnice na pleh obložen papirom za pečenje s odrezanom stranom prema gore.
Pecite ih u pećnici zagrijanoj na 200°C oko 15 minuta.
Ostavite ih da se ohlade prije posluživanja.


Almond and Apple Puff Rolls

Focaccia

$
0
0


Focaccia (thyme, olives and sundried tomatoes)

Two weeks of house detention have turned me into frenetic baker. To the point that I was left without flour, eggs or butter in the end, not being able to go shopping. Forced detention, seeing that my three kids keep handing down the viruses, bacteria and every possible germ present in the air to each other. I couldn't but fall victim myself. So, now, with all the beauties that keep coming out of my oven, from bread, pizzas, focaccias to sweet pastries, I haven't been able to feel tiniest scent. As for that, I don't feel the bad smells either, which isn't always as good as it may seem. My son knows something about it, as the poor thing goes around after having filled his diaper for hours without me noticing anything wrong.
Escaping to the kitchen, kneading and baking I've been trying to avoid becoming insane.
I think my husband thinks the same I'm insane, as every evening he comes home from work to find the kitchen full of bread, sweet pastries or other stuff. You would expect someone in my situation to rest and take a nap in the afternoon once the children are having one. But no!
I feel like if I sit down, I won't be able to get up any more.
I've been wanting to share this recipe for focaccia & pizza dough for weeks now, even longer. I've tried many, with more or less success, more or less complicated, with yeast or sourdough starter. But this dough has become our favourite one over the past few months. It's made with tiniest quantity of yeast which calls for long resting times, and results in soft and light dough once it's baked. Whether I make pizza or focaccia it's become my only choice.
Sometimes I leave a piece of the dough in the fridge so I can have a nice, warm focaccia for lunch or dinner the following day. Sometimes I make a double quantity of the dough. And sometimes I bake it for days in a row. Friends that had this focaccia at my house, can't wait to be invited over again. The focaccia disappears the moment I take it to the table. I could serve this focaccia only for dinner and everyone would be satisfied the same. But try adding some prosciutto, or salami, mortadella or cheese along, the only sound you'll hear will be mmmmmmmmmmmmmm!!!
To get the best result, however, don't rush the dough. It needs long period of proofing to reach the best result once it's baked.
Also the steam during the initial baking phase is important - it helps the dough spread/rise better, and the crust will be thin and crispy, not hard as a biscuit, while the interior will be airy and cotton soft. I create the steam by throwing a handful of ice cubes into the oven (steam is created instantly and last just the time necessary to bake the focaccia or pizza), you could also place a shallow pan with hot water during the first 10 minutes and then remove it and bake the focacca until done.
I hope you give it a try, you might never switch to another recipe, I'm warning you ;))


Focaccia (thyme, olives and sundried tomatoes)


Focaccia

* 630 g flour (Italian type "0")
* 400 ml water
* 2 g fresh yeast
* 4 g sugar
* 2 TBspoons extra virgin olive oil
* 14 g salt

DSC_0645 DSC_0646 DSC_0647 DSC_0649 Focaccia

Pour all the water into a mixing bowl. Dissolve the yeast and the sugar in it.
Add half of the flour and mix with a wooden spoon.
Stir in the oil, and then the rest of the flour and the salt.
Knead the dough on the kneading board dusting with a little flour just so it doesn't stick too much. However, it will be very soft and a little sticky. Don't worry if the dough at this point isn't nice and smooth. Form a ball, place it on a floured kneading board and cover with a large upturned bowl. Let the dough rest for 15 minutes and then knead it again for 10 seconds. Repeat three more times, letting the rest each time for 15 minutes (if I'm busy and forget about it, my dough sometimes rests for half an hour or more).
After the last rest, divide the dough in two parts (or more if you prefer making small focaccias). Form two balls and place each in a separate, lightly oiled container with a lid.
Let the dough proof at room temperature for 3-4 hours. If, instead, you intend baking it much later or even the following day, put the dough in the fridge (making sure you take it out in time - about 2 hours to reach room temperature and about 2-3 hours for final proofing).
Take one part of the dough and place it on a generously floured piece of baking paper (I use semolina flour for this purpose).
Flatten the dough gently - pressing with your hands, but without using a rolling pin or pulling and streching the dough, to approximately 1,5 to 2 cm thick.
Pour 2 TBspoons of good extra virgin olive oil and 1 TB spoon lukewarm water in the center of the flattened dough.  Mix them with the palm of your hand and spread all over the dough. Then push your fingertips energetically into the dough to create those tipical focaccia dimples.
Sprinkle the surface with whatever you like - freshly ground sea salt, fresh or dry herbs, sundried tomatoes, olives, sliced onion, cherry tomatoes etc.
Cover with a piece of oiled plastic foil and a cotton cloth, and forget about it for at least 2 hours.
You may decide to bake it after one hour, but if you don't hurry it, you'll be happier, trust me.
Preheat the oven to 250°C  and put the baking stone inside or an empty baking tray if you don't have a stone.
When the oven is real hot, slide the focaccia on the baking stone/baking tray and throw a handful of ice cubes on the bottom of the oven. Close the oven door quickly, so you don't lose the steam, and bake the focaccia until it's golden brown on top.
When it's done, take it out of the oven and place on the cooling rack to cool.
This focaccia is best served still a little warm or just cooled.


Focaccia
Rosemary and sea salt focaccia

Faccio spesso la pizza in casa, a volte anche due volte alla settimana. Lo stesso vale anche per il pane. Ma da quando uso il lievito madre per panificare, i ritmi quotidiani frenetici non mi permettono sempre di impastare in tempo, tra rinfreschi del lievito e impasto, insomma, ci vuole tanto tempo e pazienza. Nello stesso tempo, da quando uso il LM, impasti fatti con il lievito di birra non mi piacciono tanto. Ma ecco che arriva questa ricetta. Inizialmente la usavo per la pizza. La quantità di lievito è così piccola che neanche si sente, e richiede una lievitazione lunga e lenta, anche in frigo, volendo. Tutto ciò, fa sì che la pasta risulti leggera e saporita, nonostante sia fatta con il lievito e non LM.
Può sembrare complicato, ma in realtà la preparazione è semplice: una volta preparato l'impasto e lavorato 4 volte a distanza di 15 minuti (quindi un'oretta in tutto) pasta può essere lasciata per ore a temperatura ambiente o anche in frigo per rimandare ulteriormente la cottura, oppure volendo cuocere una parte subito e conservare il resto per il giorno dopo.
Quando la uso per fare la pizza la lascio lievitare per 5-7 ore. Per la focaccia invece divido i tempi di lievitazione in due parti, prima e dopo averla stesa.
Ogni volta che la preparo, è un successo, sparisce in tempi record. Amici che l'hanno assaggiata, sono rimasti così entusiasti che non vedono l'ora di ricevere un altro invito a cena :)))


Focaccia

* 630 g di farina "0")
* 400 ml di acqua
* 2 g di lievito di birra fresco
* 4 g di zucchero
* 2 cucchiai di olio extra vergine d'oliva
* 14 g sale

Versate l'acqua nella ciotola, aggiungete il lievito e lo zucchero e fateli sciogliere.
Unite metà farina e mescolate con un cucchiaio di legno.
Aggiungete l'olio, e successivamente il resto della farina e il sale.
Lavorate l'impasto sulla spianatoia aggiungendo se necessario poca farina alla volta. L'impasto deve comunque risultare morbido, anche un po' appiccicoso.
Formate una palla, mettetela sulla spianatoia infarinata e coprite con la ciotola a campana.
Dopo 15 minuti, riprendete la pasta e lavoratela di nuovo per una decina di secondi.
Ripetete altre 3 volte, lasciando sempre riposare la pasta 15 minuti.
Dividete poi la pasta in due parti uguali, formate due palle e lasciatele lievitare in contenitori con coperchio, per 3-4 ore. Se volete rimandare la cottura (anche per il giorno successivo) mettete la pasta a lievitare in frigo.
Riprendete la pasta lievitata e stendetela su un pezzo di carta da forno ben infarinato con la semola rimacinata. Stendetela con delicatezza a uno spessore di 1,5-2 cm.
Versate al centro della pasta stesa un paio di cucchiai di olio extra vergine e un cucchiaio d'acqua, mescolateli e stendete con la mano su tutta la superficie. Imprimete le dita energicamente nella pasta creando dei buchi.
Cospargete la focaccia con il sale grosso macinato al momento e foglie di rosmarino, timo o quello che più vi piace.
Coprite la focaccia con un foglio di pellicola unta d'olio perché non si attacchi alla pasta e lasciatela lievitare altre due ore.
Riscaldate poi il forno a 250°C. Scaldate insieme al forno anche la pietra refrattaria o se non l'avete una teglia vuota.
Quando il forno è ben caldo trasferite la focaccia sulla pietra/teglia aiutandovi con la carta da forno.
Buttate subito sul fondo del forno 4-5 cubetti di ghiaccio e chiudete il forno velocemente per non perdere il vapore. Il vapore farà a modo che la pasta cresca meglio in cottura e la formazione di una crosticina sottile e croccante lasciando l'interno morbidissimo.
Sfornate la focaccia quando avrà un colore bruno dorato e lasciatela raffreddare un po' sulla gratella.


Focaccia


Isprobala sam dosad nebrojene recepte za focacciu. Nekima sam bila oduševljena, nekima manje. Neke su bile odlične ali prilično zahtjevne pripreme koja bi oduzimala skoro cijeli dan. Pripremala sam ih s kvascem, ali i s prirodnim kvasom/starterom. Od kad sam isprobala ovo tijesto koje je zapravo bilo tijesto za pizzu, nisam ga više mijenjala (ok, osim jednog detaljčića - u početku sam stavljala 1 žličicu jajeta, ali me je to nakon nekog vremena zamrzilo i izbacila sam ga, ništa se nije značajno promijenilo). Može se činiti da je i ovo zahtjevno, nakon što pročitate recept, ali vjerujte mi nije. Nakon početne faze pripreme kad se tijesto četiri puta premijesi u razmaku od 15 minuta, možete ga ostaviti bez problema da se diže satima (jer ima tako malu količinu kvasca u sebi, da što se duže diže to je bolje), ili čak staviti u hladnjak i odgoditi tako pečenje. Dogodi mi se često da zamijesim tijesto ujutro i ostavim do navečer. Ili ispečem jednu focacciu za ručak, a drugu za večeru ili čak sutradan. Zgodno je imati ga u hladnjaku kao rezervu kad vam treba kruha.
Ostavite li tijesto da se dovoljno dugo diže, dobit ćete tako mekano i prozračno tijesto, da ćete zaboraviti uz što ste je htjeli poslužiti, najest ćete se samo focaccie. Prijatelji kad mi dolaze na večeru, sanjaju danima unaprijed da im je pripremim, toliko su svi oduševljeni.
Ako se još na kraju pitate zašto ubacujem led na dno pećnice, evo objašnjenja. Naime dodate li vodenu paru u početnoj fazi pečenja focaccie ili kruha općenito, tijesto će se bolje širiti, tj. narasti. Korica koja će stvoriti bit će tanka i hrskava, a ne tvrda poput keksa. Netko stavlja na dno posudu s vodom, ja sam došla do zaključka da mi je ova fora s ledom najjednostavnija i najbolja.
I za kraj, ovo isto tijesto koristim i za pizzu, samo ga podijelim na 3-4 dijela.

Focaccia

* 630 g brašna (talijansko tip "0")
* 400 ml vode
* 2 g svježeg kvasca
* 4 g šećera
* 2 žlice ekstra djevičanskog maslinovog ulja
* 14 g soli

Stavite vodu u zdjelu za miješenje, dodajte kvasac i šećer pa izmiješajte rukom da se istope.
Dodajte polovicu brašna i izmiješajte drvenom žlicom.
Umiješajte ulje, a zatim dodajte ostatak brašna i sol. Zamijesite tijesto prvo u zdjeli, a zatim prebacite na pobrašnjenu dasku, i kratko mijesite dodajući po potrebi malo brašno. Tijesto treba ostati dosta mekano i pomalo ljepljivo. Neće čak biti ni sasvim glatko.
Ostavite tijesto na pobrašnjenoj dasci, pokopite ga naopako okrenutom zdjelom.
Nakon 15 minuta tijesto premijesite, vrlo kratko, 10-ak sekundi. Primijetit ćete kako je tijesto postalo glatko i podatno. Ponovite to još 3 puta, uvijek u razmaku od 15 minuta.
Nakon toga tijesto podijelite na dva jednaka dijela, svaki oblikujte u kuglu i stavite u pojedinačne spremnike s poklopcem.
Ostavite tijesto da se diže na sobnoj temperaturi 3-4 sata. Ili ga stavite u hladnjak, ako iz bilo kojeg razloga želite odgoditi pečenje, pa čak i do sljedećeg dana. Imajte samo na umu da ga izvadite na vrijeme iz hladnjaka (3-4 sata).
Kad je tijesto nadošlo, pobrašnite veći komad papira za pečenje i na njemu vrlo lagano rastanjite tijesto na debljinu od 1,5 do 2 cm. Ne vucite tijesto niti ga valjajte valjkom, već samo lagano pritišćite dlanovima.
Po površini tijesta pospite par žlica ulja i žlicu vode. Premažite cijelu površinu tijesta mješavinom ulja i vode, a zatim energično utisnite vršcima prstiju rupice po cijeloj površini.
Pospite krupnom morskom soli i dodacima po želji (npr. ružmarin, timijan, masline, sušene rajčice, luk, itd.).
Pokrijte focaccie komadom nauljene prozirne folije i ostavite da se opet diže barem 2 sata. Možete je peći i već nakon sat vremena, ali iz iskustva sam vidjela da što duže stoji bolje naraste u pečenju i bude mekša.
Zagrijte pećnicu na 250°C. Ako imate kamen za pečenje stavite odmah i njega da se zagrijava, ako nemate kamen stavite prazan pleh.
Kad je pećnica zagrijana, prebacite tijesto na kamen/pleh (budući da je već na papiru, lako ćete ga samo "skliznuti" unutra. Čim ste stavili focacciu unutra ubacite na dno pećnice 4-5 kockica leda (stvorit će se para koja će učiniti da se tijesto bolje širi i raste u pečenju, korica će biti tanka i hrskava, ali ne tvrda).
Pecite focacciu dok ne dobije zlatno smeđu boju. Ostavite je da se ohladi na rešetki.


Focaccia

Crumble Apple Slices

$
0
0
Crumble Apple Slices

I've been teasing my facebook followers with photografs recently, promising to post the recipes soon. But things rarely happen in the order I have in mind. And one of the biggest problems is that I'm always most thrilled to share the latest recipe I tried.
And so, instead of Ensaimada, Sourdough Doughnuts or Cornmeal Braids, (all delicious, trust me), I decided to start this new week with a simple apple recipe. Simple and simply delicious.
I love anything apples, and I'm a little biased. But this cake was truly a great weekend treat.
Soft, cake like base, topped with slightly caramelized apples and cruncy crumbs on top. Tell me you could resist? But I know you wouldn't.


Crumble Apple Slices


Crumble Apple Slices

Crumble:
* 140 g flour
* 1/2 teaspoon baking powder
* 100 g cold butter
* 125 g sugar
Apple filling:
* 3 big apples (or 5 small ones)
* 20 g butter
* 2 TBspoons raw cane sugar
* 1/2 teaspoon ground cinnamon
Cake:
* 100 g butter (softened)
* 100 g sugar
* 1 egg
* 150 g flour
* 1 teaspoon baking powder
* 1 TBspoon milk

For crumble, sift the flour and the baking powder into a mixing bowl. Add the sugar and whisk together. Add the chopped cold butter. Rub the butter into the flour mixture to form coarse crumbs. Cover and place in the fridge until you need it. Can be prepared in advance.
Peel and cut the apples into small cubes.
Put them in a skillet with the butter, cinnamon and brown sugar. Stir on medium high heat until the butter and sugar have melted. Then cover, lower the heat and cook on low heat until apples are tender (about 5 minutes, depends on type of apples used)
For the cake, beat the softened butter with the sugar in an electric mixer until creamy. Add the egg and beat thoroughly. Stir in the flour sifted with the baking powder and the milk.
Line a 20x30 cm baking pan with parchment paper. Spread the dough evenly on the bottom of the pan helping yourself with a spoon (the dough has medium thick consistency, not very easy to spread, so I used a spoon that I often moistened with cold water so it stick less).
Top the base with apple filling and sprinkle the crumble mixture over the apples.
Place in the oven preheated to 180°C for about 40 minutes or until golden on top.
Let the cake cool down completely in the pan before cutting it.
Dust with a little powdered sugar before serving.


Crumble Apple Slices


Quadrotti alle mele e crumble

Crumble:
* 140 g di farina
* 1/2 cucchiaino di lievito per dolci
* 100 g di burro freddo
* 125 g di zucchero semolato
Ripieno di mele:
* 3 mele grandi (o 5 piccole)
* 20 g di burro
* 2 cucchiai di zucchero di canna integrale
* 1/2 cucchiaino di cannella in polvere
Impasto della torta:
* 100 g di burro ammorbidito
* 100 g di zucchero semolato
* 1 uovo
* 150 g di farina
* 1 cucchiaino di lievito per dolci
* 1 cucchiaio di latte

Per il crumble, setacciate la farina con il lievito. Aggiungete lo zucchero e il burro freddo tagliato a pezzettini. Lavorate con le punte delle dita per formare delle briciole. Mettete il composto nel frigo mentre preparate il resto.
Sbucciate le mele e tagliatele a dadini.
Saltate le mele in padella con il burro, la cannella e lo zucchero di canna. Quando il burro e lo zucchero si saranno sciolti, abbassate la fiamma, coprite la padella e lasciate cuocere le mele per circa 5 minuti, o finché morbide.
Lavorate il burro con lo zucchero usando lo sbattitore elettrico finché diventi cremoso.
Aggiungete l'uovo e continuate a sbattere.
Alla fine unite la farina setacciata con il lievito e il latte.
Trasferite il composto in una teglia 20x30 cm rivestita con la carta da forno. Distribuitelo uniformemente sul fondo della teglia aiutandovi con un cucchiaio bagnato con l'acqua fredda.
Distribuite le mele sopra l'impasto. Terminate con il composto di crumble distribuito sopra le mele senza premere.
Cuocete la torta nel forno già caldo a 180°C per circa 40 minuti o finché dorato in superficie.
Lasciate raffreddare il dolce nella teglia prima di tagliarlo a quadretti e spolveratelo leggermente con lo zucchero a velo.


Crumble Apple Slices


Crumble kocke s jabukama

Crumble:
* 140 g brašna
* 1/2 žličice praška za pecivo
* 100 g maslaca
* 125 g šećera
punjenje od jabuka:
* 3 velike jabuke (ili 5 manjih)
* 20 g maslaca
* 2 žlice smeđeg šećera
* 1/2 žličice cimeta u prahu
tijesto:
* 100 g maslaca
* 100 g šećera
* 1 jaje
* 150 g brašna
* 1 žličica praška za pecivo
* 1 žlica mlijeka

Za crumble, stavite u zdjelu brašno prosijano s praškom za pecivo. Dodajte šećer i maslac narezan na listiće ili kockice.
Utrljajte maslac u brašno da dobijete mrvičastu smjesu.
Stavite u hladnjak dok pripremate ostalo.
Jabuke ogulite i narežite na kockice.
Stavite ih u tavu s maslacem, smeđim šećerom i cimetom.
Zagrijavajte na jačoj vatri miješajući dok se maslac i šećer ne istope, minutu-dvije, a zatim smanjite vatru, poklopite i ostavite da se lagano kuhaju oko 5 minuta, da odmeknu.
Za tijesto, mutite mikserom omekšali maslac sa šećerom dok ne postane pjenast.
Dodajte jaje i opet dobro umutite.
Umiješajte na kraju brašno i mlijeko.
Pravokutni kalup promjera 20x30 cm obložite papirom za pečenje.
Na dno rasporedite tijesto - smjesa nije ni rijetka da se sama razlije, niti čvrsta poput prhkog tijesta da je možete razvaljati, stoga si pomozite žlicom koju s vremena na vrijeme navlažite hladnom vodom i rasporedite tijesto podjednako da pokrije dno pleha.
Preko tijesta rasporedite jabuke.
Po jabukama pospite crumble (mrvičastu smjesu).
Pecite kolač u pećnici zagrijanoj na 180°C oko 40 minuta.
Ostavite kolač da se potpuno ohladi u plehu, a tek onda ga režite na kocke, pospite s malo šećera u prahu i poslužite.


Crumble Apple Slices

Warm Roast Cauliflower, Chickpea and Quinoa Salad

$
0
0
Warm Roast Cauliflower, Chickpea and Quinoa Salad


It's Friday and it calls for a simple, healthy but always delicious recipe.
To combine vegetables, legumes and cereals in one meal is for me the closest thing to perfection. One dish that has everything to make you eat healthy, to feel full but light, to enjoy but without a little bit of guilt if you "exaggerate". You can't exaggerate with this salad, as much as you eat.
Making this salad, I also discovered my 19-month-old loves quinoa, which was really great. Now we can enjoy quinoa dishes together. And there will be more of them coming soon.
I got stuck on Gourmet Traveller page the other day, and discovered several quinoa recipes that I loved at first sight (and not only quinoa recipes, there are so many great recipes and pictures are simply mothwatering and so inviting). This is one of them.

Since this recipe is also gluten-free, I'm sending it to 100% Gluten Free (Fri)Day


Warm Roast Cauliflower, Chickpea and Quinoa Salad

* 350 g cauliflower
* 1 garlic clove
* 1 organic lemon, zest and juice
* 100 ml extra virgin olive oil
* 400 g canned chickpeas 
* 200 g quinoa
* 3 spring onions
* 1 TBspoon vinegar
* 100 g Greek feta or labne cheese
* fresh mint and parsley

Preheat the oven to 200°C.
Cut the cauliflower into small florets. In a mixing bowl, mix well the finely minced garlic, finely grated zest of 1/2 lemon, 2 TBspoons extra virgin olive oil, salt and pepper to taste. Add the cauliflower florets and toss to coat them evenly.
Spread the cauliflower florets on a baking tray lined with baking paper and roast them in the hot oven until golden and  tender, about 20 minutes. 
Drain and rinse the chickpeas, dry them with the absorbent paper and season with the zest of 1/2 lemon, 1 TBspoon of extra virgin olive oil, and a little salt. 
Spread them on a baking tray adn roast for 15 minutes.
Meanwhile, put the quinoa in a fine mash sieve and rinse well under cold running water.
Put the quinoa into a saucepan, add twice as much water and bring to a boil. Add a little salt, cover and simmer on low heat until the quinoa has absorbed all the water. Be careful towards the end. 
Spread the cooked quinoa on a large plate to cool down a little.
In a salad bowl, combine roughly torn parsley and mint, sliced spring onions, vinegar (I used apple vinegar), lemon juice and the remaining oil. Add the roasted cauliflower, the chickpeas and the quinoa. Toss everything to combine and scatter with crumbled feta or labne. 
Serve warm.


Warm Roast Cauliflower, Chickpea and Quinoa Salad


Insalata calda con cavolfiori arrostiti, ceci e quinoa

* 350 g di cavolfiore
* 1 spicchio d'aglio
* 1 limone non trattato, scorza e succo
* 100 ml di olio extra vergine d'oliva
* 400 g di ceci precotti
* 200 g quinoa
* 3 cipollotti
* 1 cucchiaio di aceto 
* 100 g di formaggio feta o labna
* foglioline fresche di menta e prezzemolo

Scaldate il forno a 200°C.
Dividete il cavolfiore in cimette piccole. In una ciotola mescolate l'aglio sminuzzato, la scorza finemente grattugiata di 1/2 limone, 2 cucchiai di olio EVO, sale e pepe. Aggiungete il cavolfiore e mescolate bene.
Stendete il cavolfiore su una teglia ricoperta con la carta da forno e infornate per circa 20 minuti o finché il cavolfiore non risulti dorato e tenero.
Scolate i ceci dal liquido e sciacquateli. Asciugateli sulla carta assorbente e poi conditeli con l'altra metà della scorza di limone grattugiata, 1 cucchiaio di olio EVO, e un pochino di sale. Infornate sempre a 200°C per 15 minuti.
Nel frattempo mettete la quinoa in un colino con le maglie fitte e sciacquatela bene sotto l'acqua fredda. Mettetela a cuocere con la doppia quantità di acqua. Quando inizia a bollire, salate leggermente coprite e lasciate cuocere a fuoco basso finché non sarà assorbita tutta l'acqua.
Stendete la quinoa cotta su un piatto largo e lasciatela raffreddare.
In un'insalatiera mescolate le foglie di prezzemolo e menta spezzettate, i cipollotti affettati, l'aceto (ho usato quello di mele), il succo di limone e l'olio EVO rimasto. Aggiungete il cavolfiore, i ceci e la quinoa. Mescolate bene e aggiungete il feta sbriciolato. 
Servite l'insalata ancora calda.


Warm Roast Cauliflower, Chickpea and Quinoa Salad


Topla salata od pečene cvjetače, slanutka i quinoe

* 350 g cvjetače
* 1 češanj bijelog luka
* 1 neprskani limun
* 100 ml ekstra djevičanskog maslinovog ulja
* 400 g kuhanog slanutka
* 200 g quinoe
* 3 mlada luka
* 1 žlica octa 
* 100 g Grčke fete ili labneha

Zagrijte pećnicu na 200°C.
Izrežite cvjetaču na što manje cvjetiće. Pomiješajte u zdjeli usitnjeni češnjak, sitno naribanu koricu 1/2 limuna, 2 žlice maslinovog ulja, malo soli i papra (po ukusu). Dodajte cvjetaču i dobro izmiješajte. Rasporedite zatim cvjetaču na pleh obložen papirom za pečenje i stavite peći u zagrijanu pećnicu oko 20 minuta ili dok cvjetača nije zlatno smeđe boje i mekana.
Slanutak ocijedite i isperite. Posušite ga na upijajućem papiru, pa ga začinite sa žlicom maslinovog ulja, naribanom koricom 1/2 limuna i malo soli. Stavite ga peći 15 minuta.
U međuvremenu, stavite quinou u gusto cjedilo i isperite je pod mlazom hladne vode.
Stavite je kuhati u dvostrukoj količini vode (suhu quinou stavite u mjernu čašu pa odredite potrebnu količinu vode za kuhanje).  Kad voda prokuha, malo je posolite, poklopite i kuhajte na laganoj vatri dok quinoa ne upije svu vodu.
Istresite quinou na širi tanjur da se prohladi.
U zdjeli za salatu pomiješajte nakidane listiće mente i peršina s preostalim maslinovim uljem, octom (ja sam stavila jabukov), limunovim sokom. Dodajte pečenu cvjetaču, slanutak i quinou. Dobro izmiješajte pa dodajte izmrvljeni feta sir. 
Poslužite salatu toplu.


Warm Roast Cauliflower, Chickpea and Quinoa Salad


Hot cross buns with chocolate chips

$
0
0
Chocolate Chip Hot Cross Buns


Soft sweet buns or croissants are my second favourite thing to eat in the morning for breakfast. Cookies of all shapes are always my first choice. But I must admit that over the past couple months I have been baking a lot. Both with yeast and my sourdough starter. Bread and dinner rolls, as well as sweet stuff like these traditional Easter buns. I should start breaking, however, or I'll have to forget about the swimsuit this summer... seriously. 
But just when I decide I won't be baking anything, my husband starts whining that he needs those delicious chocolate chip buns and I'm baking again. Strong will, indeed. But that also tells you how delicious these are. Soft like little clouds. It's hard to eat only one. The second and third one follow instantly.
Chocolate Chip Hot Cross Buns


Hot cross buns are part of British Easter tradition. They used to be baked on one particular day only. On Good Friday. In the times of Elizabeth I, it was even forbidden to bake them except at burials, on Good Friday and Christmas. Now they are not baked and eaten in such a strick manner anymore. 
Traditionally, these sweet buns are made with raisins or currants in the dough, and spices like cinnamon and mixed spices. But lots of modern versions include toffee, coffee, apples, chocolate etc.
The cross on top of the buns is a symbol of crucifixion.
Chocolate Chip Hot Cross Buns

"English folklore includes many superstitions surrounding hot cross buns. One of them says that buns baked and served on Good Friday will not spoil or mold during the subsequent year. Another encourages keeping such a bun for medicinal purposes. A piece of it given to someone who is ill is said to help them recover.
Sharing a hot cross bun with another is supposed to ensure friendship throughout the coming year, particularly if "Half for you and half for me, Between us two shall goodwill be" is said at the time, so some say they should only be cooked one at a time. Because there is a cross on the buns, some say they should be kissed before being eaten. If taken on a sea voyage, hot cross buns are said to protect against shipwreck. If hung in the kitchen, they are said to protect against fires and ensure that all breads turn out perfectly. The hanging bun is replaced each year." [source: Wikipedia]

Chocolate Chip Hot Cross Buns

Those of you who follow my blog regularly know that chocolate rules among my family, and every attempt I make in direction of spices is usually refused and sent back. So I did make half a batch of spiced hot cross buns for myself, filled with apples, but actually went on making the chocolate chip ones, without spices for the rest. I know, they are not totally tradional, but they are delicious just the same.


Hot cross buns with chocolate chips


* 200 g sourdough starter with 100% hydratation or 20 g fresh yeast or 6 g dry * instant yeast 

* 50 g caster sugar
* 360 ml milk
* 640 g flour
* 50 g butter (melted and cooled)
* 1 egg
* 50 g caster sugar (additional)
* 100 g milk or semi-bitter dark chocolate, finely chopped or chocolate chips

  glaze for crosses:

* 35 g flour
* 1 TBspoon sugar
* 40 ml cold water

  for brushing:

* 1 egg
* 2-3 TBspoons milk


     DSC_0836   Chocolate Chip Hot Cross Buns   DSC_0840   Chocolate Chip Hot Cross Buns

    Chocolate Chip Hot Cross Buns   Chocolate Chip Hot Cross Buns   Chocolate Chip Hot Cross Buns   Chocolate Chip Hot Cross Buns

Dissolve 50 g sugar in lukewarm milk. Add the sourdough starter (refreshed 4 hours before you start preparing the dough) or crumbled fresh yeast or dry instant yeast. If using yeast, let the mixture sit a few minutes until you see the yeast is foamy (active).  
Put the flour in a mixing bowl. Add the melted and cooled butter, lightly beaten egg, finely chopped chocolate (or chocolate chips), and the additional 50 g sugar.  
Add the milk with sourdough starter/yeast and start mixing with a butter knife until the ingredients comes together and you have a moist, sticky dough. 
Transfer the dough onto a floured kneading board and work for a few minutes adding a little flour if necessary until the dough is soft and elastic. Make sure you don't add to much flour as you want the dough to stay very soft.
Form a ball and place it in a clean, lightly oiled, large bowl. Let the dough rise for 30-40 minutes or up to 1 hour if using yeast, or until doubled if using sourdough starter (it may take 2-3 hours or longer, depending on temperature and the strength of your sourdough starter).
When the dough has risen, divide it into small portions (I made as big as 80 g for mini loaf pans, and 50 g ones for round buns).
Shape each piece of the dough into nice smooth ball and place in a baking pan lined with baking paper.
Cover with a piece of plastic foil and a clean cloth and let rise again until doubled in size (30 minutes if using yeast, 1-2 hours if using sourdough starter).
Preheat the oven to 200°C.
Beat the egg with milk and brush the buns. 
Bake them in a hot oven for about 10 minutes, or until they just start getting golden on top.
In the meantime, prepare the flour mixture for crosses, mixing the flour with sugar and adding water (you may need a teaspoon or two more) to get thick but pourable mixture. Put it in a decorating bottle or a disposable pastry bag. 
Take the pan with the buns out of the oven, and decorate the buns with prepared flour mixture forming a cross on each one. Work rather quickly.
Put them back into the oven. Lower the heat to 180°C and bake for additional 10 minutes or until golden brown.
Let them cool on a cooling rack.
Once they are cold, you can store them in plastic bags or freeze.
Chocolate Chip Hot Cross Buns


Questi panini dolci fanno parte della tradizione pasquale britannica. Infatti, nel passato venivano preparati e mangiati solo nel giorno del venerdì santo. 
Tradizionalmente sono dei panini fatti con l'impasto aromatizzato con cannella e altre spezie miste, e arricchiti con l'uvetta o altra frutta secca. 
Adesso si possono trovare in vendita anche durante altri periodi del anno. E in tante versioni moderne, come quella al caramello, al caffè, con le mele o pezzettini di cioccolato.
Visto che a casa mia devono sempre scorrere fiumi di cioccolato qualunque cosa io decida di preparare, non potevano mancare in versione al cioccolato e sono diventati subito un successone, vista anche la somiglianza con i pangoccioli.
La croce disegnata sopra questi panini è simbolo della crocifissione. 
E sono anche legati alle superstizioni popolari. Se un panino viene condiviso e mangiato tra due amici questo assicurerà che la loro amicizia duri tutto l'anno successivo. Se un panino viene appeso nella cucina (da sostituire con uno nuovo ogni anno) questo proteggerà la cucina dagli incendi e assicurerà che il pane fatto li venga sempre buono. Portato a bordo di una nave, la proteggerà dal nubifragio. E tante altre. 
Che siate superstiziosi o no, non perdete l'occasione di prepararli e condividerli con gli amici.

Hot Cross Buns al cioccolato


* 200 g di licoli (PM al 100% di idratazione) o 20 g di lievito di birra fresco o 6 g di lievito secco
* 50 g di zucchero
* 360 ml di latte
* 640 g di farina (00)
* 50 g buro (fuso e lasciato raffreddare)
* 1 uovo
* 50 g di zucchero (aggiuntivi)
* 100 g di cioccolato al latte o forndente, tagliato a pezzettini piccoli (o gocce di cioccolato)


  glassa per le crocette:
* 35 g di farina
* 1 cucchiaio di zucchero
* 40 ml di acqua


  per spennellare
* 1 uovo
* 2-3 cucchiai di latte

Sciogliete 50 g di zucchero nel latte tiepido e aggiungete il licoli (precedentemente rinfrescato). Mescolare per far sciogliere il licoli (se usate il lievito di birra, sbriciolate quello fresco o aggiungete quello secco e lasciatelo attivare per qualche minuto).
In una ciotola setacciate la farina, aggiungete il burro fuso, il restante zucchero (50 g), l'uovo leggermente sbattuto e poi il latte con il licoli (o lievito di birra). Impastate con un coltello arrotondato fino a unire tutti gli ingredienti e formare un impasto appiccicoso. Aggiungere il cioccolato.
Trasferire l'impasto sulla spianatoia infarinata e lavoratelo per 5-10 minuti finché non lo sentite liscio ed elastico.
Mettete l'impasto in una ciotola leggermente unta di olio, copritelo con il coperchio o sigillate con la pellicola e lasciate lievitare fino al raddoppio (2-3 ore o di più se usate il licoli, 30-40 minuti o fino a 1 ora se usate il lievito di birra).
Rovesciate l'impasto sulla spianatoia infarinata e dividerlo in pezzi da 50-55 g. Formate delle palline e sistematele su una placca da forno ricoperta con la carta da forno. Copritele prima con un pezzo di pellicola (leggermente unta con l'olio perché non si appiccichi al impasto), e poi con un telo. Lasciatele lievitare di nuovo fino al raddoppio in un posto caldo (1-2 ore se usate il licoli, 30 minuti se usate il lievito di birra):
Scaldate il forno a 200°C.
Sbattete l'uovo con il latte e spennellare i panini. Infornateli per 10 minuti.
Preparate la glassa mescolando la farina con lo zucchero e l'acqua, formando un impasto denso ma liquido. Trasferitelo in una bottiglia con il beccuccio o una bustina (tagliare la punta).
Togliere i panini dal forno, con la glassa preparata fate il disegno a forma di croce. Rimetteteli nel forno per altri 10 minuti circa o finché dorati in superficie.
Lasciateli raffreddare su una gratella.
Una volta freddi conservate questi panini in bustine di plastica oppure congelateli.
Il giorno dopo, se si induriscono, scaldateli per pochi secondi nel forno a microonde.


Chocolate Chip Hot Cross Buns


Prekrasna, mekana, neodoljiva slatka peciva anglo-saksonskog podrijetla. Po engleskoj tradiciji ova su se peciva pripremala i jela na Veliki petak. Danas ih se može kupiti cijele godine. A križ na površini predstavlja upravo Kristovo raspeće. Uz njih su vezana i razna praznovjerja. Kao na primjer ono da se jedno pecivo objesi u kuhinji jer će čuvati kuhinju od požara i pomoći da kruh ondje pečen ispadne uvijek dobro (pecivo se zamijeni jedanput godišnje). Podijeliti jedan Hot cross bun s prijateljem osigurat će da vaše prijateljstvo traje cijele predstojeće godine (pritom se izgovaraju riječi: "Pola meni, pola tebi, da među nama dobra volja vlada".


Hot Cross Buns s čokoladom


* 200 g kiselog tijesta/kvasa sa 100%-tnom hidratacijom ili 20 g svježeg kvasca ili 6 g suhog instant kvasca

* 50 g šećera 
* 365 ml mlijeka
* 640 g mekog brašna
* 50 g otopljenog maslaca
* 1 jaje
* 50 g šećera (dodatno)
* 100 g mliječne ili tamne čokolade (ili čokoladnih kapljica)

  glazura za križeve

* 35 g brašna
* 1 žlica šećera 
*40 ml vode

  za premazivanje:

* 1 jaje (ili samo žumanjak) 
* 2 žlice mlijeka

Pomiješajte mlačno mlijeko, 25 g šećera i dodajte (4 sata ranije osvježen) kvas/kiselo tijesto ili namrvljeni kvasac/ili suhi kvasac. Izmiješajte i ostavite da se kvasac zapjeni.

Stavite u zdjelu za miješanje brašno, otopljeni i prohlađeni maslac, malo razmućeno jaje, čokoladu nasjeckanu na sitne komadiće i dodatnih 50 g šećera.
Ulijte mlijeko s kvascem i zaobljenim nožem izmiješajte sastojke dok se ne povežu u vlažno ljepljivo tijesto.
Premjestite tijesto na pobrašnjenu dasku i mijesite 5-10 minuta dok ne postane glatko i elastično, dodajući po potrebi malo brašna (ali ne previše, tijesta treba ostati mekano).
Oblikujte kuglu od tijesta i stavite je u malo nauljenu zdjelu. Ostavite da se diže pokriveno dok se ne udvostruči (30-40 minuta do 1 sat ako radite s kvascem, 2-3 sata ili duže ako radite s kvasom).
Podijelite tijesto na komade jednake veličine.
Kad sam radila peciva u pravokutnim kalupima bila su teška 80 g, a okrugla 50 g (nama su se više svidjela manja, okrugla).
Oblikujte ih u glatke loptice i stavljajte ih u kalupiće ili na ravni pleh obložen papirom za pečenje malo razmaknute.
Pokrijte prozirnom folijom i platnenom krpom i ostavite da se dižu opet oko 30 minuta ili dok se ne udvostruče.
Pećnicu zagrijte na 200°C.
Razmutite jaje s mlijekom i premažite peciva uz pomoć kista.
Stavite ih peći u zagrijanu pećnicu.
Za glazuru za "križeve" pomiješajte brašno i šećer i dodajte vodu pa izmiješajte da dobijete glatku smjesu (može vam trebati još malo vode, treba biti gusta ali tekuća). Stavite glazuru u bočicu za ukrašavanje ili vrećicu kojoj odrežite vrh.
Nakon što su se peciva pekla 10-15 minuta i počela su dobivati zlatnu boju na površini, izvadite ih i glazurom oblikujte križeve na površini.
Vratite u pećnicu smanjite temperaturu na 180°C i pecite još 10-15 minuta, dok lijepo ne porumene.
Izvadite ih iz pećnice i ostavite da se hlade na rešetki.

* po originalnom receptu se u Hot Cross Buns stavljaju suhe grožđice ili ribizle i nasjeckano kandirano voće. Također se u tijesto dodaju začini poput cimeta i mješavine začina (all spice). Zbog neljubitelja istih, ja sam stavila čokoladu i izostavila začine.
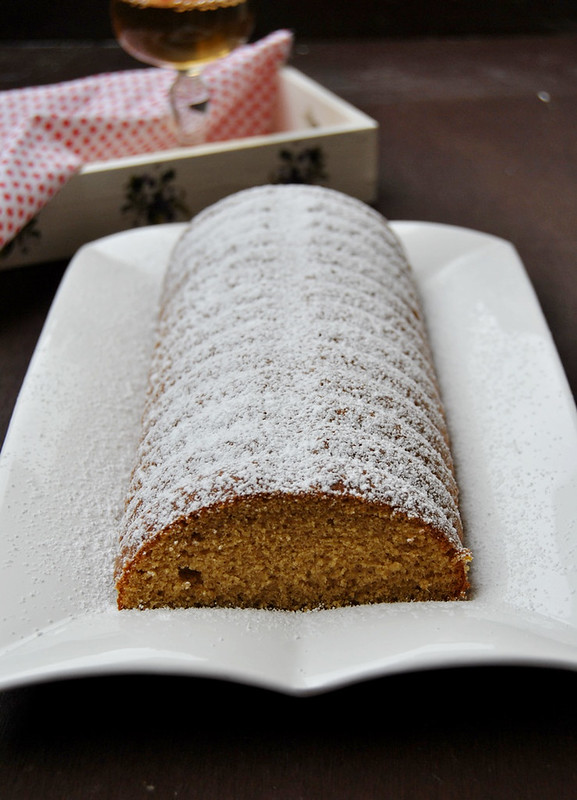
* Probajte ih također puniti kao naše buhtle, ja sam stavila npr. jabuke narezane na kockice i pirjane s maslacem i šećerom dok ne odmeknu (taj put sam u tijesto dodala i malo cimeta i mljevenog kardamoma).
Chocolate Chip Hot Cross Buns


Viewing all 183 articles
Browse latest View live